A Game Page lets you manage all aspects of a live game, from its creation to its conclusion.
In this article, we'll cover how to:
- Create a game object page, set metadata
- Curate this game page on the live preview tray on your Home page
- Edit the Game Detail Template Page
- FAQs and more
Create a Game object
- From your Tools application, click the Content > EVENT sub-tab > ADD NEW button on top. You'll see three options: Event, Bulk Upload Event, and Game Page. To create a live game page, choose Game > Create.
A new Game object is created in the CMS, and the game object page will open for configuration of the display attributes, as shown below.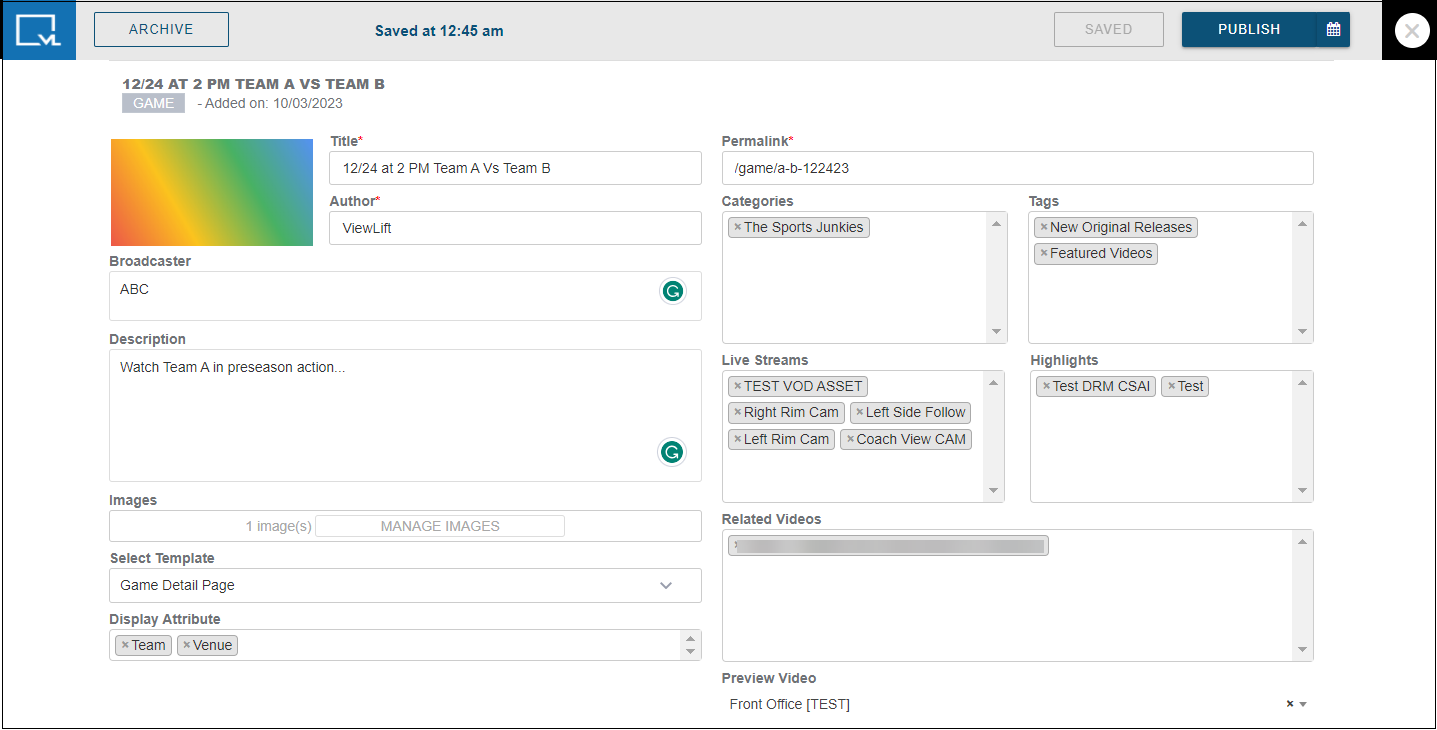
SCREEN DETAILS
| Screen element | Description |
|---|---|
| Title | Title of the game detail page. |
| Permalink | The slug for the game event. |
| Author | Tools user tasked with creating and publishing the page. |
| Broadcaster | Broadcaster name to show in the Schedule tray of the game page. |
| Categories | Attach a category. |
| Tags | Add the search keywords identified for the game event. Example, Team A, Team B, AVsB. |
| Description | Add a game description (this text will not appear for users). |
| Live Streams | Attach the live feeds here. The first cam added is the view users will see when they click into the player.  Users can click/tap on the multi-cam view to switch to alt camera angles if available. Users can click/tap on the multi-cam view to switch to alt camera angles if available. |
| Highlights | If you curate VOD or live videos here, a Highlights tray will automatically appear below the video player. Previously, you had to manually change the highlights videos after a change in game state. However, now you can use third-party services like WSC to do this automatically without managing it from the Game page. If you do not want to display a Highlights tray on a Game page, simply leave this field blank. Do not add any videos to the field. |
| Images | Add a thumbnail image with an aspect ratio of 16:9. Other aspect ratios can be ignored. |
| Exclude from Schedule (custom implementation & optional) | Click this to exclude this game from auto-populating in the Schedule tray and calendar. |
| Display Attribute | You have the option to show Venue, Team, or both. Team is created in the Sport tab and Venue entries are created in ADMIN > Venue. |
| Related Videos (next to the Sportradar stats widget) | Curate content for the Related Videos widget live as the game state progresses. This allows you to curate dynamic content relevant to the live state of a game. |
| Select Template | No need to worry about templates unless you've created custom versions of the same template type. Videos, Game and Event pages, and series pages automatically use their respective default templates. |
| Preview Videos | Link a preview VOD object to play silently as a preview. This video plays in the default state. When the game starts or the game state changes, this muted video will automatically change to show a preview of the live game. |
GAME INFO

| Screen element | Description |
|---|---|
| League | Attach the league name. |
| Sport Radar ID | Team Sports Radar ID (this will be different for different teams). |
| Champions ID | The Champion data ID for an event. |
| Home Team | Add the Home team as per the schedule. A Team is added to the CMS from the Team tab in Content -> Sport. |
| Away Team | Add the Away team as per the schedule. |
| Ticketmaster URL | Ticketmaster URL for the ticket sales for the live event. If the ticket master ID / URL is not available, we will hide the ticket icon on the schedule. |
| Ticketmaster ID | Ticketmaster ID for the event that is listed on the Ticketmaster website. Apps use this ID to initiate the Ticketmaster SDK and purchase tickets to the event. |
GAME STATES
| Screen element | Description |
|---|---|
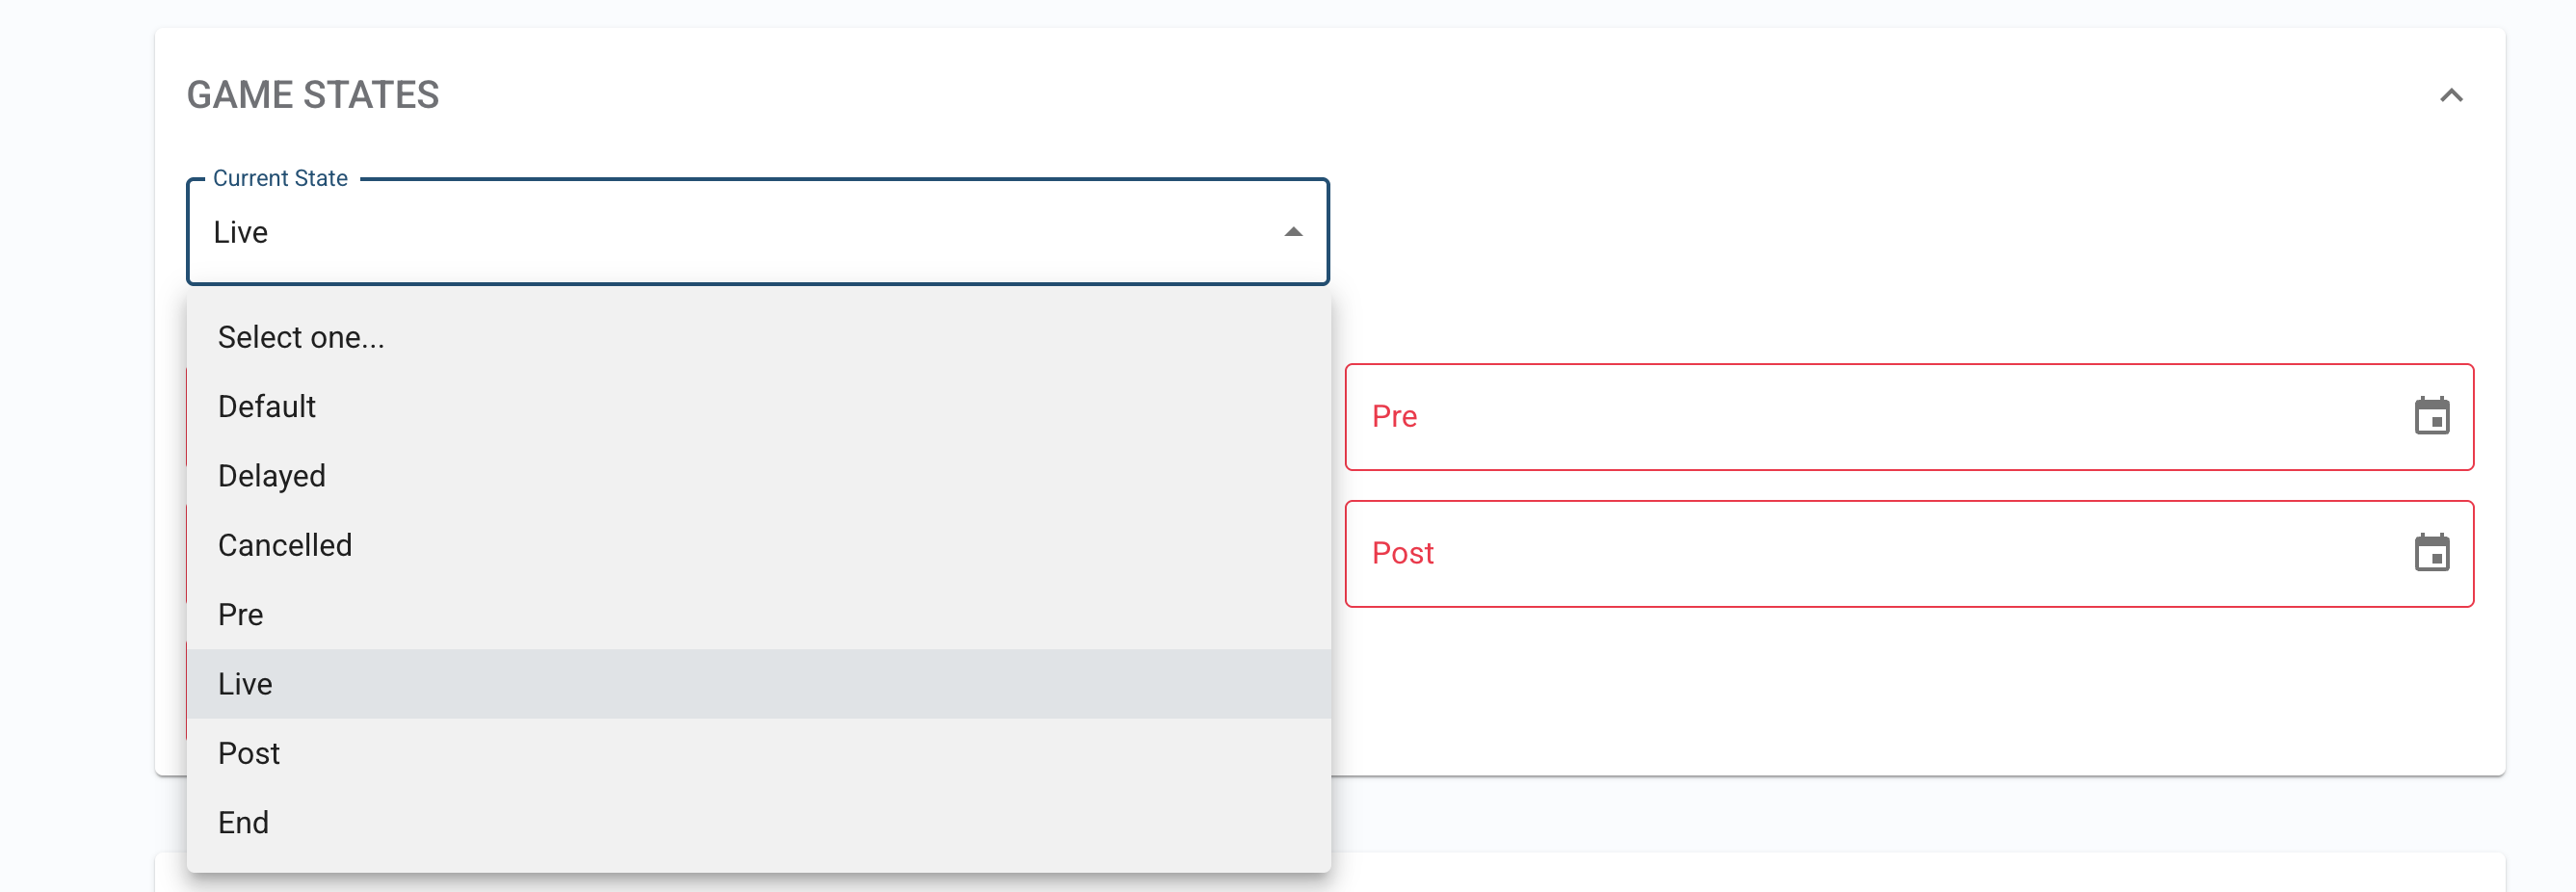
| Current State | All game states after the default state are automatically synced with Sportradar data. This means you don’t have to manually update a game page. |
| Default, Pre, Cancelled, Delayed, Live, Post, Game End | After the Default state, all game states will automatically change based on the times that you set here. If you know the match timings, you can set the estimated schedule for each game state in advance. But the actual game start and end time may vary. In such cases, you must manually modify the game state time. |
Game page - Default state
The default state of the page is when the game has not started and fans can buy tickets to the live event. The VOD object that you attach to the Preview videos section in the Game Object will play in the player.
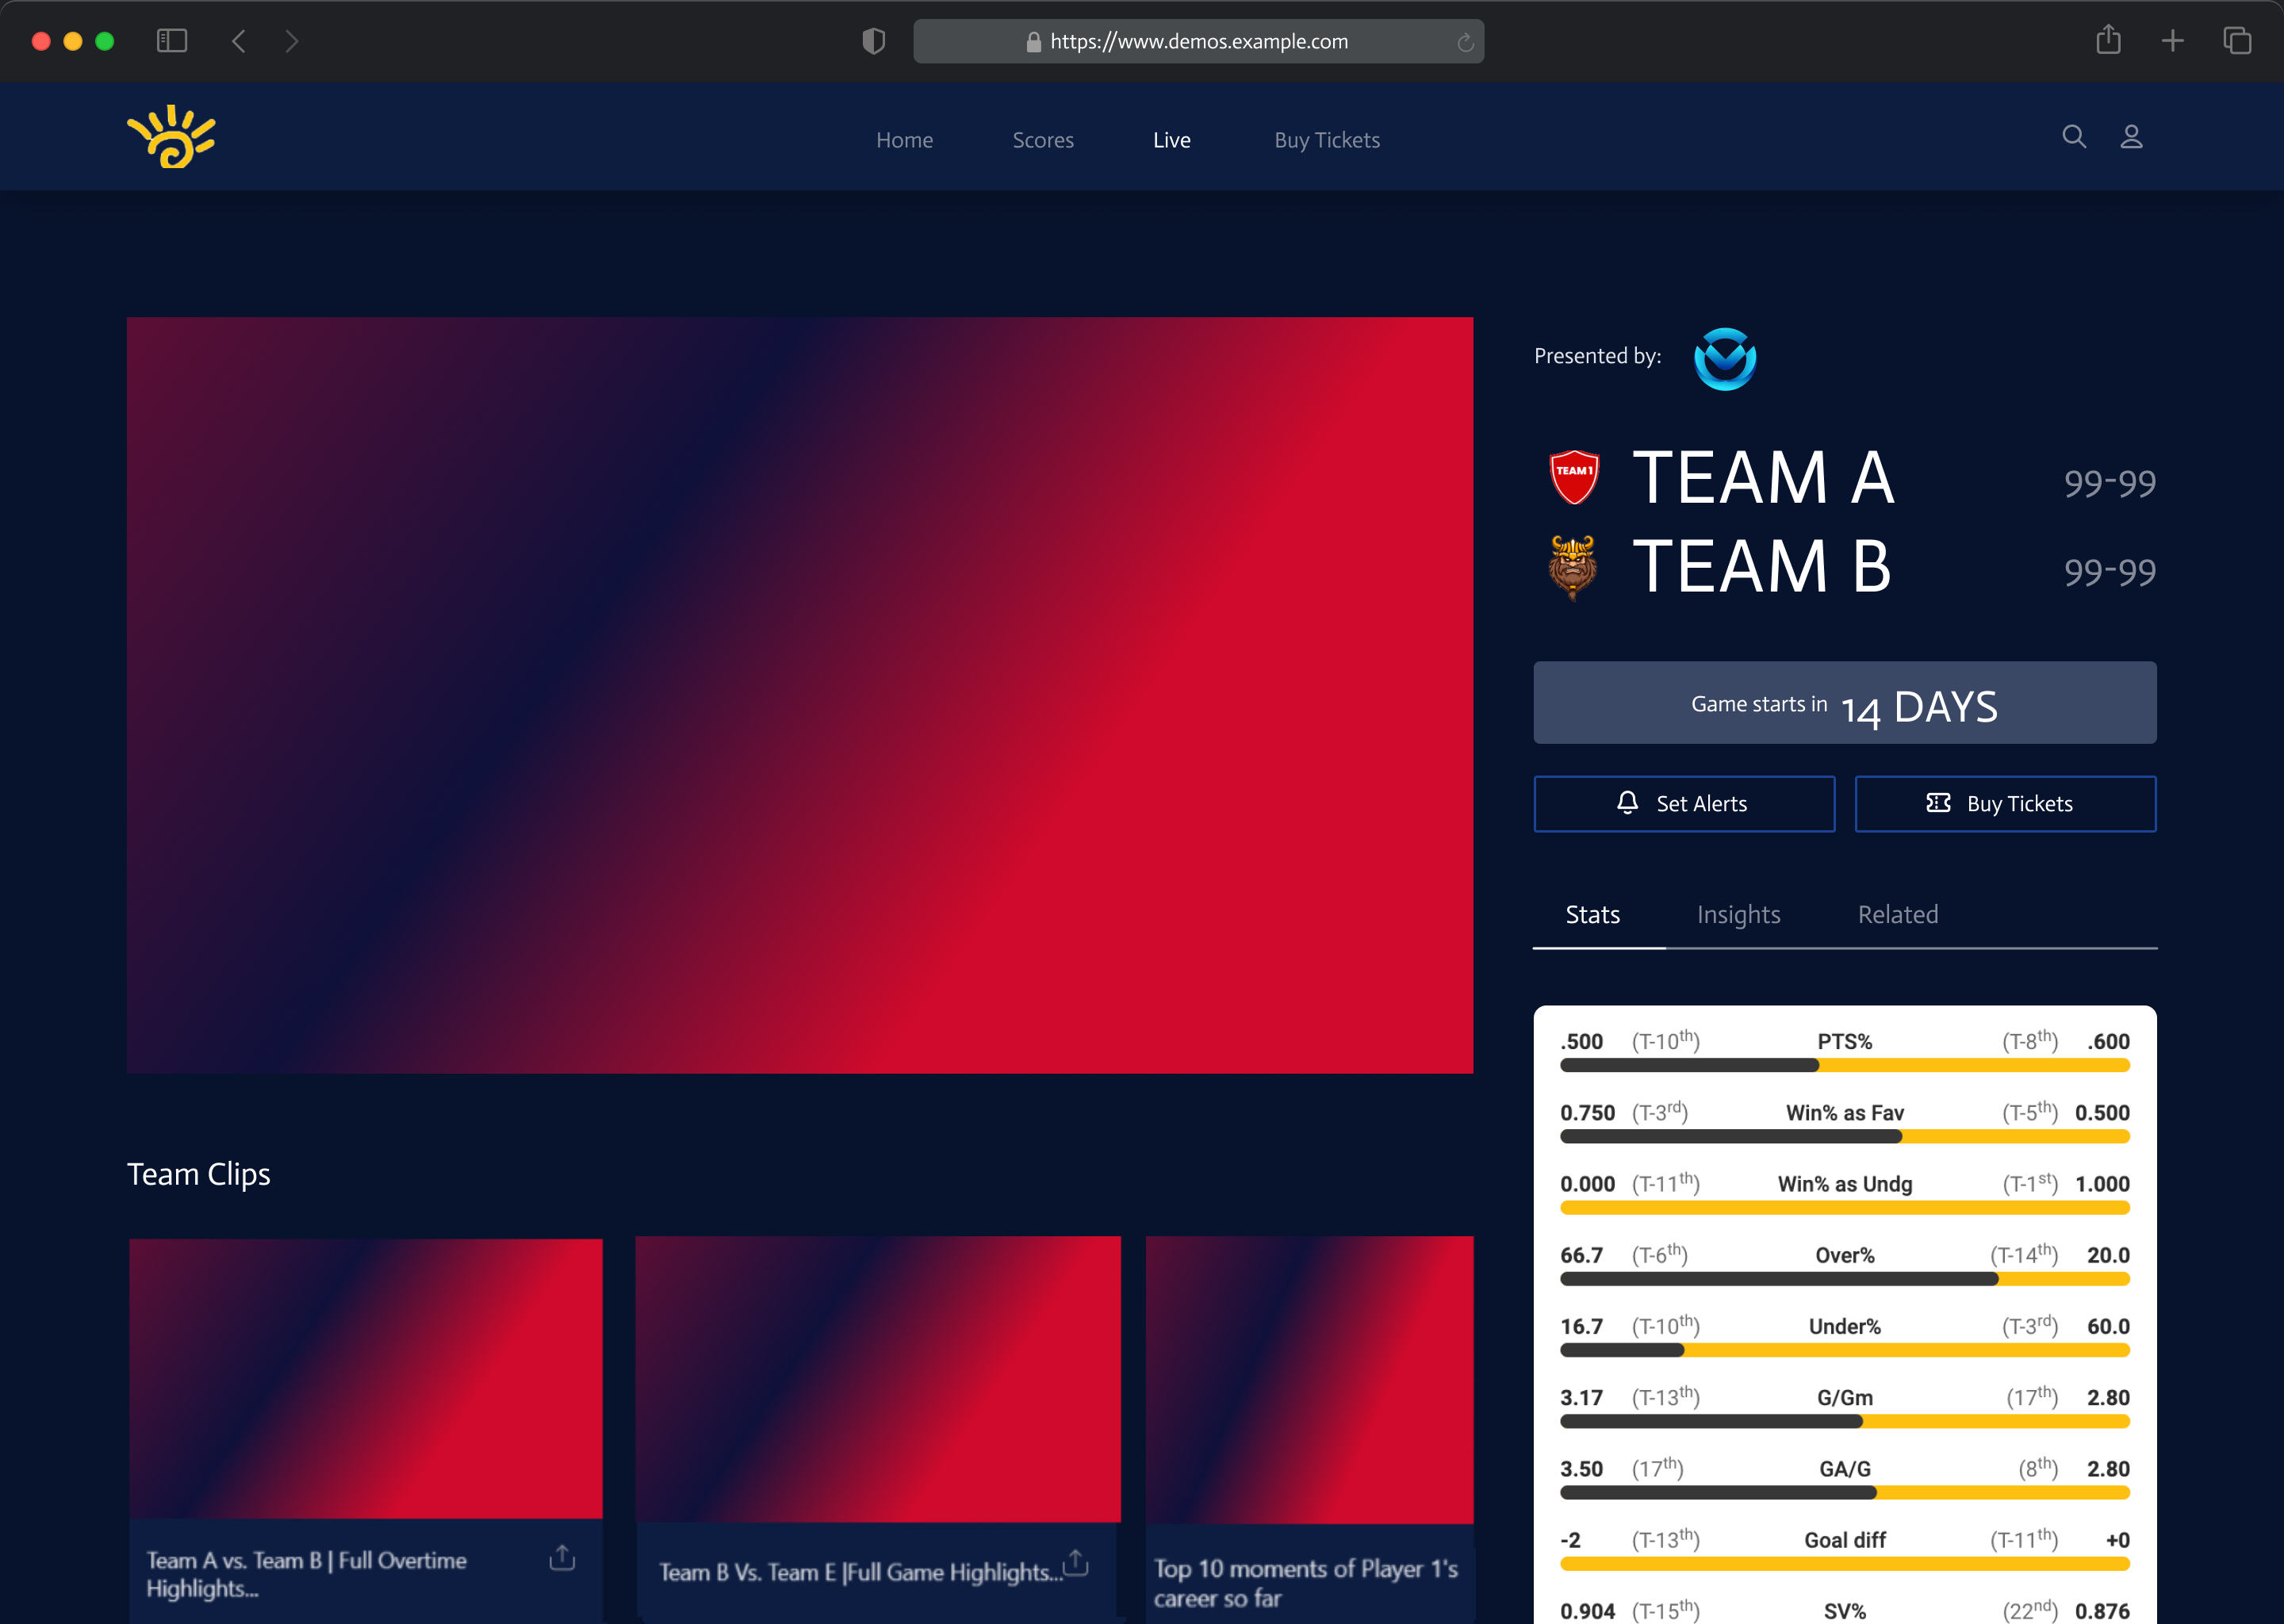
Game Page - Cancelled
If the game is cancelled due to any reason, the Game detail page automatically updates the game state to Cancelled state. Clicking on "Watch" will take the viewers to the Game Detail page

Game Page - Pre-Game
The pre-game show is typically a single-stream live broadcast feed of a sports broadcast that begins about half an hour before the actual game starts.
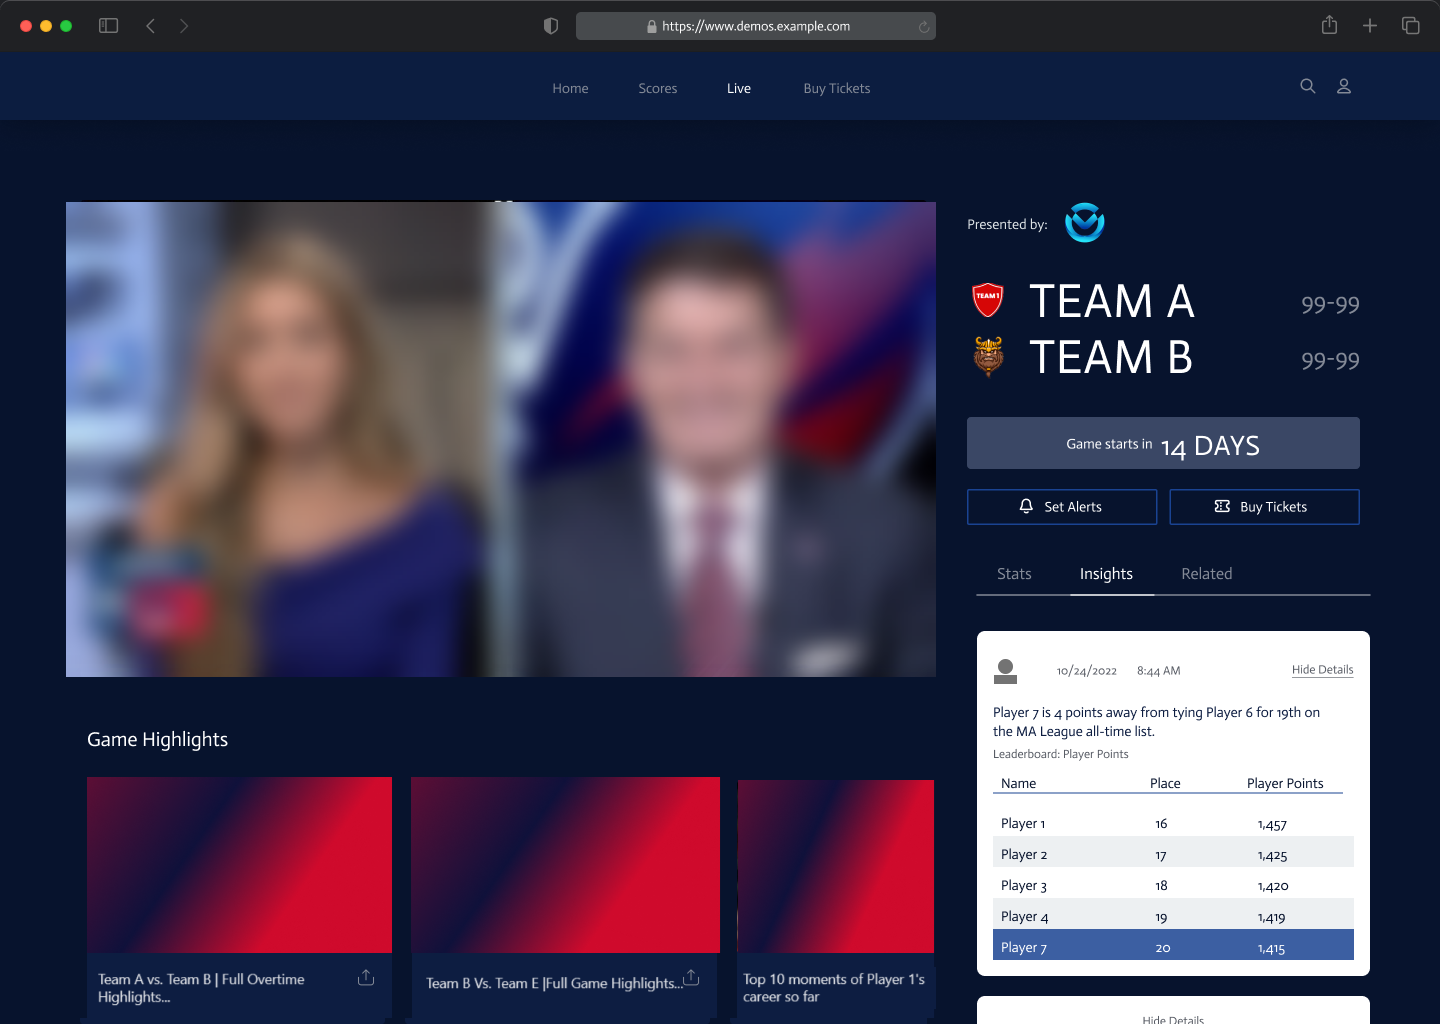
Game Page - Live Game
There can be different camera angles with the same broadcasters in a live game. Each camera feed must be added as a separate Live feed object in Tools under the Video > Live tab.

Game Page - Post Game
Once the game is over, the Game detail page automatically updates the game state to Post state. The live stream may switch back to a single stream. You can put the live feed later as VOD behind the paywall.
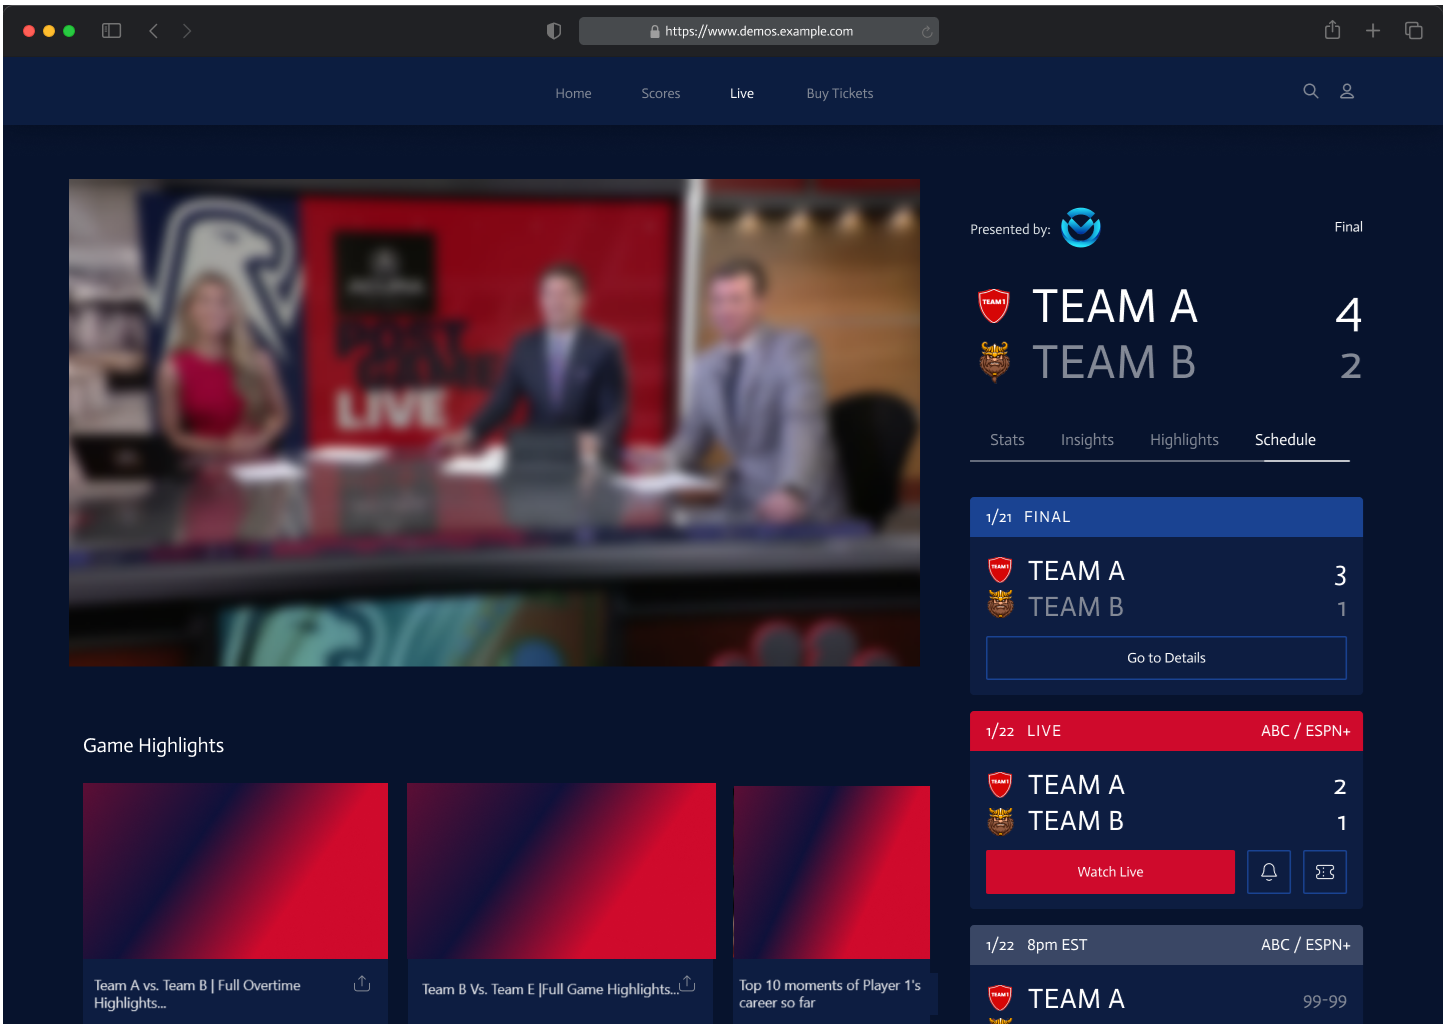
Game Page - Delayed
If the scheduled game has been postponed from its original start time, "Delayed" state is shown to the users. The stream will transition to Pre or Live state once the delay is resolved.
Game Page - Game Ended
In the Game Ended state, the Stats tab will show the complete match history. To give a distinct look for each game state, you can customize the widget tabs, update the VOD / Live objects in the Highlight tray for each state, and so on.
Replays are typically made available about 1 hour after the live broadcast ends. Talk to our Support if you want to make it accessible sooner.
Create game schedule
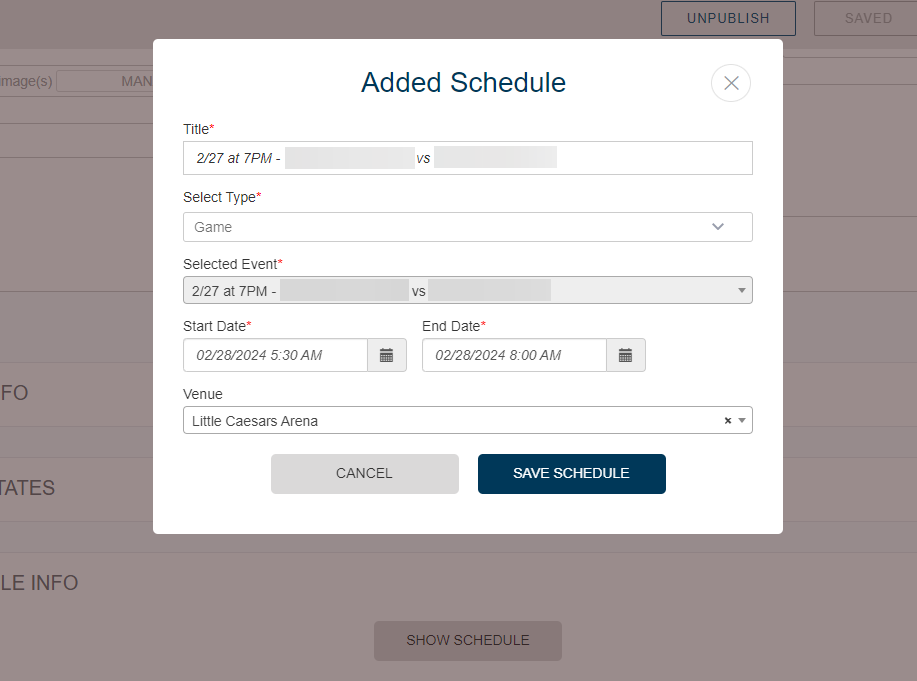
Expand the SCHEDULE INFO section and click SHOW SCHEDULE. Provide the same title as in the Title field, select Type as Game, and select the Event from the search field. You can add a game object in the published and saved status in the CMS. Provide the Start Date and the End Date, choose the venue, and click SAVE SCHEDULE.
You can also create a schedule directly from the SCHEDULE tab adjacent to the EVENT tab.
Broadcaster

The Broadcaster module offers open text fields for country name and broadcaster name. The broadcaster details (country and broadcaster name) can be a one-time configuration and subsequently can be copied to all game pages through the CMS backend. Apps will pass the country code in the API to the backend and the backend API will return the broadcaster info as per available details.
SEO
Make sure to optimize the game page for search engines. Learn how to use the SEO section in this article.
To publish the Game Page, click PUBLISH / UPDATE.
Curate the Game page on your Home Page
Once you've published the Game object page, you can curate the page on a Live Preview tray on the Home Page.
See a curation of Live Game pages highlighted in yellow box in the above screenshot. The video preview attached to the first Game page on the tray will play in silent mode in the carousal area on top by default. Clicking on the game thumbnail will take you to its Game Detail Page.
To edit the Home Page, go to Modular Pages and search for the Home Page.
Reference the Live Preview Tray module documentation to learn how to customize and control the settings in the Live Preview tray.
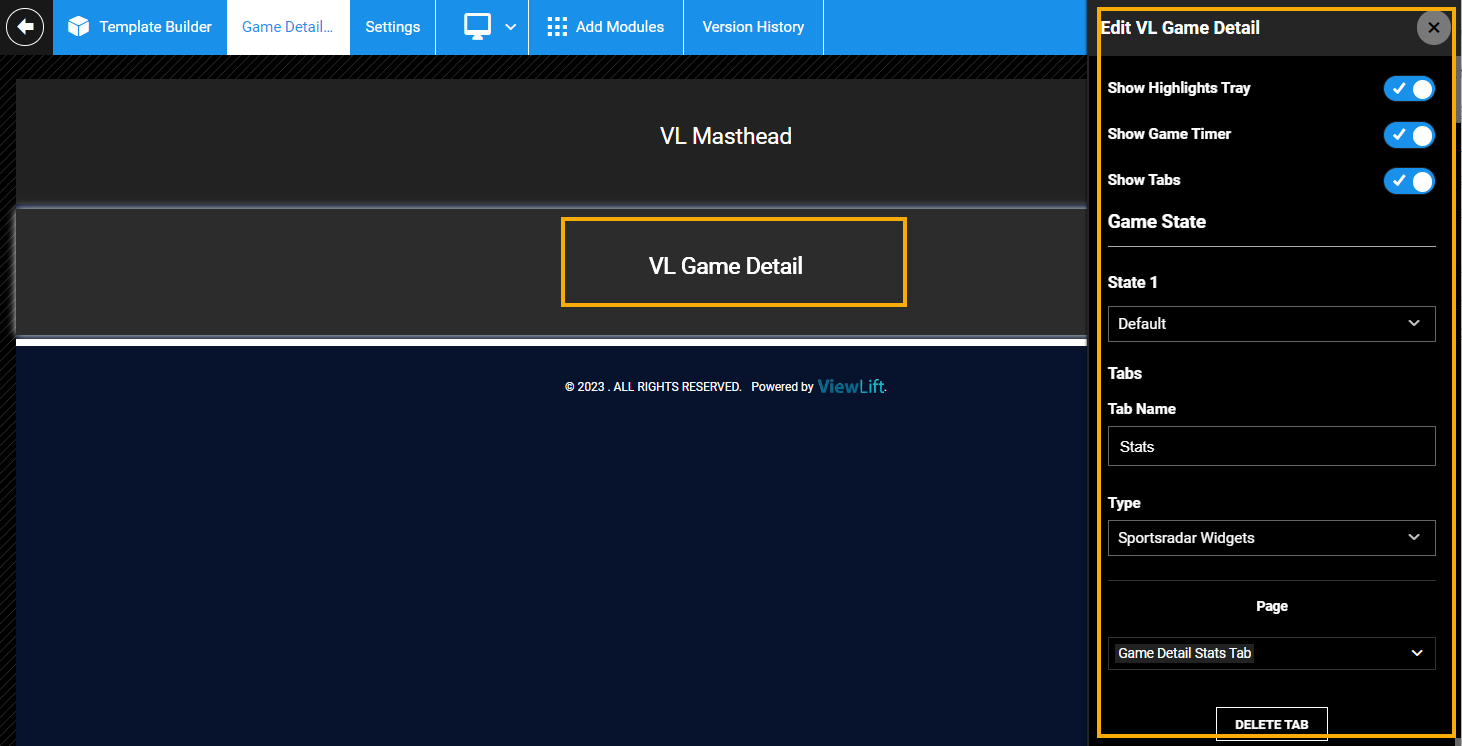
VL Game Detail Template Page
The UX experience for the Game Detail Page is predefined in the VL Game Detail module in the Game Detail Template Page settings under Pages > Template Pages. The page layout includes the trays, the player, and the widgets adjacent to the player and its UX copy and fonts can be all customized and controlled using the VL Game Detail module.
Color code the game states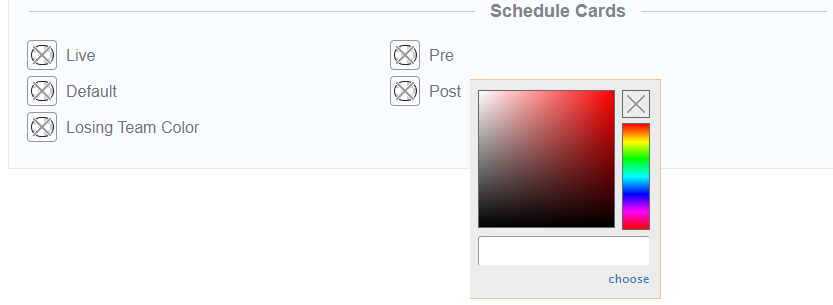
You can select a specific color for a game state from AppCMS > BRAND > Schedule Cards. Example, red for a LIVE match or gray for DEFAULT. The description on the match card will also indicate this status (see screenshot below).
Editorialize the CTA buttons
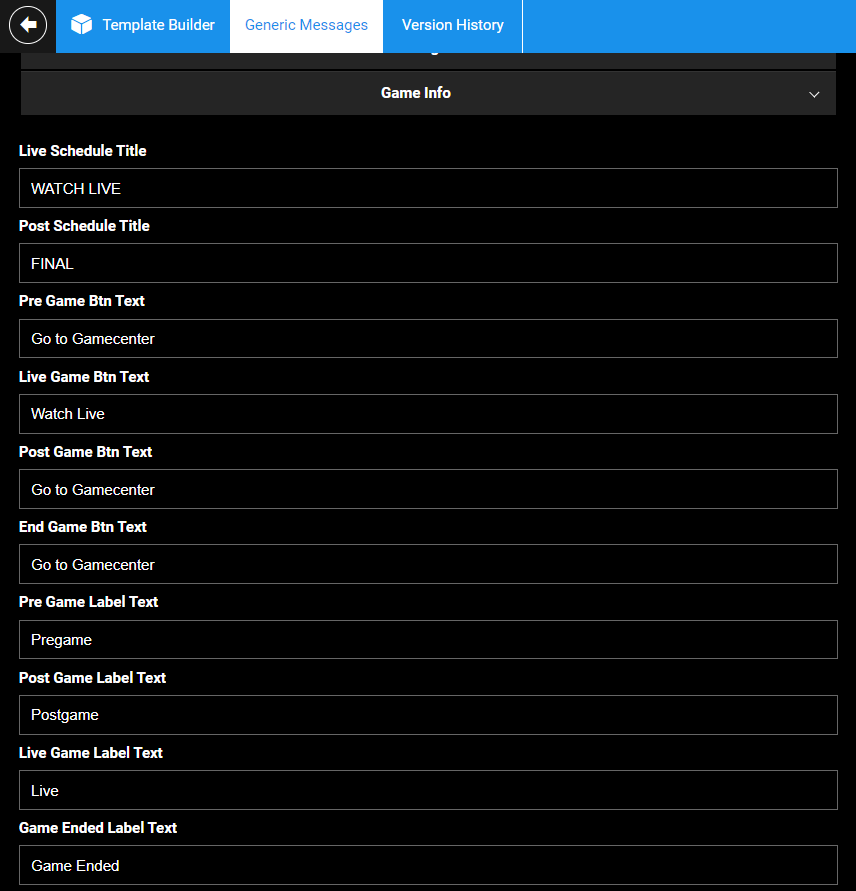
CTAs for a Game page, game states, or Schedule cards can include buttons, text hyperlinks, or plain text asking the user to take action. The buttons are strategically placed in the Live & Upcoming tray on the Home page and in the individual game pages. You can editorialize the buttons from Tools > AppCMS > Edit Template Builder > Global Settings > Generic Messages > Game Info.
Add a sponsorship logo
You can add a sponsorship logo on every tray module. Paste the image URL into the Sponsorship Logo URL field on the Live Preview tray for example. For the Live Preview tray on the home page, the sponsorship logo is displayed next to the "Go to Gamecenter" / "Go to Details" CTA.
Current limitations
- Bulk CSV upload feature for game events and schedules is not available. This is on our list of things to do.
- Duplicate functionality is currently unavailable on a Game object page.
FAQs — Game Page
Q. In the Schedule module, some teams' records won't display.

Navigate to the Team detail page from the Content tab -> Sport. Expand the SEASON RECORDS tab, fill in the Current Season and Season Year, and update the page.
