Introduction
VL Locate is a System Screen module in Template Builder. It powers the home location step — the page where customers share their location so the site can apply regional broadcast rules (for example, whether a live game is available in their area).
On the website, this experience typically lives at /locate. Signed-in customers share location, confirm a zip code, and either set that area as their home location or continue later. Unsigned customers are sent to sign in first.
This article explains how to create the Locate page in Template Builder, configure VL Locate, publish it, and verify the experience on the web.
Purpose
The purpose of this article is to help you:
- Create a Locate System Screen in Template Builder
- Add and configure the VL Locate module
- Edit images, labels, delimiter link, and brand colors
- Understand what customers see on
/locate - Publish and verify the live Locate page
Scope
This article covers:
- Creating a System Screen page for locate in Template Builder
- Adding VL Locate to the page layout
- Module settings: redirect / delimiter fields, Images, Brand, and Localization labels
- How locate appears on the website, including share location and set home location
It does not cover:
- VL Location (account page to view or change a home location that is already set)
- Enabling subscription / SVOD for the site
- VL Authentication 01 / VL Authentication 02 as the main sign-in page (except how locate sends unsigned customers to sign in)
- Zip-code groups or blackout rules in AppCMS
Prerequisites
Before you begin, ensure you have:
- Access to Template Builder for your site
- Access to ViewLift Tools / AppCMS to confirm subscription (SVOD) is enabled if
/locateis part of onboarding - Copy ready: share-location description, Continue, zip label, set-home and “I’ll do it later” text
- Optional link text and URL if the description should include a clickable phrase
Example used in this article
Throughout the steps below we use a Locate page named Locate at path/locate. Replace the sample values with your own.
Locate flow overview (website)
The flowchart below shows the typical customer journey on the website when VL Locate is published at /locate.
.png)
Notes
- The page chrome includes Back and Skip.
- Customers often arrive from onboarding after Authentication, from Subscribe, or from account / billing when a home location is still required.
- Continue asks the browser for location. If the customer allows it, the next screen shows the detected zip code.
- If the customer blocks location, they stay on the share-location screen.
- After Set as Home Location or I'll do it later, the customer continues to the next onboarding step (for example View Plans). A TV-device visit (for example
?device=roku_box) can go to a thank-you page instead. - VL Location is a different module for viewing or changing home location later in account settings.
Step 1: Open Template Builder
- Log into ViewLift Tools.
- Open AppCMS → Edit Template Builder (or open Template Builder for your site from your usual entry point).
- Confirm you are on the correct site and language (if localization is enabled, use the language selector on the Template Builder home screen before editing page copy).
.png)
Template Builder home. From here you create pages and open System Screens.
Step 2: Create the Locate System Screen
The Locate page must be a System Screen so that VL Locate is available in the module picker.
- In Template Builder, go to Pages.
- Select + ADD NEW (or Create a New Page).
- Enter New Page Name:
Locate(or your preferred name). - In New Page Type * Developers Only, select System Screen.
- Optionally set Target Language (If localized Page) if you are creating a language-specific Locate page.
- Select CREATE.
Set the page path
- On Page Settings, set the page path to
/locate(recommended). - Confirm the page type is System Screen.
- Save page settings if prompted.
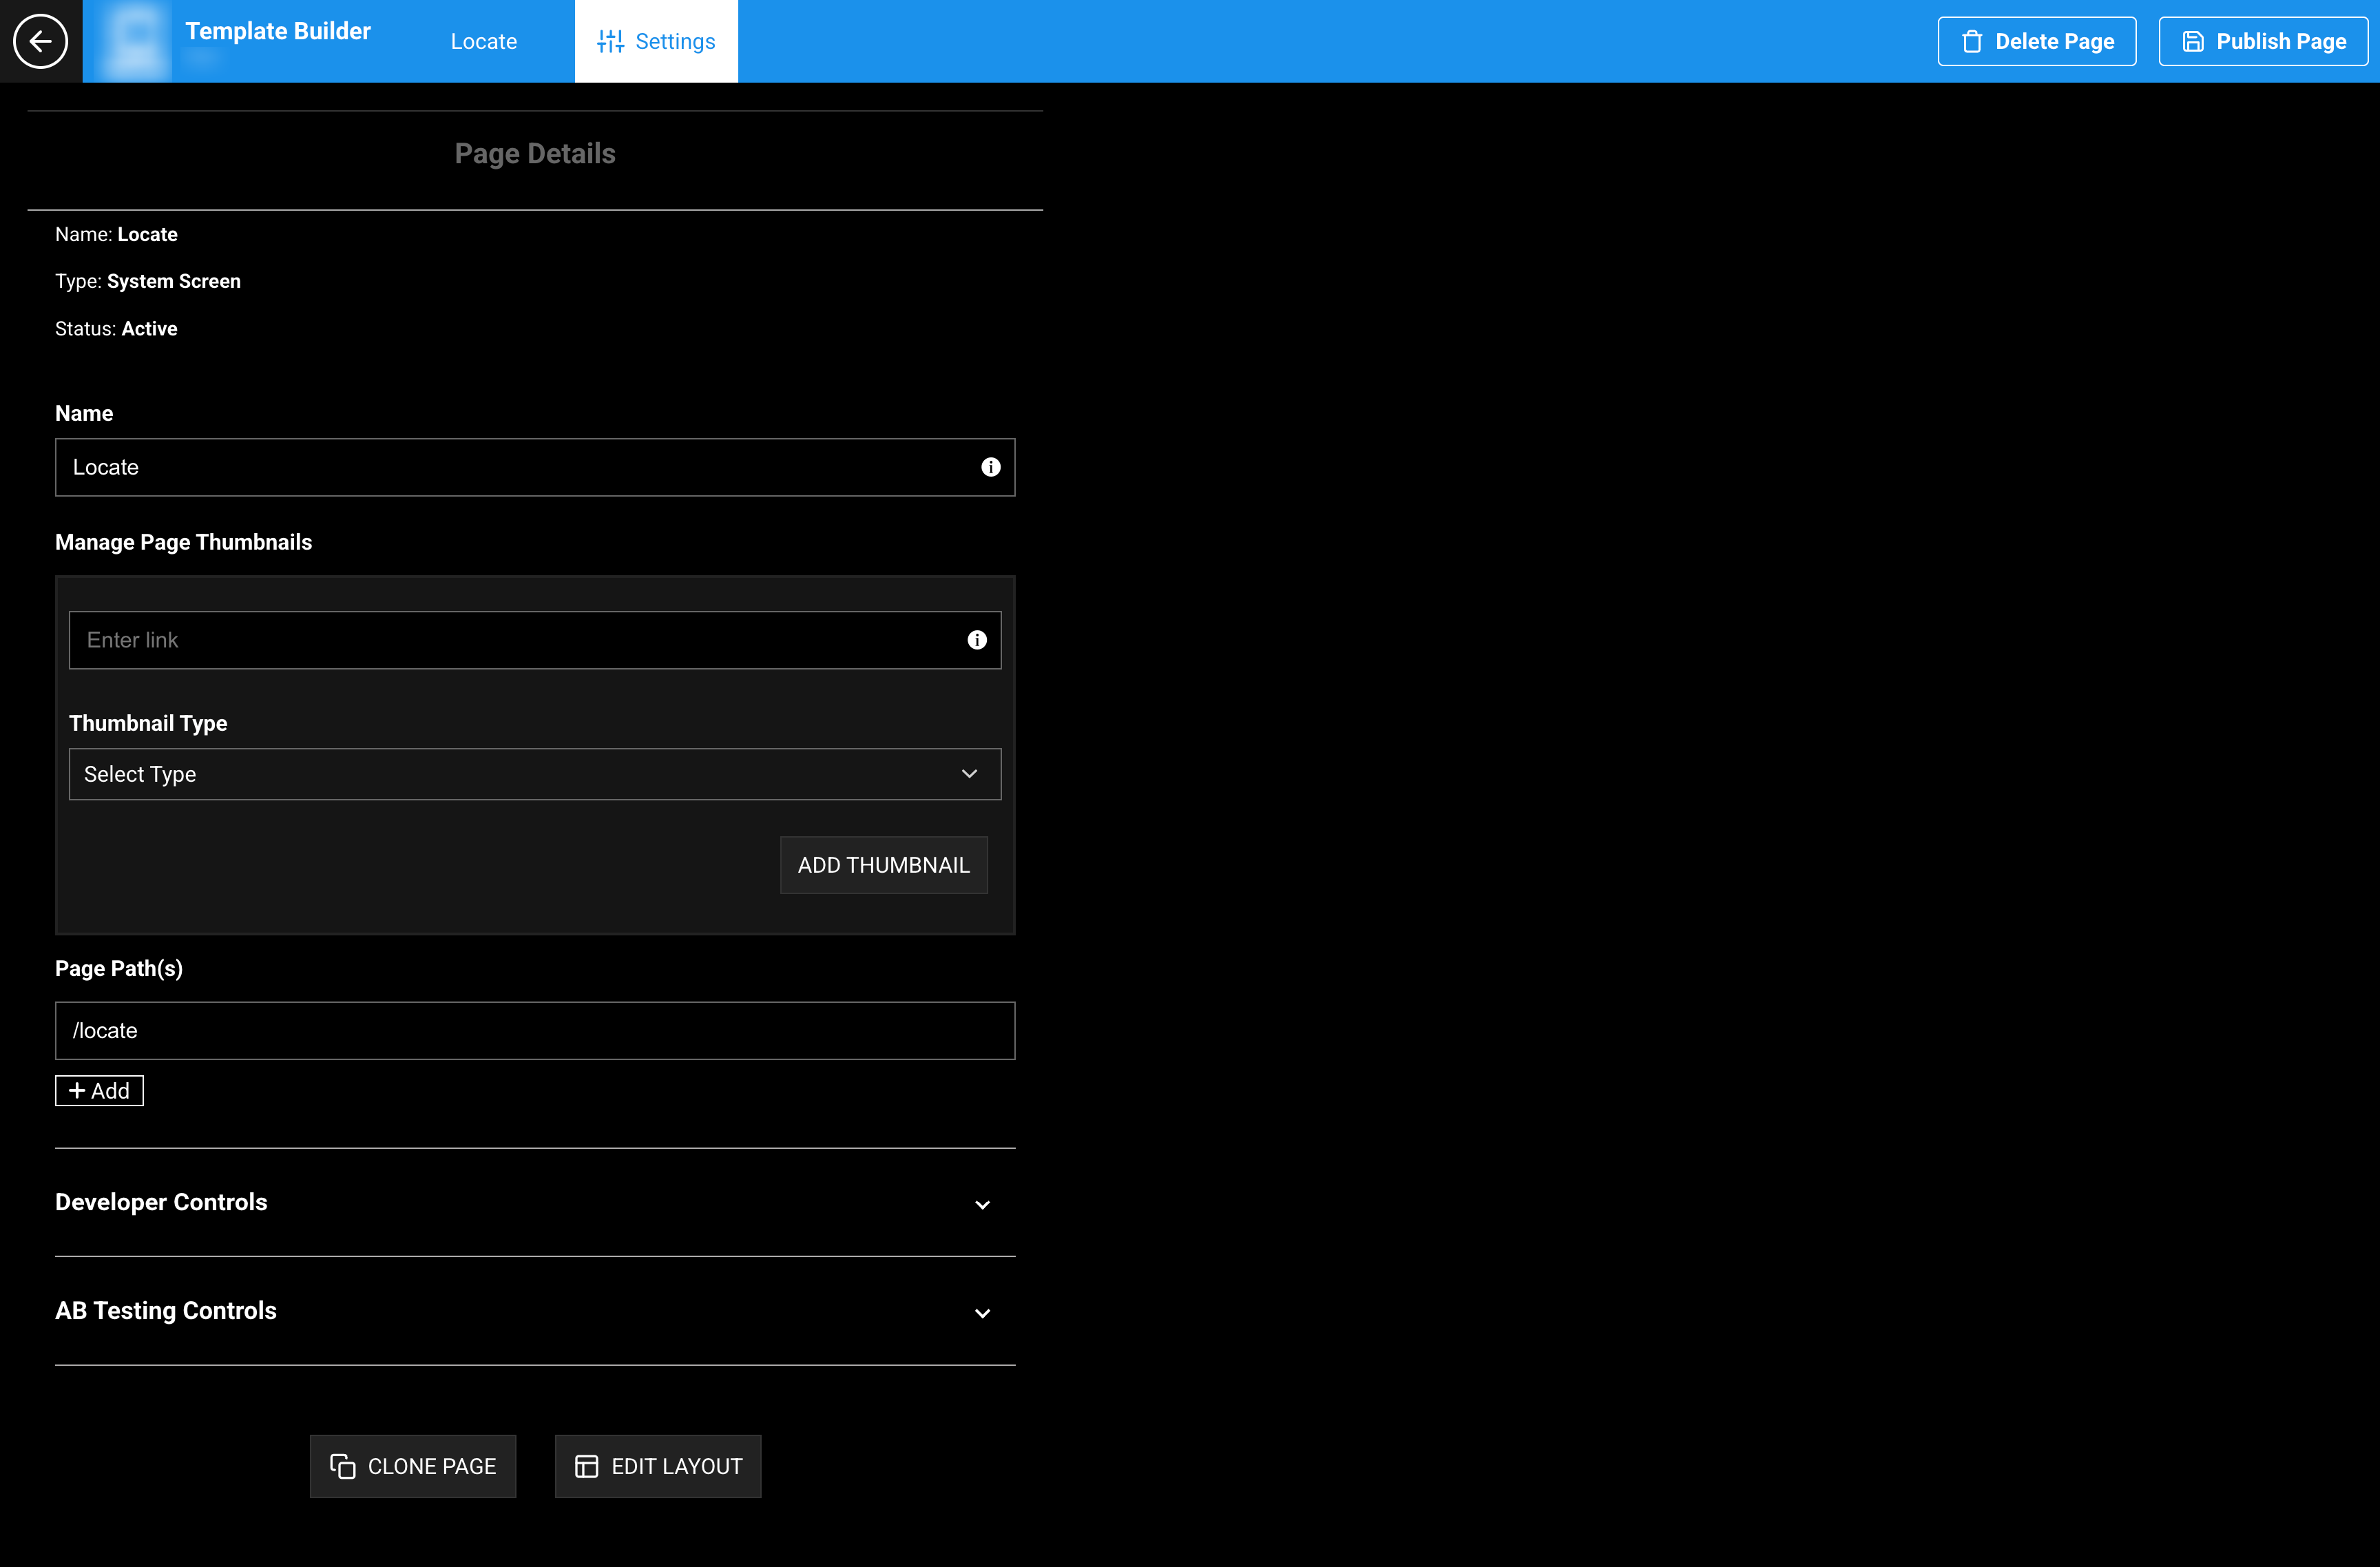
Page Settings. Set the path to /locate so onboarding, Subscribe, and return URLs resolve correctly.
Tip: Keep
/locateconsistent. Viewing or changing a home location later uses VL Location, not this page.
Step 3: Add VL Locate to the layout
- Open the Locate page.
- Select Edit Layout.
- Select Add a New Module.
- Because the page is a System Screen, the picker shows system modules.
- Search for or select VL Locate.
- Insert the module into the page layout.
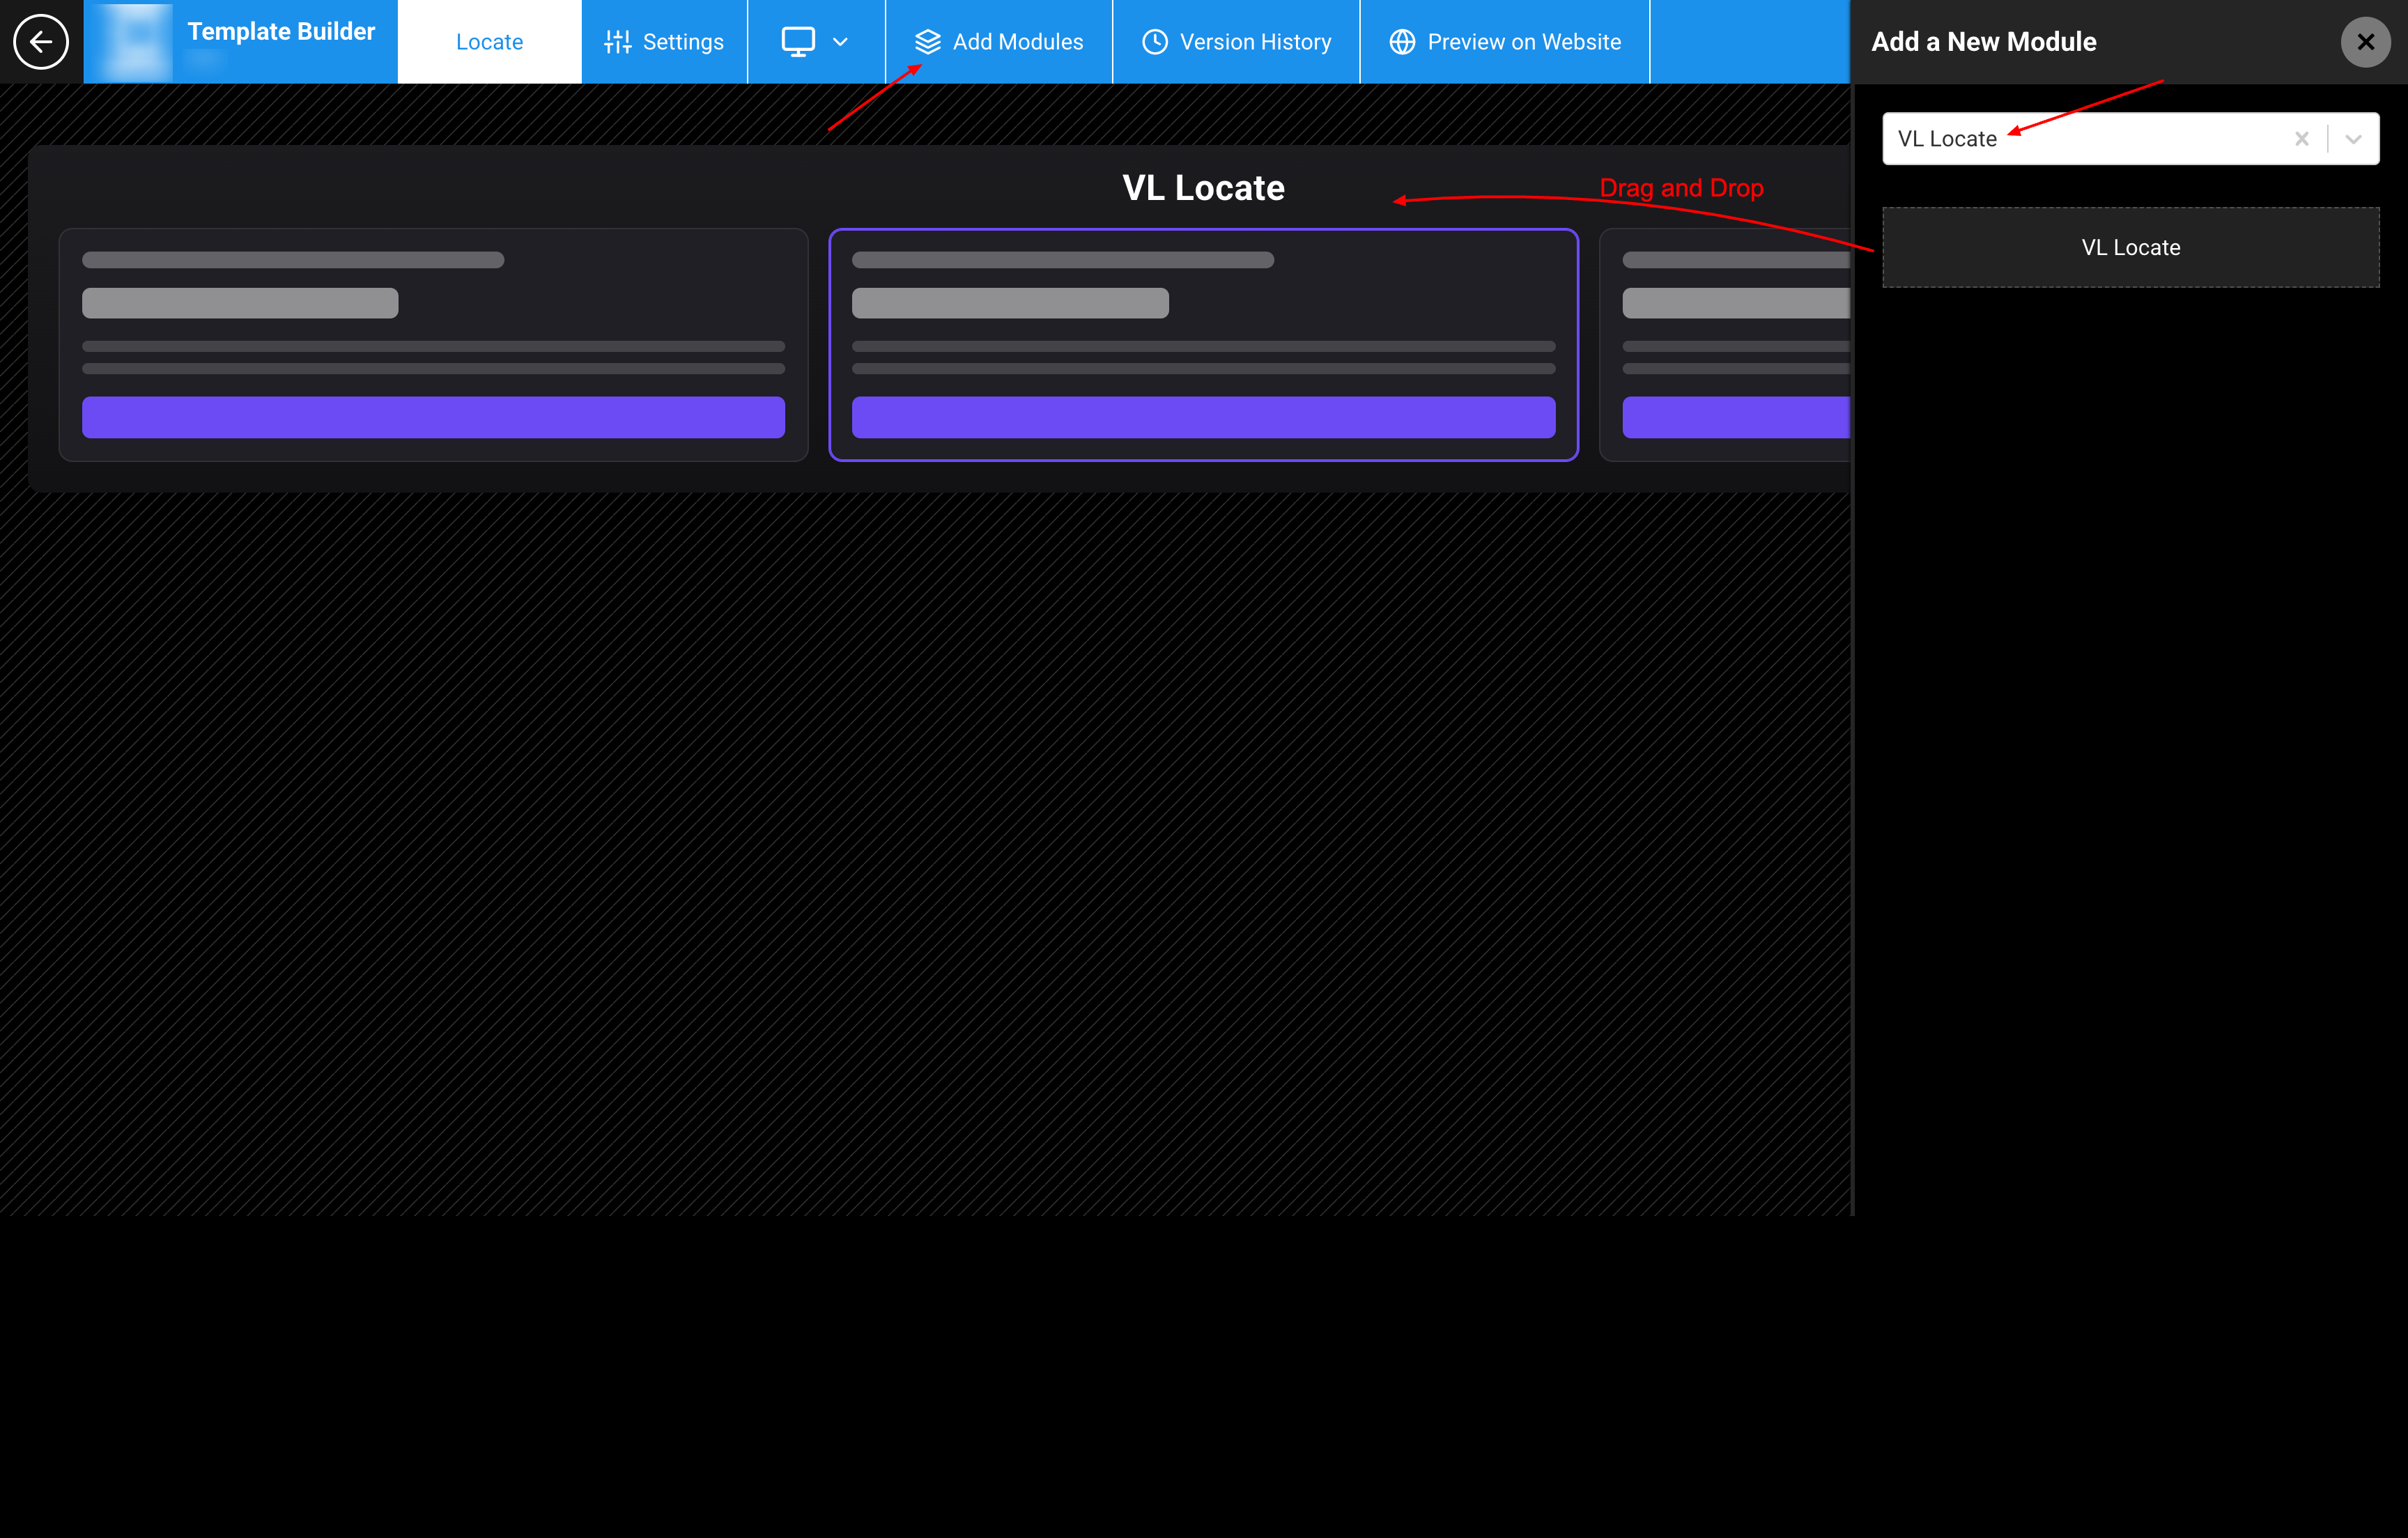
Edit Layout → Add a New Module. Search for and insert VL Locate.
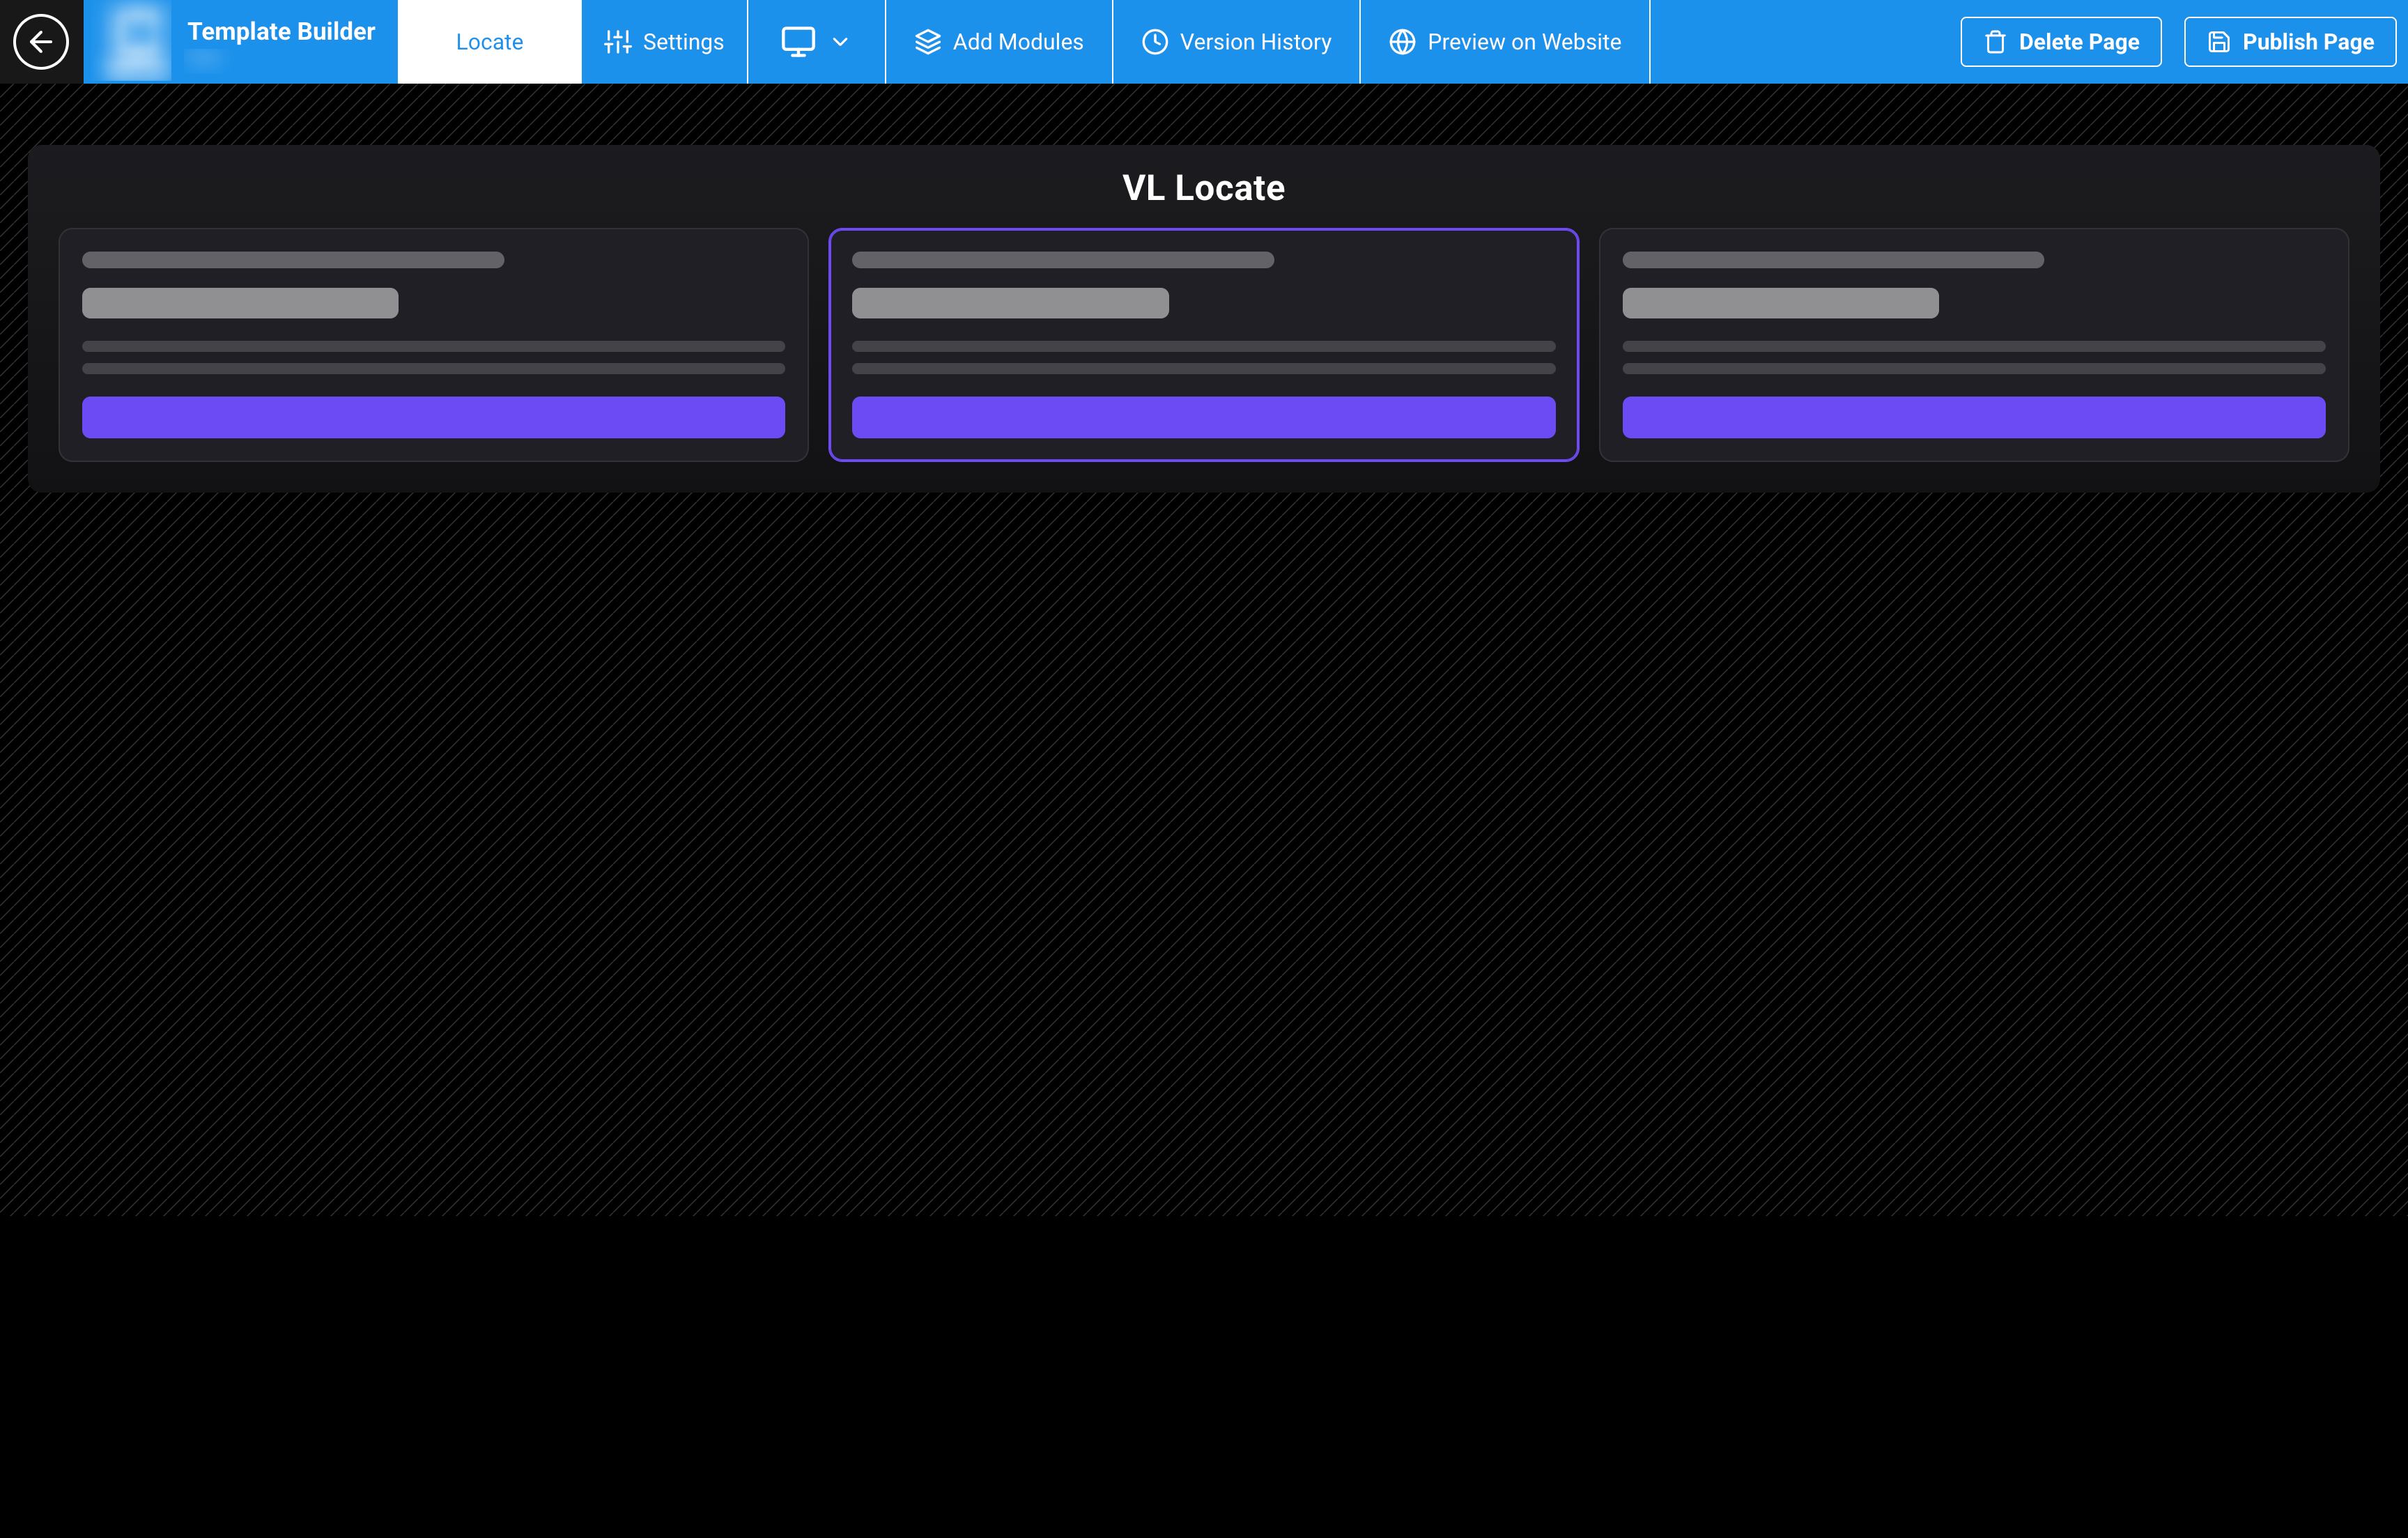
Locate System Screen layout with VL Locate placed on the page.
System Screens typically use a single primary system module. Avoid stacking unrelated content trays on this page.
Step 4: Configure redirect and delimiter fields
Open the VL Locate module settings. These fields sit above Images.
| Field | Description |
|---|---|
| Location Redirect Url | Optional URL stored on the module. |
| Delimiter Text ($$$) | Link text inserted where $$$ appears in Share Location Description. |
| Delimiter Link | URL opened by that link (new tab). |
To add a link inside the share-location description, put $$$ in Share Location Description, then set Delimiter Text ($$$) and Delimiter Link.
Example: description Read more $$$ about regional games. with delimiter text here and a help-page URL.

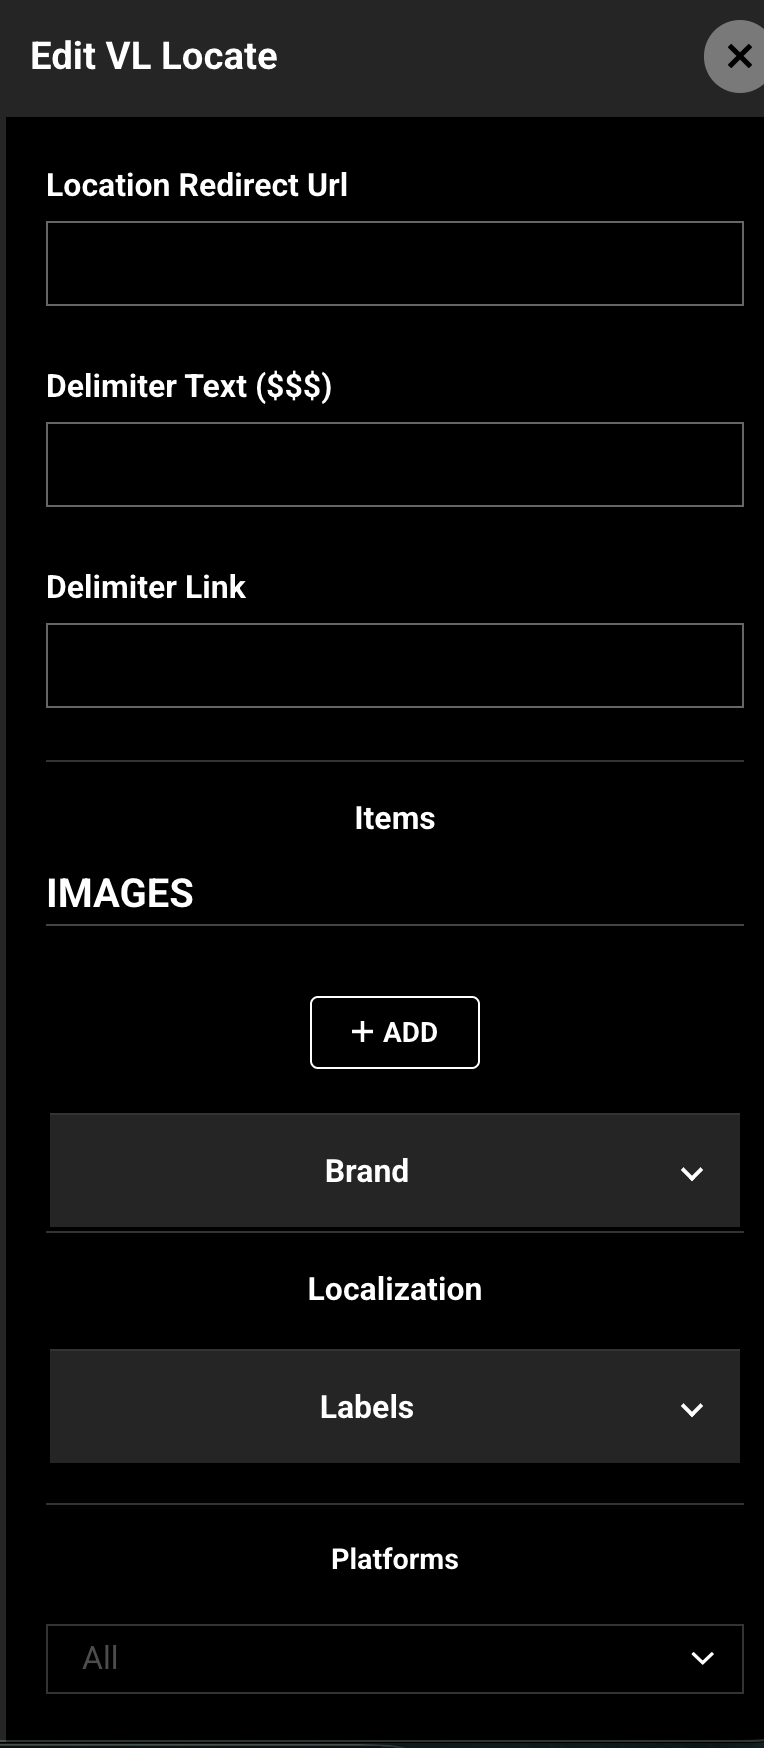
Location Redirect Url, Delimiter Text ($$$) and Delimiter Link.
Step 5: Configure Images
Under Items → Images, add one or more promotional slides for the locate flow layout.
Each row includes:
| Field | Description |
|---|---|
| Title | Headline for the slide. |
| Sub Title | Supporting headline. |
| Description | Body copy for the slide. |
| Image URL | Image for desktop / default. |
| Image URL (Mobile) | Optional image for mobile. |
| Image URL (Tablet) | Optional image for tablet. |
A single row shows one banner. Multiple rows can appear as a carousel in the flow layout on supported experiences.
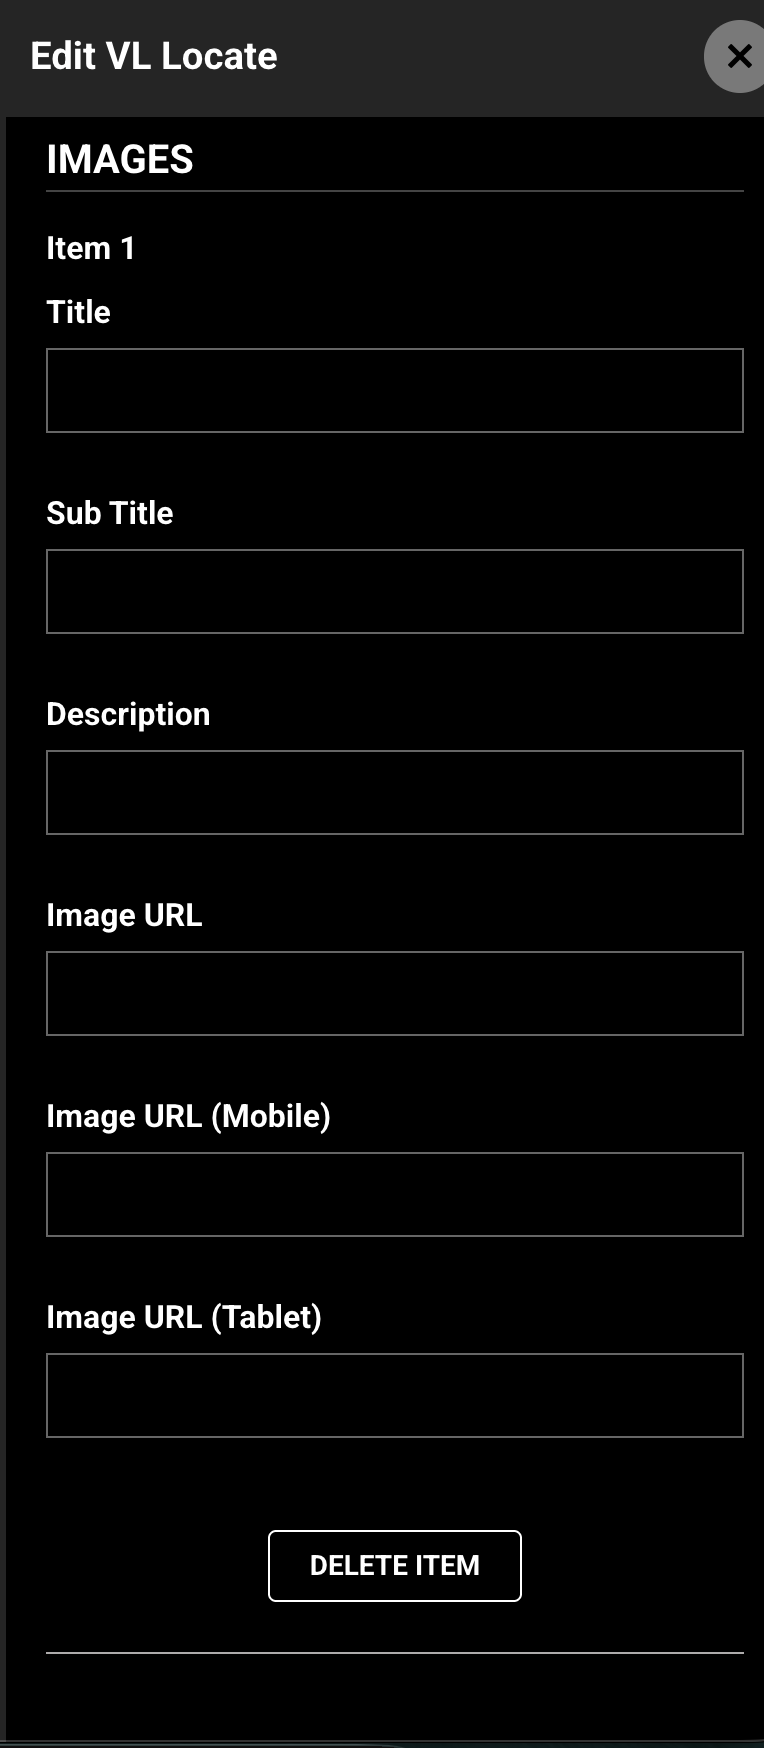
Images. Add Title, Sub Title, Description, and image URLs for the locate promotional panel.
Step 6: Configure Localization — Labels
Expand Localization → Labels.
| Label | What it controls | Default example |
|---|---|---|
| Share Location Text | Share-location button / heading on some locate layouts. | Share your location |
| Share Location Description | Body copy on the first /locate screen. Use $$$ for the delimiter link. |
Broadcast restrictions can limit live game broadcasts to a 150-mile radius from Washington, DC. Enabling location services allows for more accurate detection of your viewing area. |
| Continue Text | Button that asks the browser for location. | Continue |
| Zip Code Text | Label above the detected zip on the confirm screen. | Zip Code : |
| Set Home Location Text | Heading on the website locate screens. | Set your home location |
| Set Home Location Description Text | Body copy under the zip code. | You can always change your home location in settings later. Not your zip code? Continue and verify your location in settings later. |
| Set Home Location Btn | Button that saves the detected area as home. | Set as Home Location |
| Cancel Set Location Text | Button that continues without saving home. | I'll do it later |
| Location Dialog Steps | Optional step lines for a location dialog on supported experiences. | (empty) |
| Confirm Location Text | Confirm-location heading on device / QR layouts. | Confirm your location: |
| Scan QR Code Text | QR section heading. | Scan QR Code |
| Done Button CTA | Done control on device / QR layouts. | Done |
| Back Button CTA | Back control on device / QR layouts. | Go Back |
| QR Code Instructions | How to scan the QR code on a TV or device screen. | Use your camera app or QR code reader on your mobile device. … |
On the website:
- First screen uses Set Home Location Text, Share Location Description, and Continue Text.
- Second screen uses Zip Code Text, Set Home Location Text, Set Home Location Description Text, Set Home Location Btn, and Cancel Set Location Text.
- QR / Confirm / Done / Go Back copy is for device screens that show those elements.
Step 7: Configure Brand
Expand Brand.
| Setting | Default (example) | Purpose |
|---|---|---|
| Module Background Color | #0D2148 |
Background behind the locate panel. |
| CTA Background Color | #2B426E |
Continue / action button background on layouts that use this color. |
Match these colors to Authentication and View Plans so onboarding feels like one product.
Step 8: Save and publish the Locate page
- Save the module settings.
- Review the page layout once more.
- Publish the Locate System Screen.
Until the page is published, apps and web will not show your latest Locate configuration.
Changes can take several minutes to appear because of caching. To verify sooner, use a private window, another browser, or clear cookies and cache.
Also publish Authentication so unsigned customers who open /locate can sign in and return.
Step 9: How it looks on the website
After publish, open your site’s Locate URL, for example:
https://www.example.com/locate
Access checks
| Condition | What happens |
|---|---|
| Subscription / SVOD is not enabled for the site | Customer is sent to the homepage |
| Customer is not signed in | Customer is sent to Authentication (for example /authentication) |
Share location
Signed-in customers usually see:
- Back and Skip in the flow chrome
- Optional promotional Images
- Heading from Set Home Location Text
- Share Location Description (with an inline link if you used
$$$) - Continue
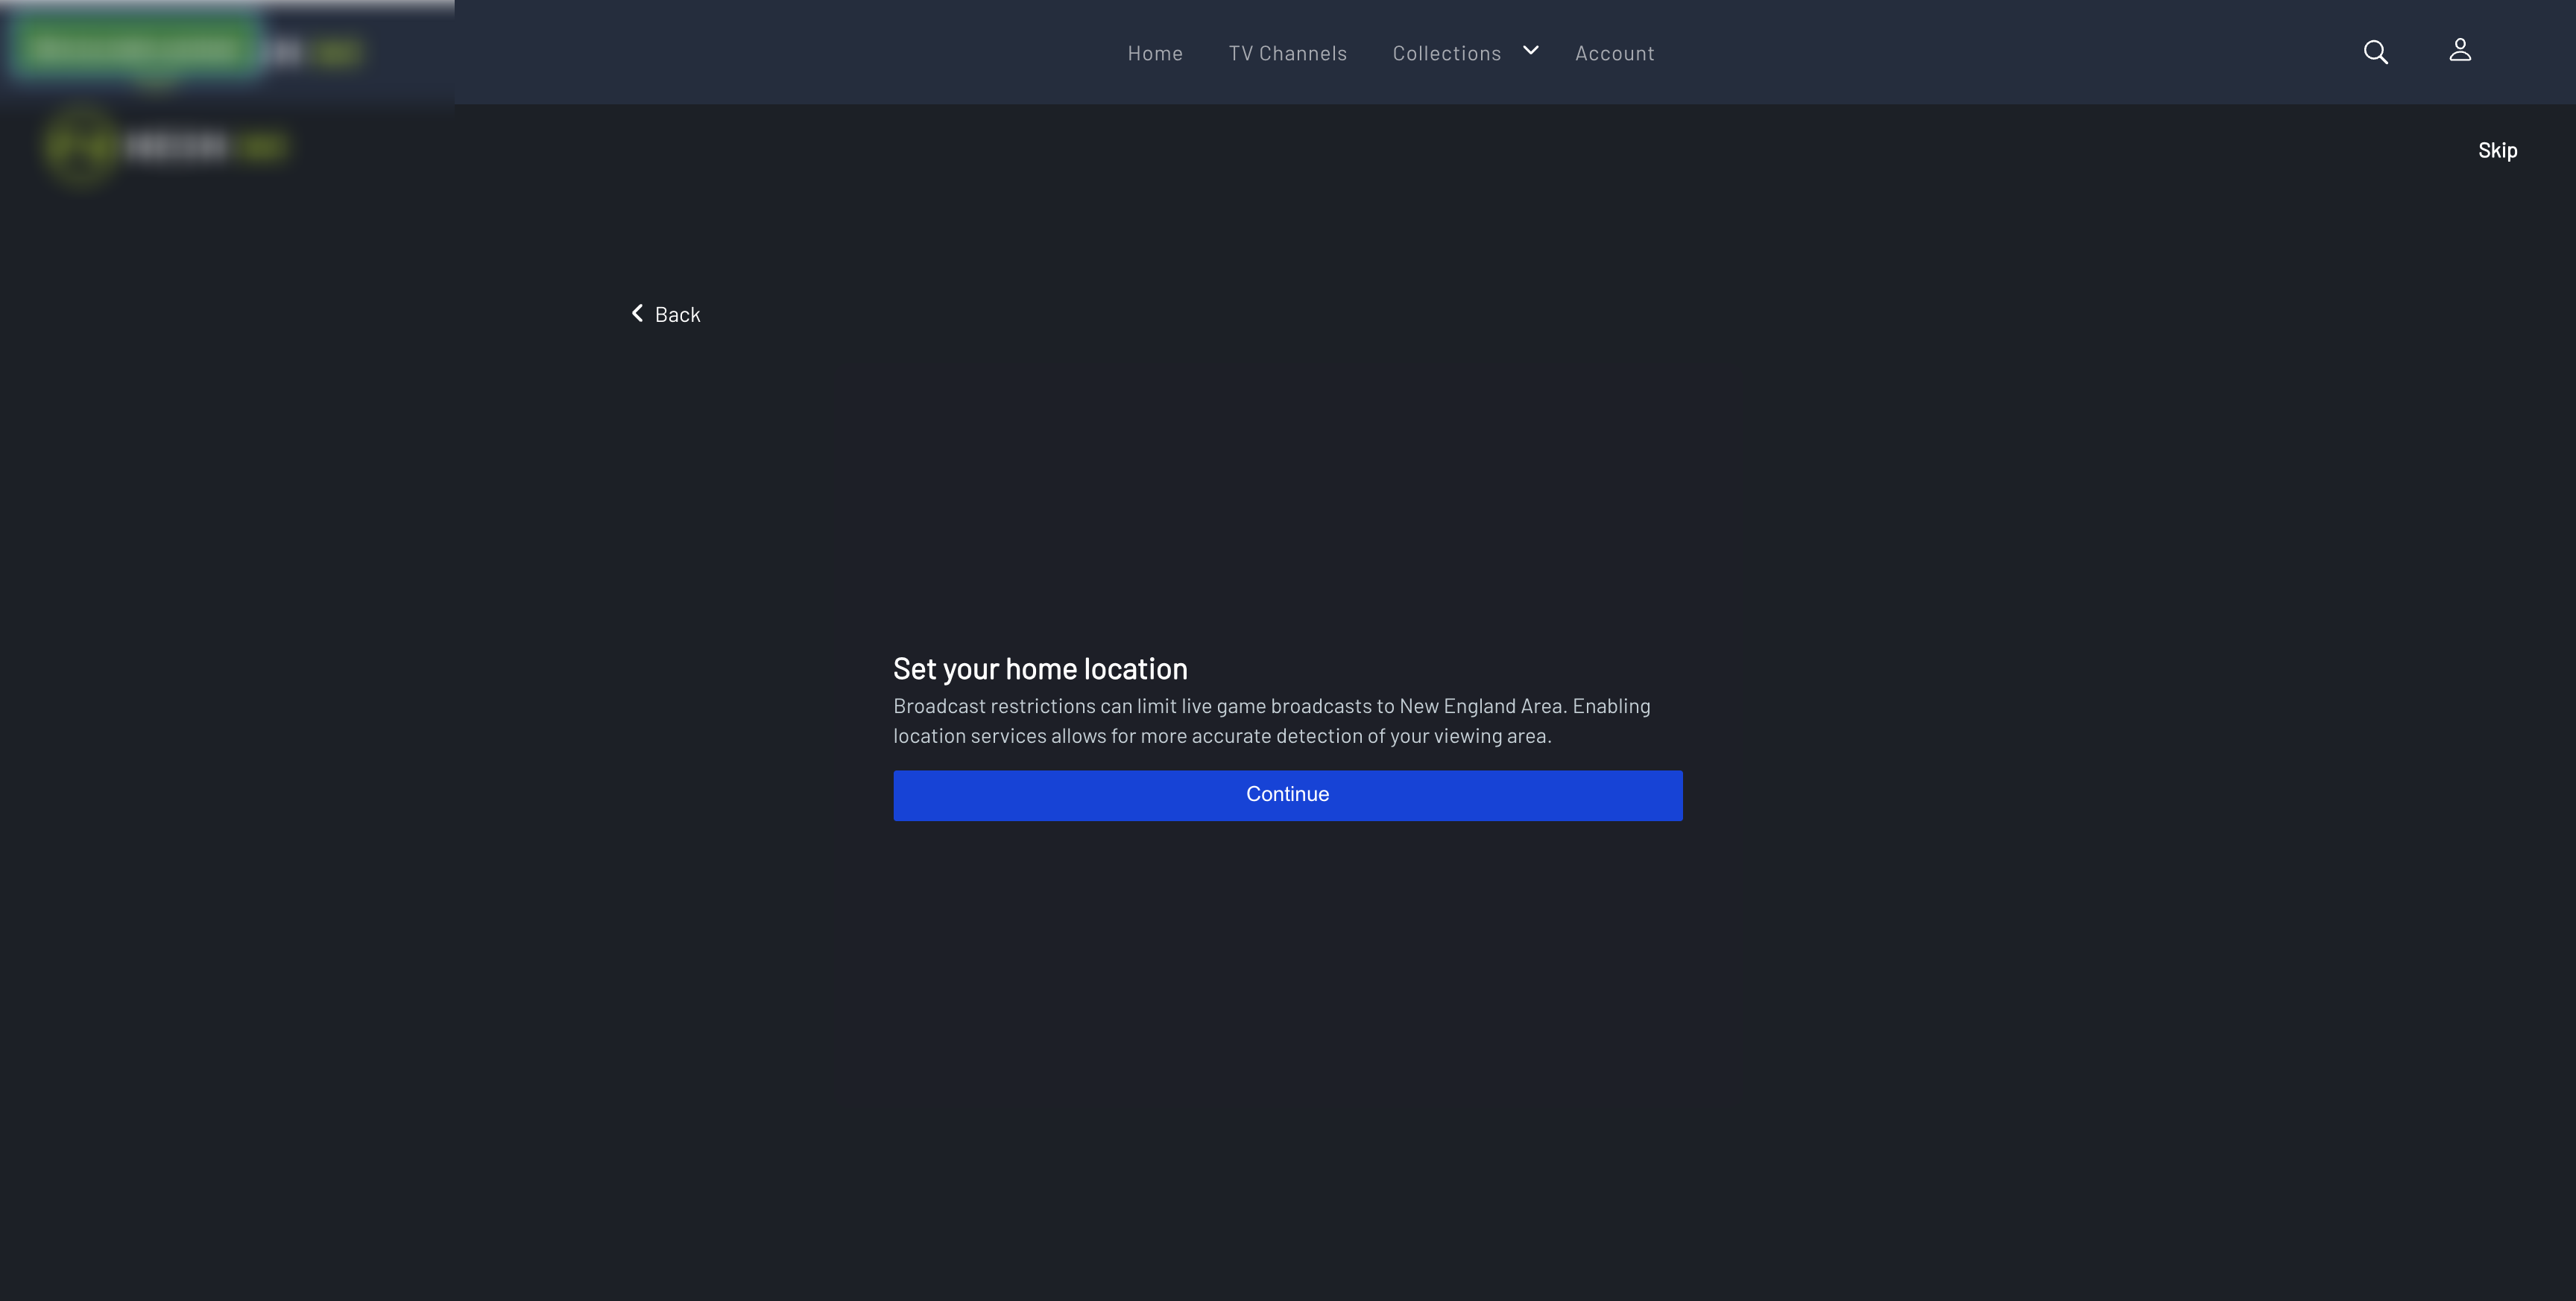
Website /locate first screen with description and Continue.
Selecting Continue asks the browser for location. A loading state can appear while location is read.
Confirm zip and set home
After location is allowed:
- Zip Code Text and the detected zip
- Set Home Location Text
- Set Home Location Description Text
- Set as Home Location
- I'll do it later
| Action | What the customer sees next |
|---|---|
| Set as Home Location | Home location is saved. The customer continues to the next onboarding step. |
| I'll do it later | The customer continues without saving home location. |
| Location blocked in the browser | The customer stays on the share-location screen. |
TV device URL (for example ?device=roku_box) |
After this step the customer can go to a thank-you page. |
Verification checklist
- Locate page exists as a System Screen
- Page path is
/locate - VL Locate is on the layout
- Subscription / SVOD is enabled if onboarding should show
/locate - Share-location description, Continue, zip, set-home, and later copy are reviewed
$$$delimiter text and link are set if you want an inline link- Brand colors match the site
- Optional Images are configured when used
- Page is published
- Signed-out customers are sent to Authentication
- Signed-in customers can Continue, see a zip, and set home or continue later
- Blocking location in the browser leaves the customer on the first screen
- Authentication is published
Troubleshooting
| Problem | What to check |
|---|---|
| VL Locate is not in the module list | Confirm the page type is System Screen. Search for VL Locate. |
| Customer is sent to the homepage immediately | Enable subscription / SVOD for the site. /locate is for that onboarding path. |
| Customer is sent to Authentication | Locate requires a signed-in session. Complete sign-in first. |
| Page path is wrong | Open Page Settings and set path to /locate. |
| Continue does nothing / zip never appears | The browser must allow location. If location is blocked, the first screen stays. |
| Inline link does not appear | Put $$$ in Share Location Description and fill Delimiter Text ($$$) and Delimiter Link. |
| Labels do not change on the site | Save module settings, publish the page, and allow cache to clear. For localization, edit labels in the correct language. |
| Customer expected to change an existing home location | Use VL Location on the account location page, not /locate. |
| QR or Confirm Location copy never appears on the website | Those labels are for device screens. The website is share location, then zip / set home. |
Best Practices
- Use one Locate System Screen at
/locate. - Keep
/locateand VL Location separate — first-time set vs later change. - Explain why location is needed in Share Location Description (regional games, blackouts).
- Offer I'll do it later so customers are not blocked if they decline.
- Localize description and buttons when the site has multiple live languages.
- Test allow, block, set home, and later before launch.
- Publish after every meaningful change — draft System Screens do not update production.
FAQs
Q. What page type should I use for VL Locate?
System Screen. Set the path to /locate.
Q. What is the module name in the picker?
VL Locate (this is the Template Builder caption for VL Locate 01).
Q. How is this different from VL Location?
VL Locate is the onboarding / first-time set home location page (/locate). VL Location is the account screen to view or change a home location that is already set.
Q. Must the customer be signed in?
Yes. Unsigned customers are sent to Authentication.
Q. What if the site is not a subscription site?
/locate sends the customer to the homepage when subscription / SVOD is not enabled.
Q. What if the customer blocks location?
They stay on the share-location screen. They can try Continue again after allowing location in the browser.
Q. Can I add a link in the description?
Yes. Put $$$ in Share Location Description, then set Delimiter Text ($$$) and Delimiter Link.
Important Information
- VL Locate must be placed on a System Screen at
/locate. - The page requires a signed-in customer and a subscription / SVOD site setup.
- Create the page, add the module, configure copy and colors, then publish.
- Home location can usually be changed later from account settings (VL Location).
- Cache can delay frontend updates by several minutes.
Glossary
| Term | Definition |
|---|---|
| VL Locate | System Screen module for sharing location and setting a home area. |
| Home location | The saved area used for regional / blackout rules. |
| System Screen | Template Builder page type used for locate, sign-in, checkout, and other system flows. |
| Delimiter ($$$) | Placeholder in the description that becomes a link. |
| VL Location | Separate module for viewing or changing home location in account settings. |
Contact Support
If you need help beyond this article, contact the ViewLift support team.
- Email: techsupport@viewlift.com
- Phone (US): +1-800-859-0420
- Phone (UK): +44-203-014-8921
Support hours: B2C requests are handled Monday to Friday. B2B support is available 24/7.