Overview
This document explains how to configure Datadog Observability through the ViewLift CMS.
Navigation
Navigate to:
AppCMS → Settings → Observability → Datadog
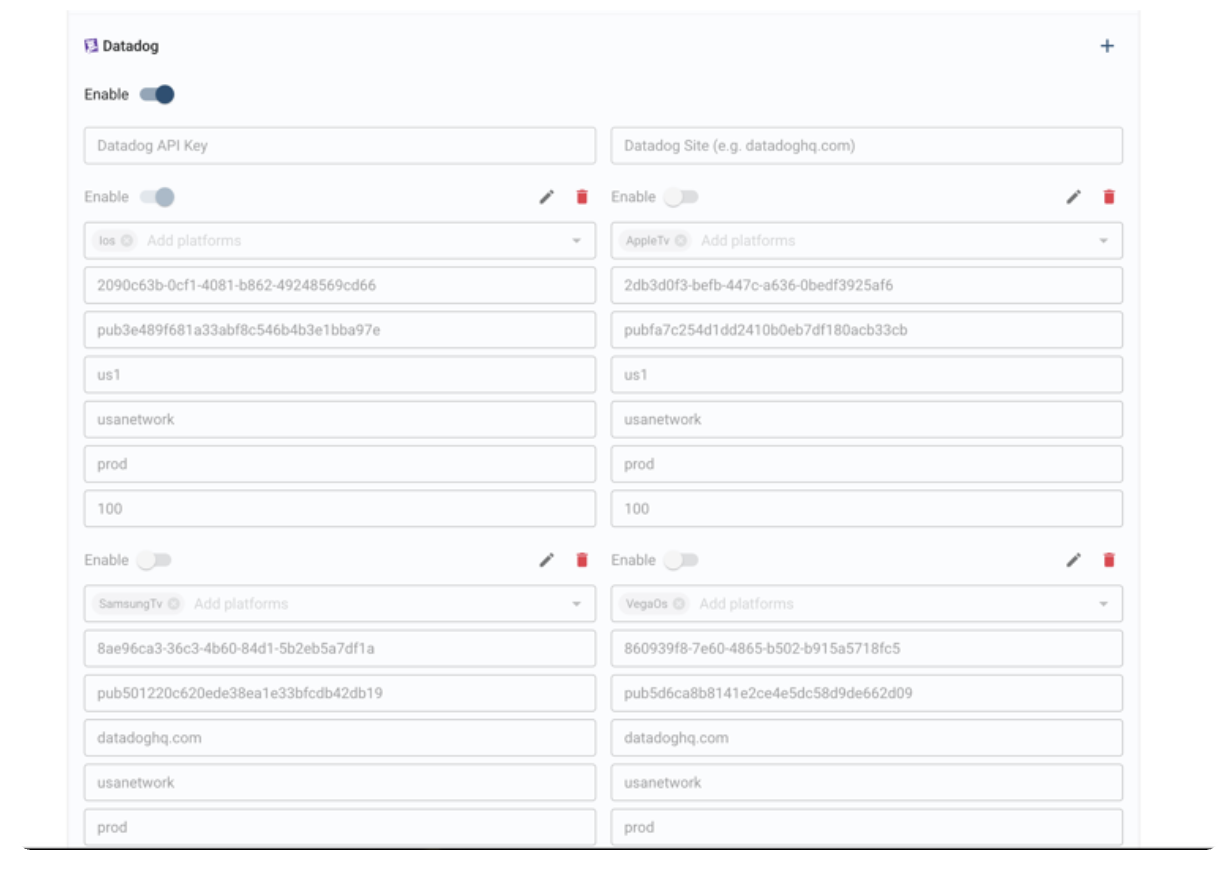
This section contains all the configuration required to enable Datadog for your applications.
Step 1 – Enable Datadog
The Datadog configuration is disabled by default.
- Enable the Datadog parent toggle to activate the configuration.
- Once enabled, additional configuration options become available.
Step 2 – Configure Global Datadog Settings
Provide the following global credentials:
- Datadog API Key
- API key used for Datadog integration.
- Datadog Site
- Datadog site endpoint (for example:
datadoghq.com).
- Datadog site endpoint (for example:
Step 3 – Configure Platform-Specific Settings
Datadog can be configured independently for each supported platform.
For each platform:
- Enable the Platform Configuration toggle.
- Select the desired platform from the predefined dropdown.
- Enter the platform-specific Datadog configuration.
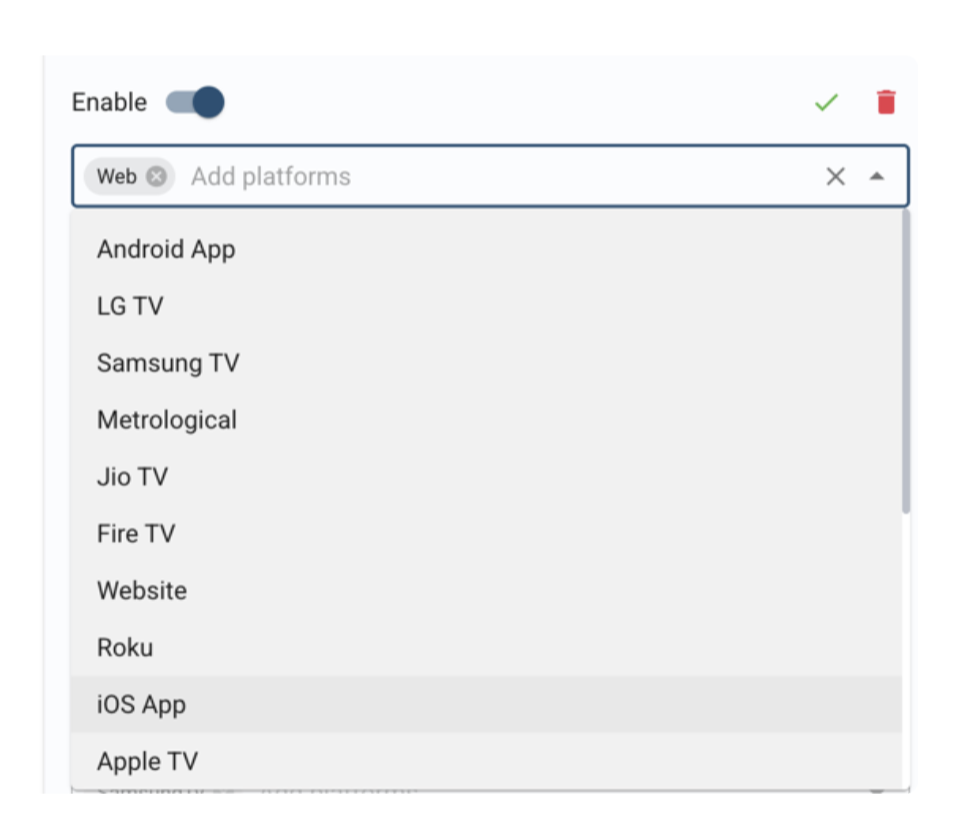
This allows different applications or platforms to use separate Datadog environments when required.
Platform Configuration Fields
Configure the following fields for each enabled platform:
- Datadog Application ID
- The RUM Application ID associated with your Datadog application.
- Datadog Client Token
- Client token used to authenticate RUM events.
- Datadog Site
- Datadog endpoint where telemetry data is sent (for example:
datadoghq.com).
- Datadog endpoint where telemetry data is sent (for example:
- Datadog Preferred Service Name
- Service name displayed within Datadog for this application.
- Datadog Environment
- Environment identifier such as
stagingorproduction.
- Environment identifier such as
- Datadog Session Sample Rate
- Percentage of user sessions that will be captured by Datadog RUM (0–100).