Introduction
VL ViewPlans 02 is a Template Builder module that powers a plan comparison experience on your website and connected apps. Customers compare subscription plans side by side, select one, and continue into checkout.
On the website, this module typically lives on a page at /viewplans. Desktop shows a comparison table; narrower screens show a mobile-friendly plan list. After the customer selects a plan and chooses Subscribe, they are sent to checkout (/checkout) in the usual flow.
This article explains how to create a View Plans page in Template Builder, configure VL ViewPlans 02, publish it, and verify the experience on the web.
Purpose
The purpose of this article is to help you:
- Create a View Plans page in Template Builder
- Add and configure the VL ViewPlans 02 module
- Brand and localize plan comparison copy and colors
- Understand what customers see on the website when choosing a plan
- Publish and verify the live View Plans page
Scope
This article covers:
- Creating a page for plan comparison in Template Builder
- Adding VL ViewPlans 02 to the page layout
- Module settings: display toggles, Localization (Labels), Brand, Font Settings
- How the plan comparison page appears on the website
- An overview of the plan-selection flow on web (flowchart)
It does not cover:
- Creating or pricing subscription plans in AppCMS
- VL ViewPlans 01 (older plan-picker layout)
- VL Checkout 01 payment steps (documented separately)
- VL Plan Banner 01 or other entry CTAs that link to View Plans
Prerequisites
Before you begin, ensure you have:
- Access to Template Builder for your site
- At least one active subscription plan configured for the site
- A published Checkout page (recommended path
/checkout) so Subscribe can continue the purchase flow - Brand colors and copy ready: plan heading, Subscribe button label, Terms Apply link, no-plans messages
Example used in this article
Throughout the steps below we use a page named View Plans at path/viewplans. Replace the sample values with your own.
Plan selection flow overview (website)
The flowchart below shows the typical customer journey on the website when VL ViewPlans 02 is published on your View Plans page.
(1).png)
Notes
- Closing the page (X) cancels plan selection. If the customer came from an in-app browser with a return URL, they may be sent back to the app; otherwise behavior follows any saved redirect for that session.
- Plan list content comes from your site’s subscription plans in AppCMS, not from labels in this module alone.
- VL ViewPlans 02 is a decorative Template Builder module. For a dedicated View Plans page, use a Modular Page (recommended). The module can also be added on other page types that allow decorative modules (for example Marketing Page or Ancillary Page). It is not available on System Screens or User Pages.
Step 1: Open Template Builder
- Log into ViewLift Tools.
- Open AppCMS → Edit Template Builder (or open Template Builder for your site from your usual entry point).
- Confirm you are on the correct site and language (if localization is enabled, use the language selector on the Template Builder home screen before editing page copy).
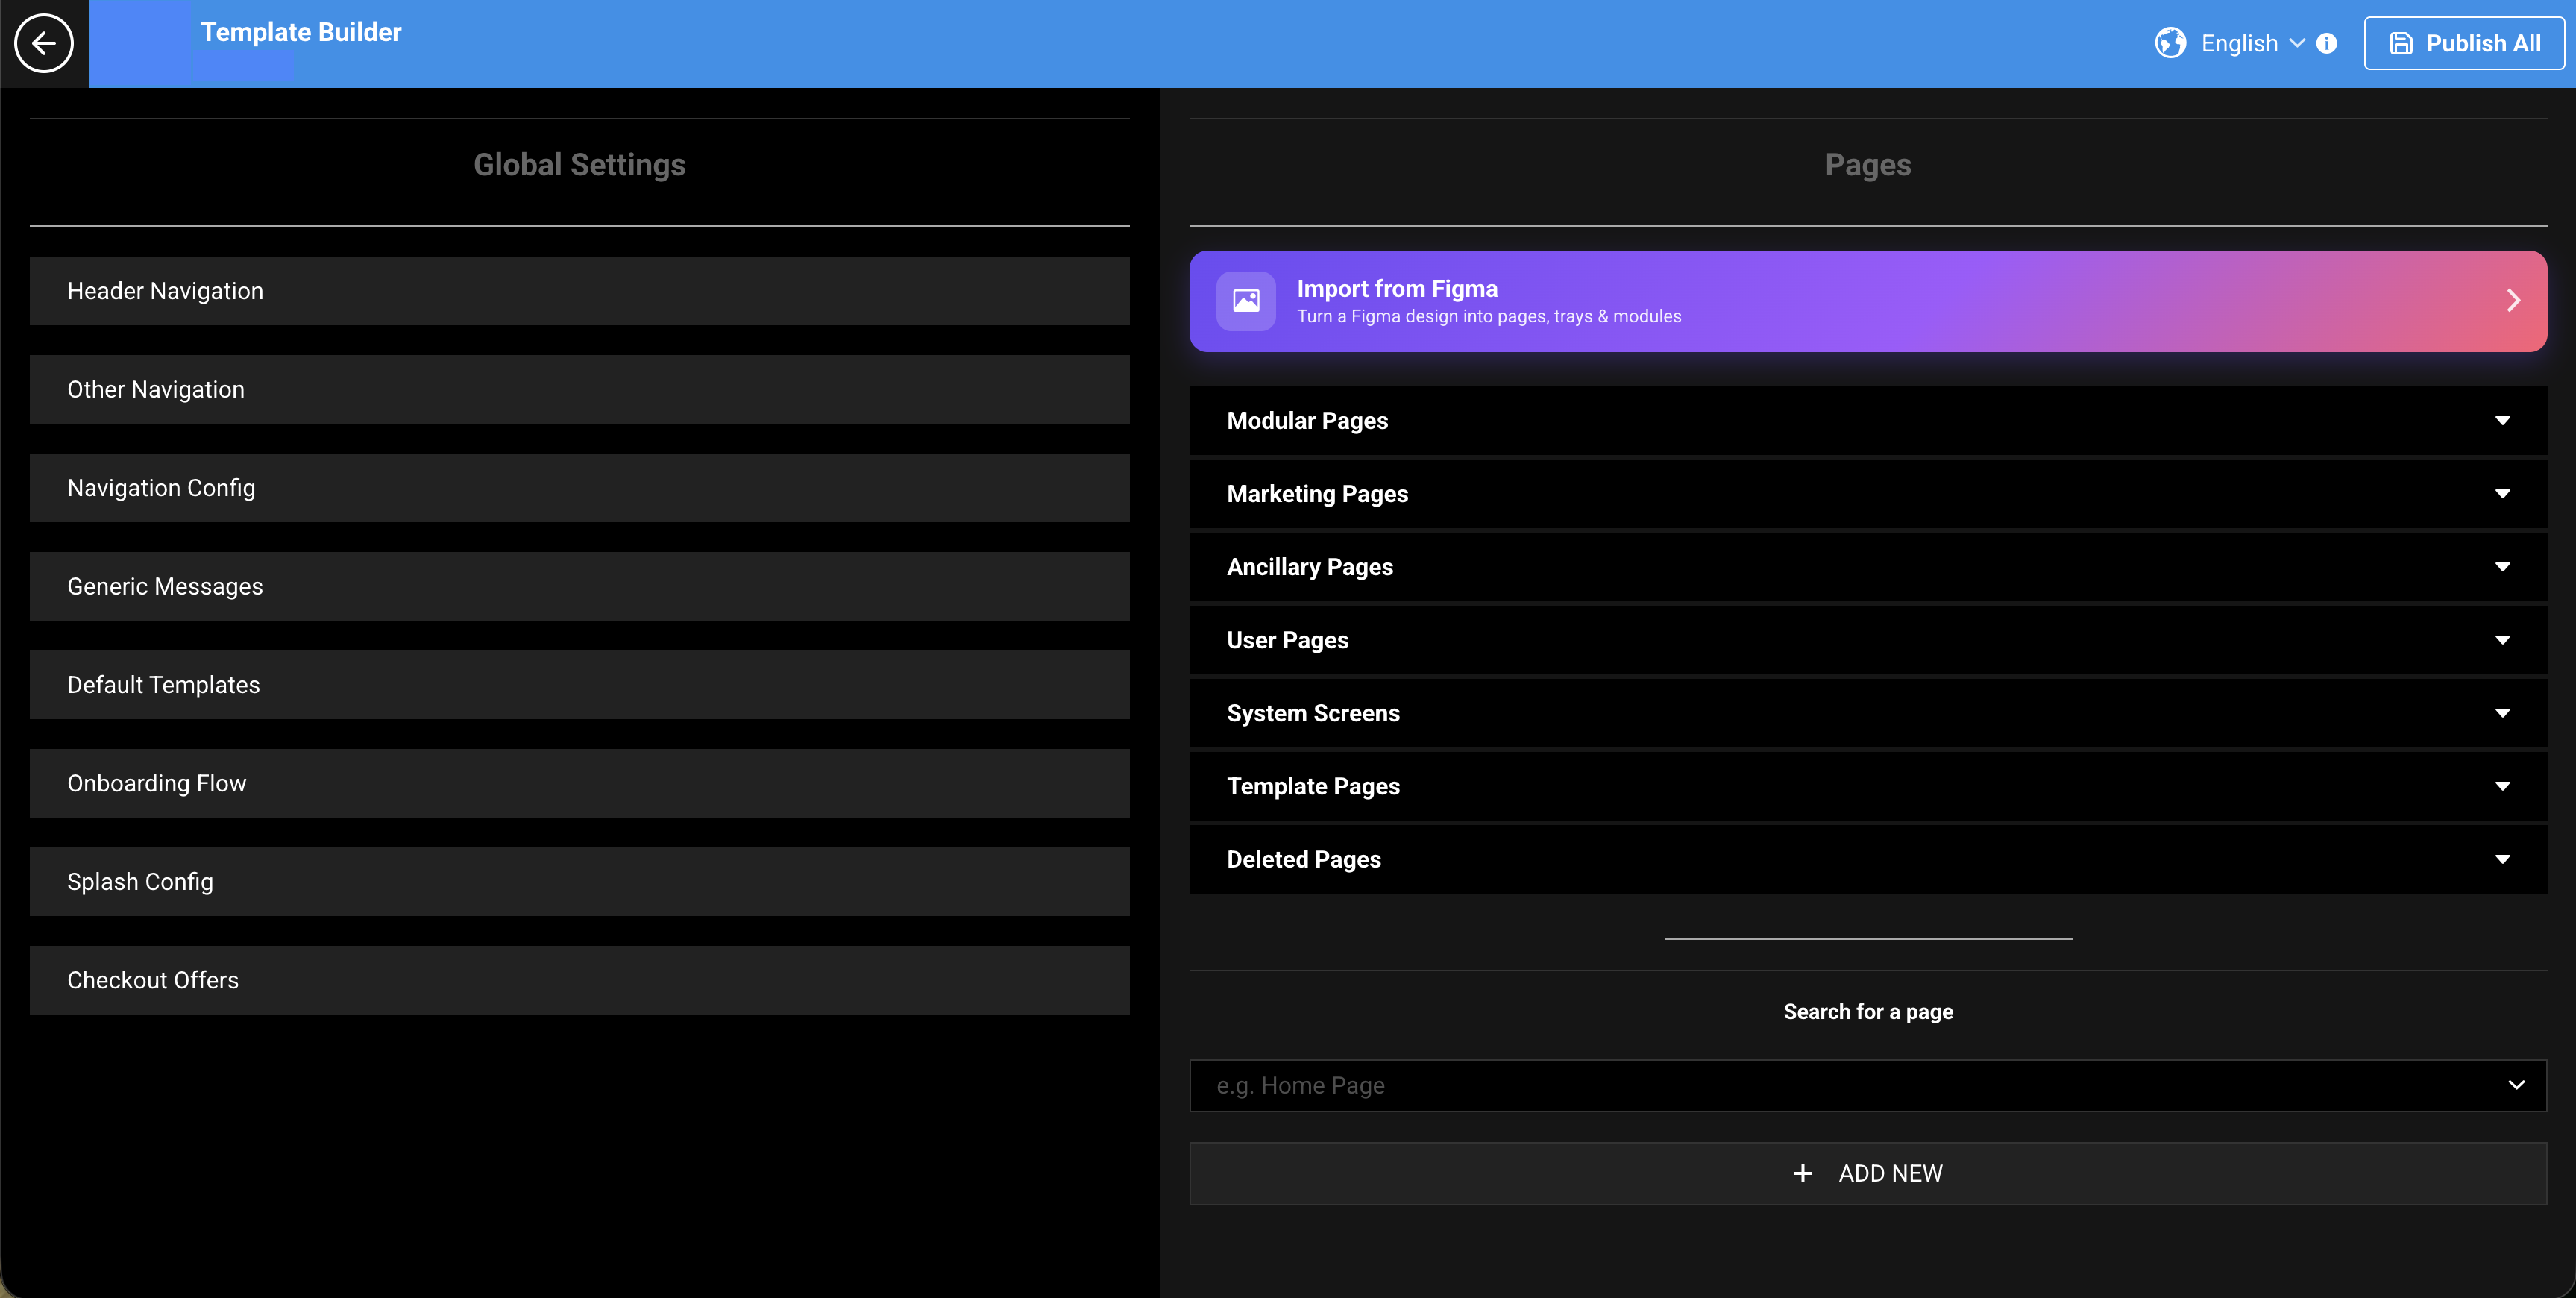
Figure 1. Template Builder home. From here you create pages and open Modular Pages.
Step 2: Create the View Plans page
VL ViewPlans 02 is a decorative module. For a dedicated View Plans page, create a Modular Page (recommended). You can also place this module on other page types that allow decorative modules (for example Marketing Page or Ancillary Page). It does not appear in the module picker on System Screens or User Pages.
- In Template Builder, go to Pages.
- Select + ADD NEW (or Create a New Page).
- Enter New Page Name:
View Plans(or your preferred name). - In New Page Type * Developers Only, select Modular Page (recommended for a dedicated
/viewplanspage). - Optionally set Target Language (If localized Page) if you are creating a language-specific page.
- Select CREATE.
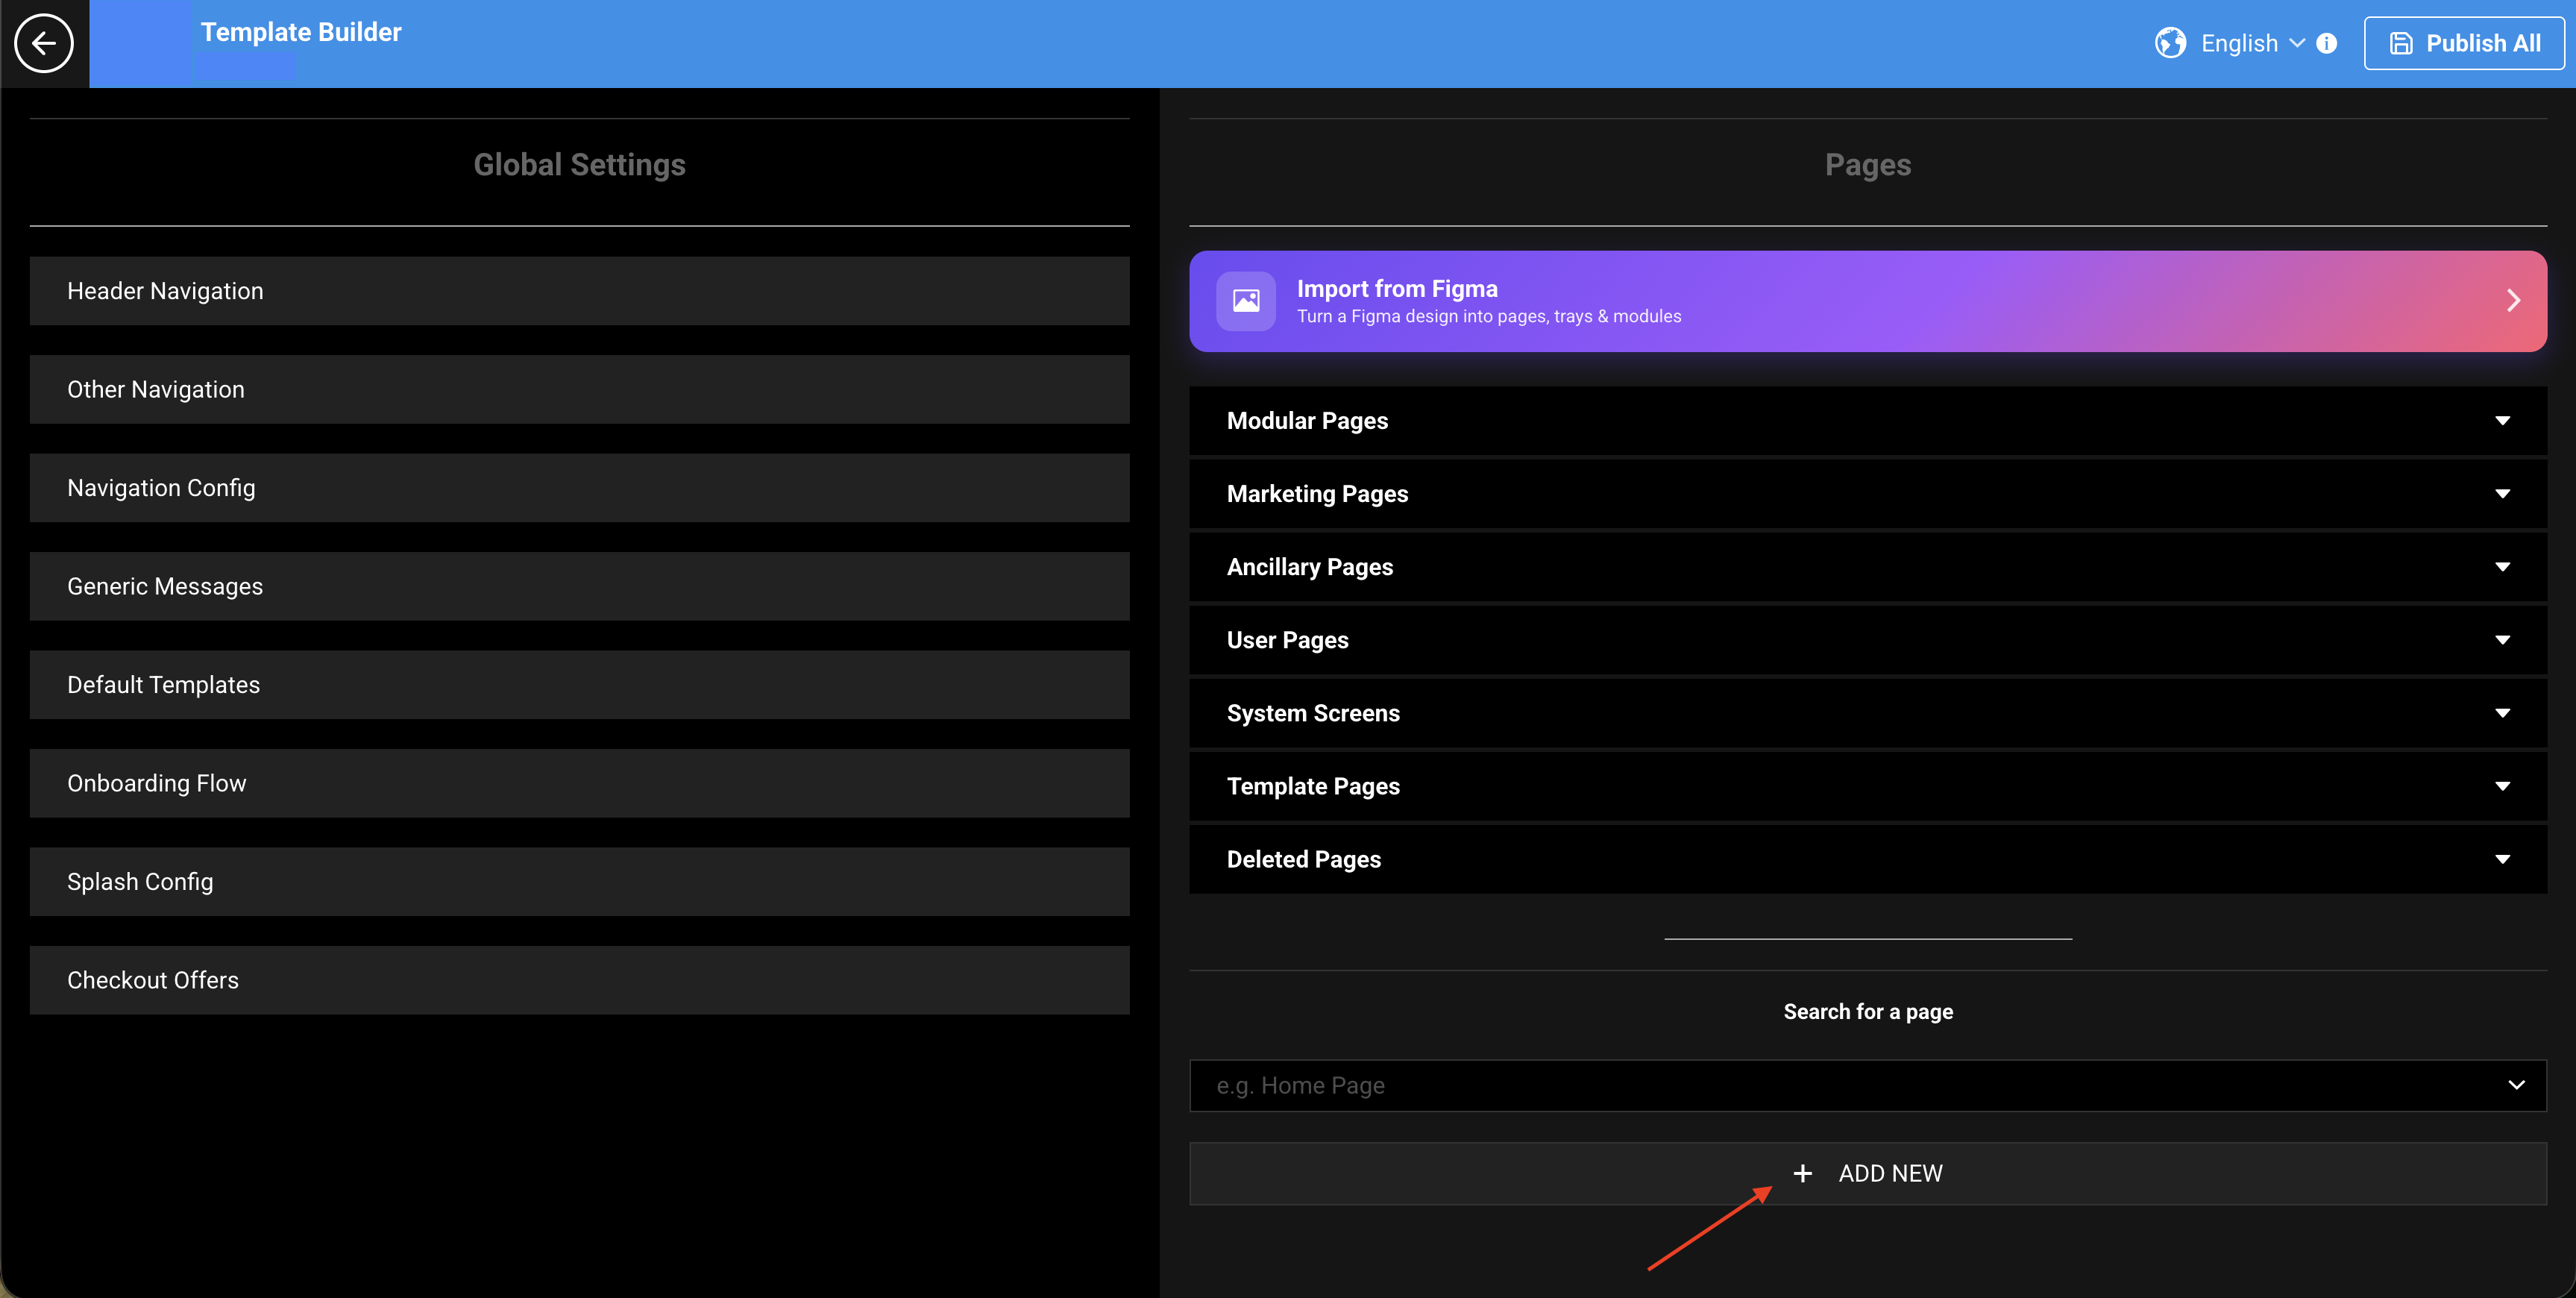
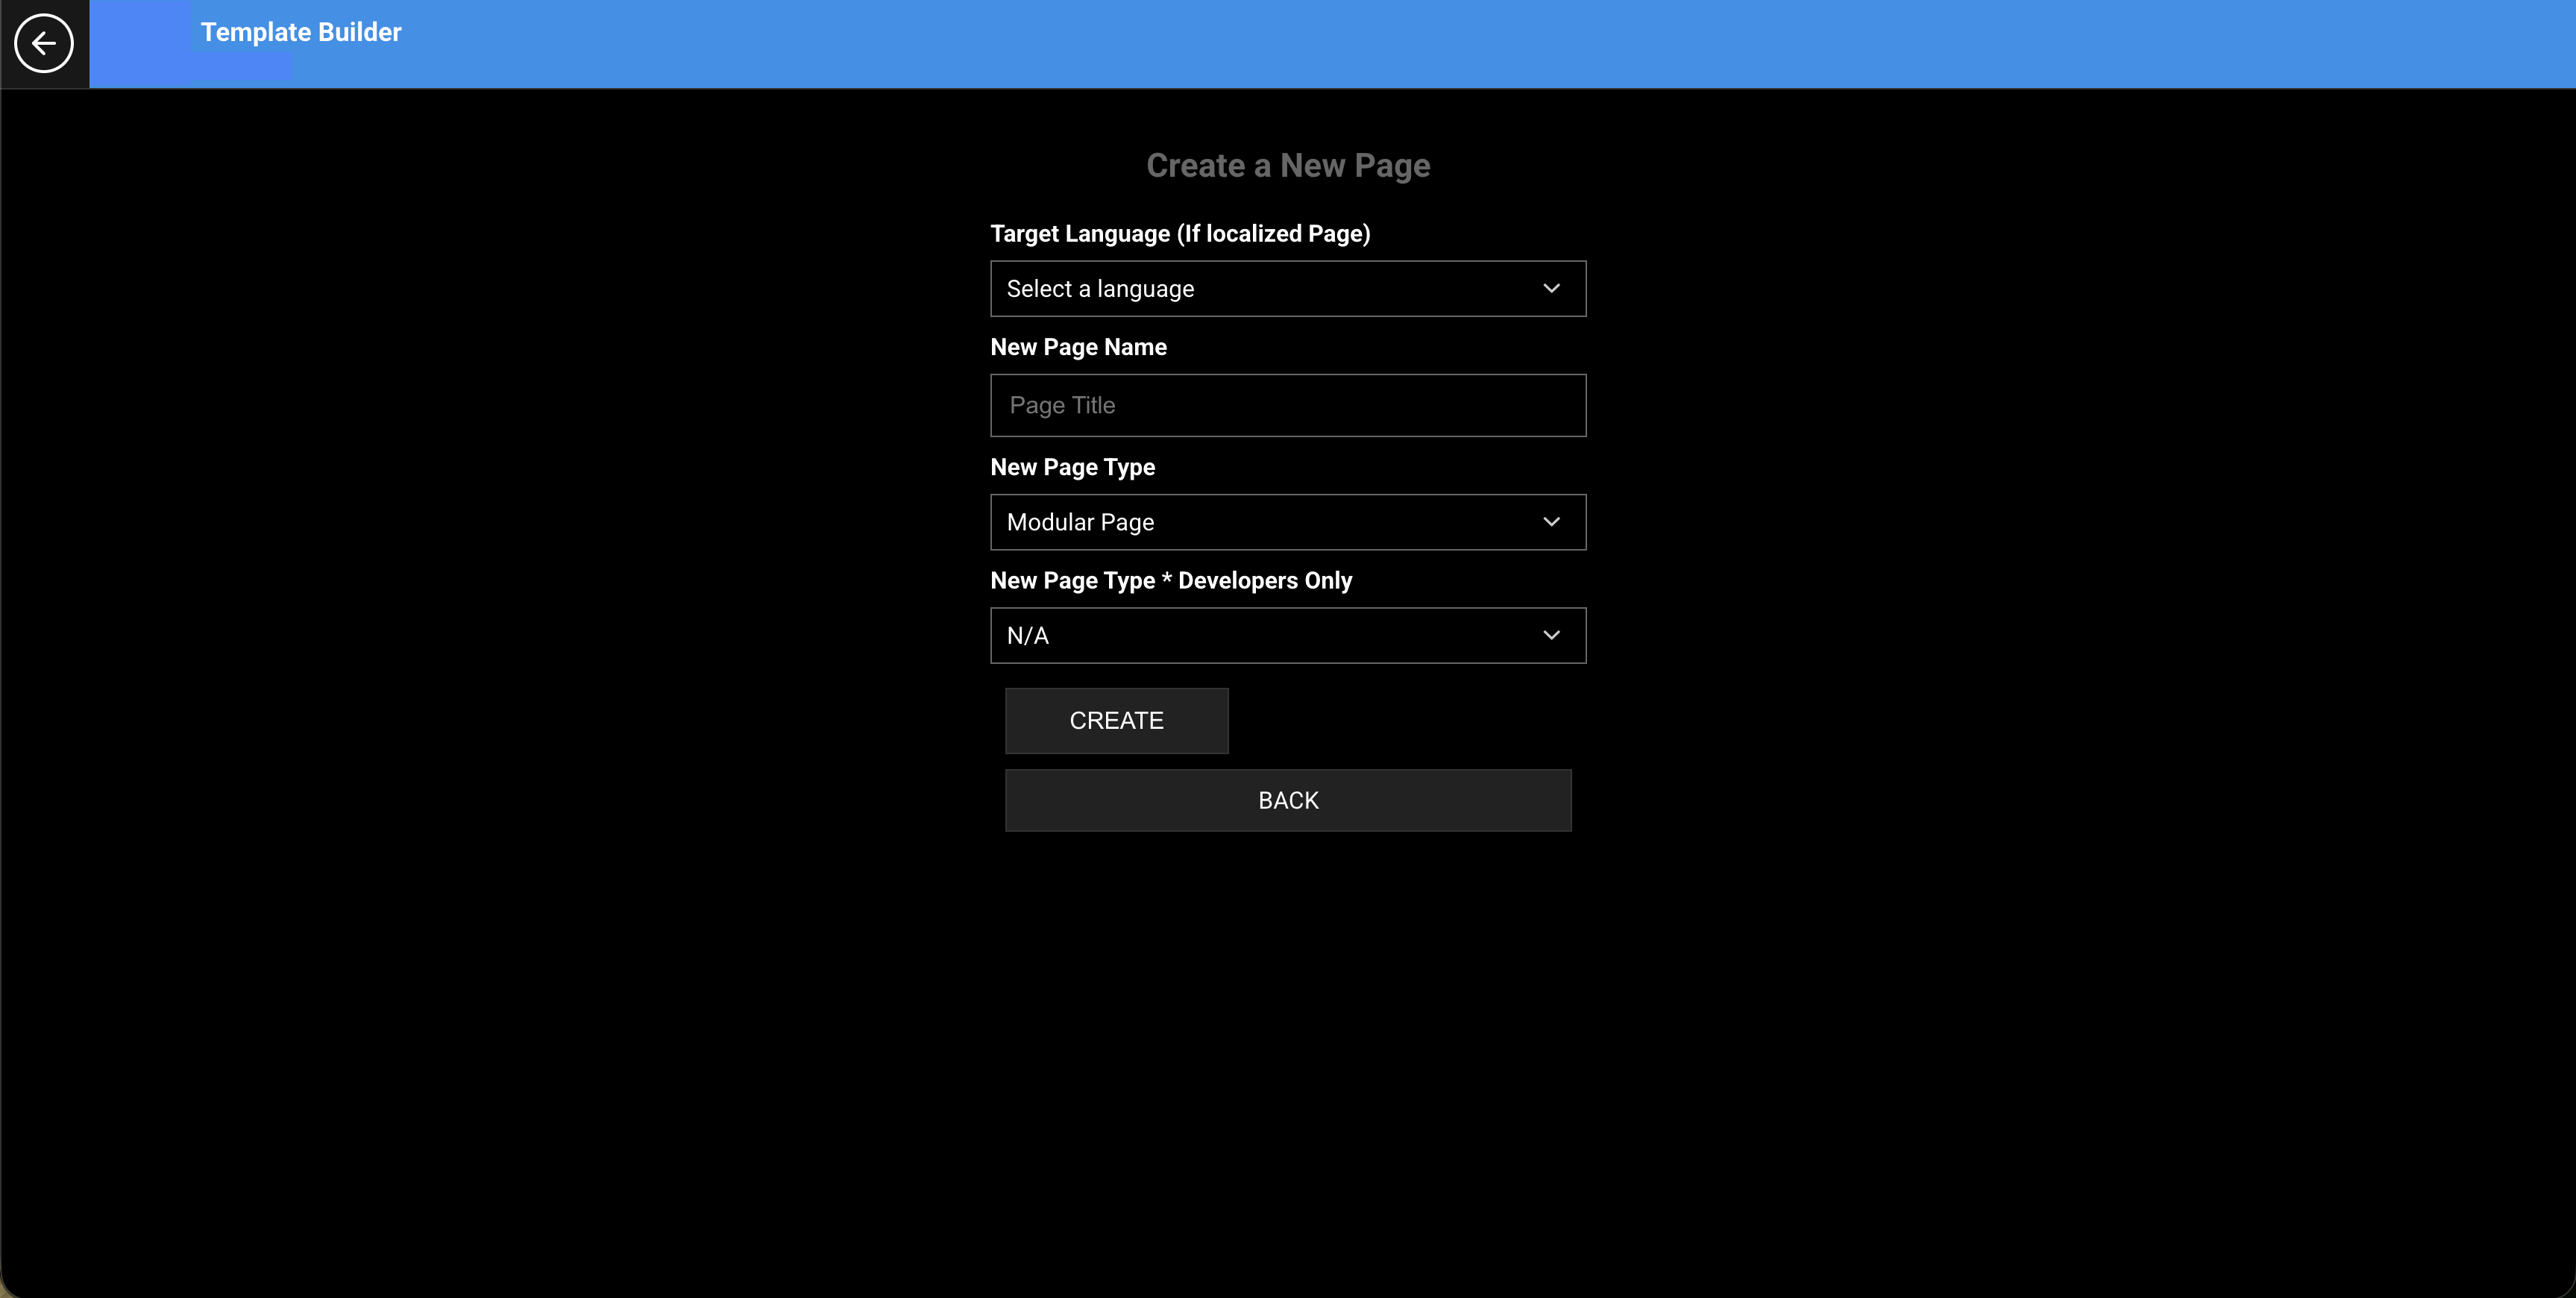
Figure 2. Create a New Page. Set New Page Name to View Plans, set New Page Type * Developers Only to Modular Page (recommended), then select CREATE.
Set the page path
- On Page Settings, set the page path to
/viewplans(recommended) unless your site already uses a different view-plans path. - Confirm the page type allows decorative modules (Modular Page recommended).
- Save page settings if prompted.
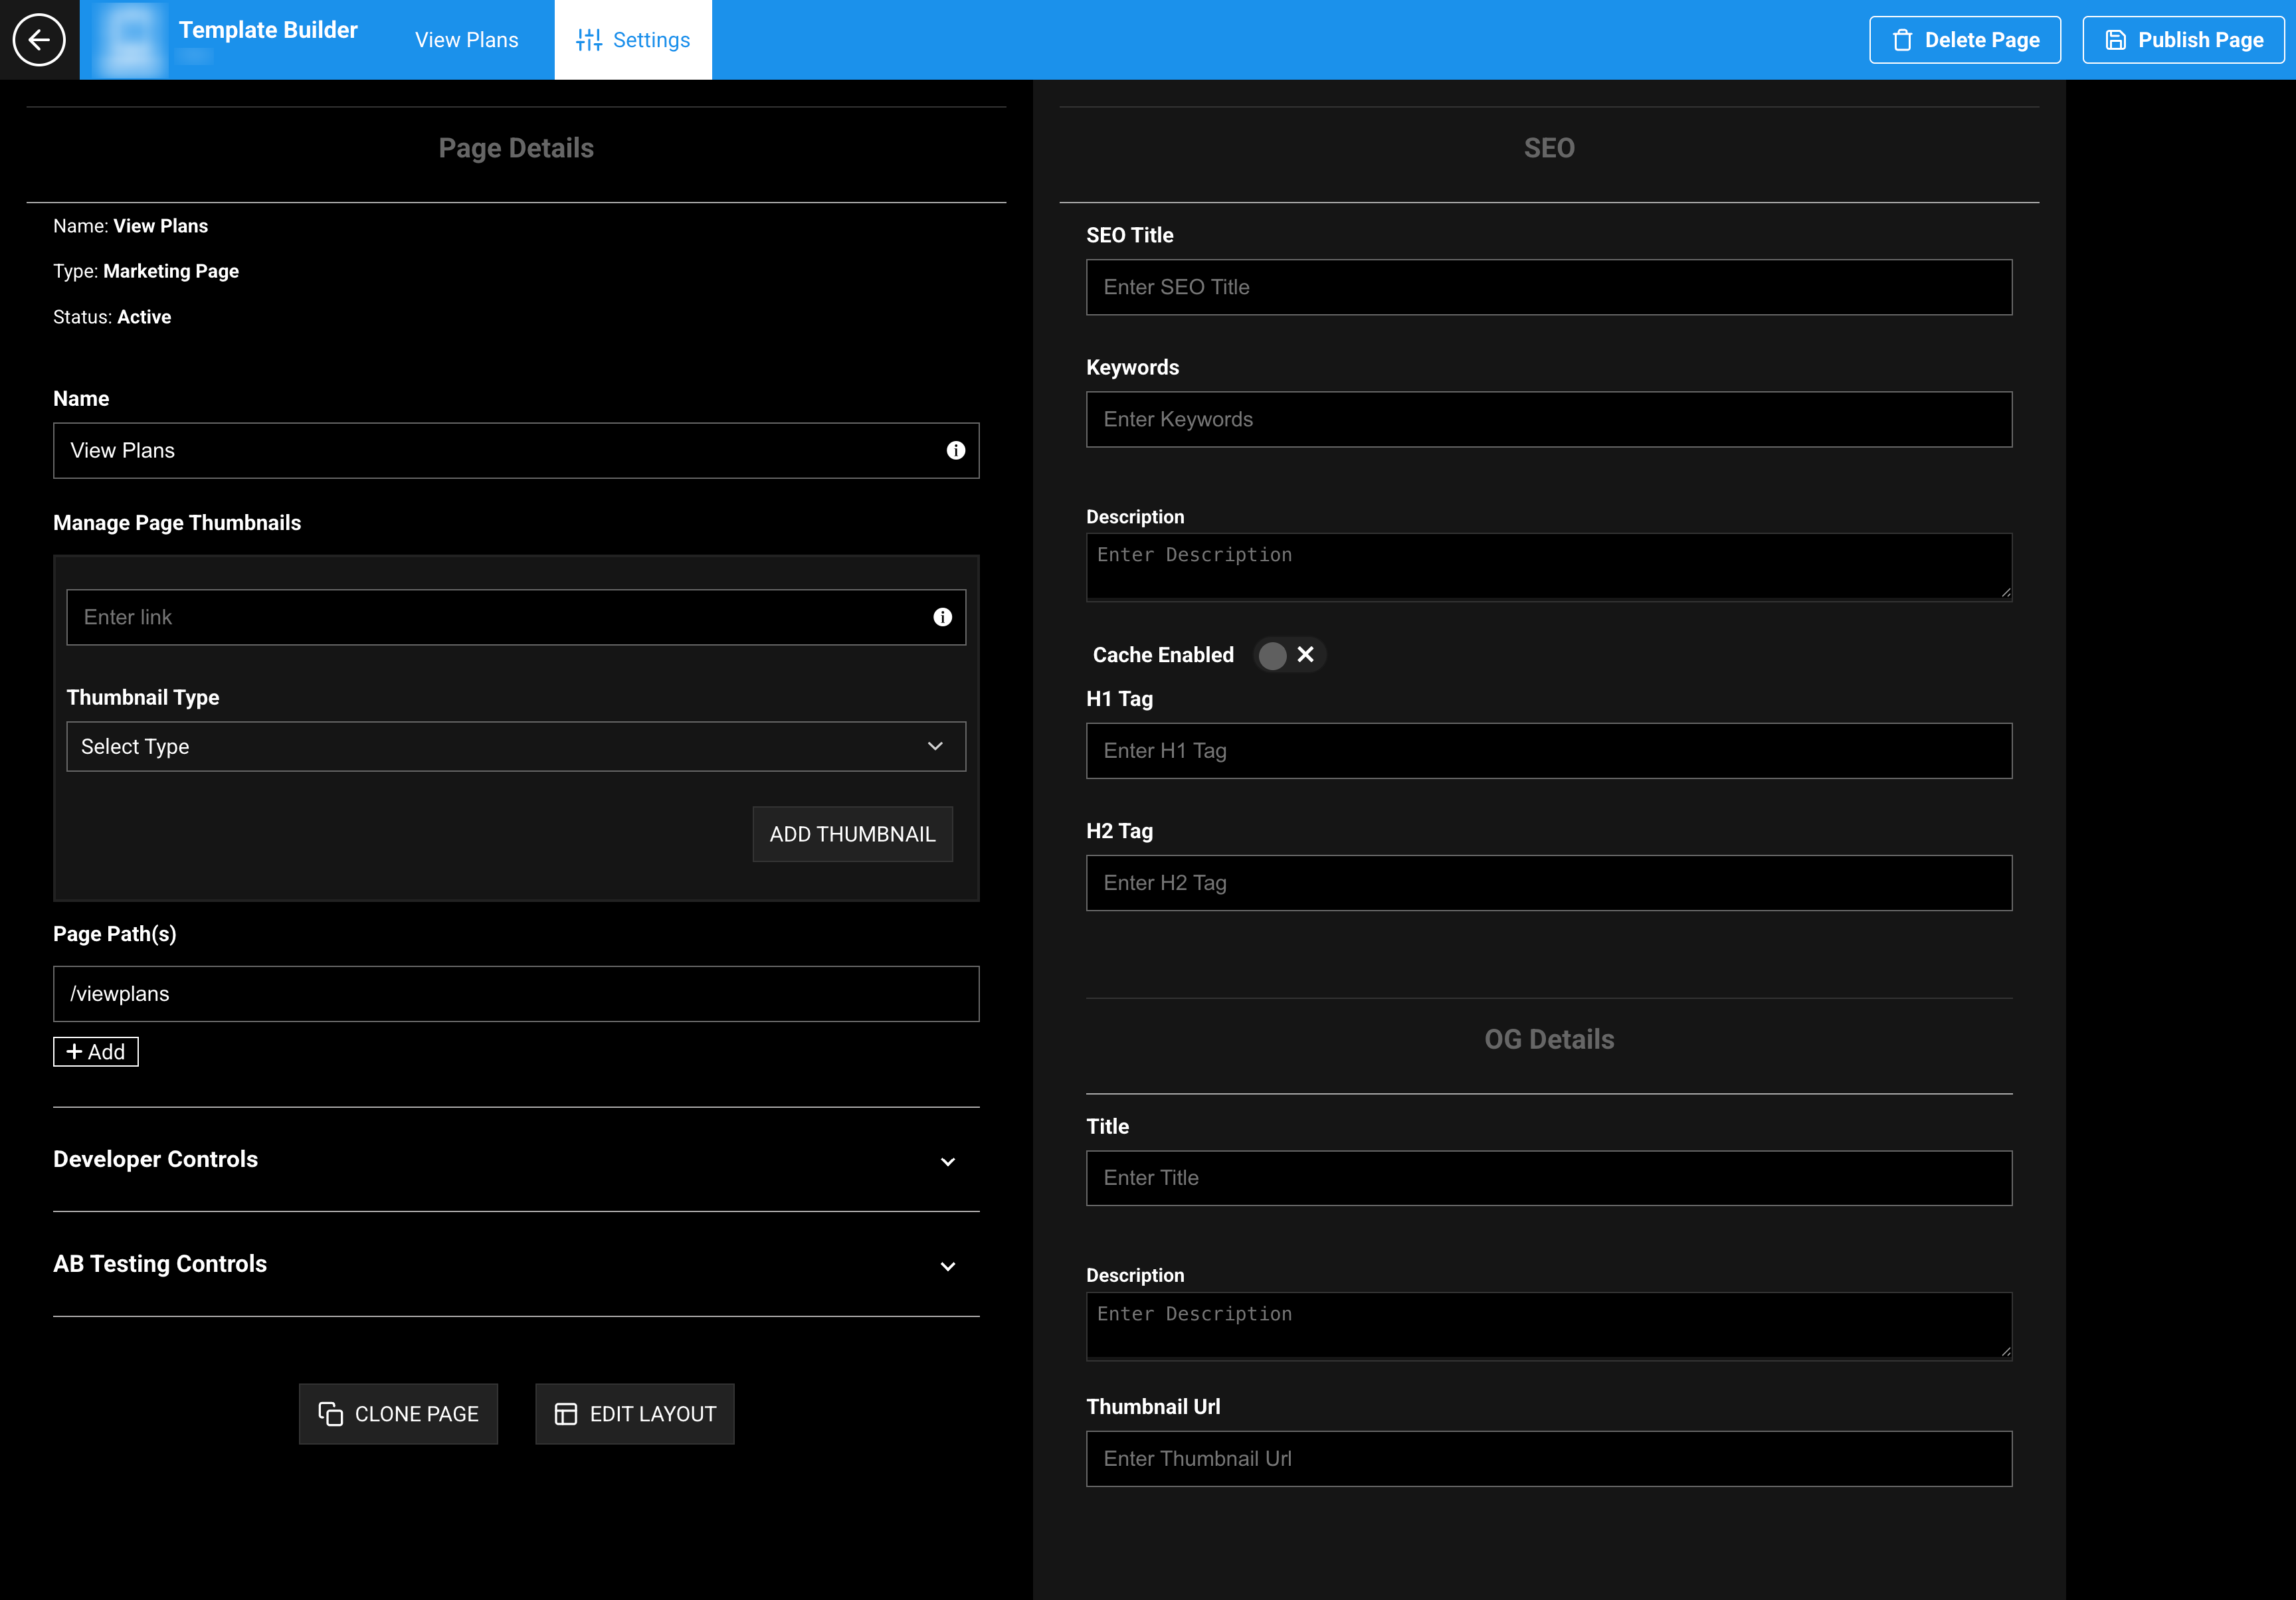
Figure 3. Page Settings. Set the path to /viewplans so Subscribe, billing, and masthead links that use this path resolve correctly.
Step 3: Add VL ViewPlans 02 to the layout
- Open the View Plans page.
- Select Edit Layout.
- Select Add a New Module.
- Search for or select VL ViewPlans 02.
- Insert the module into the page layout.
.png)
Figure 4. Edit Layout → Add a New Module. Search for VL ViewPlans 02.
.png)
Figure 5. View Plans page layout with VL ViewPlans 02 placed on the page (Modular Page example).
Step 4: Configure display toggles
Open the VL ViewPlans 02 module settings. At the top of the form:
| Setting | Description |
|---|---|
| Continue Without Subscription | Template Builder toggle for allowing customers to continue without buying a plan on supported experiences. |
| Disable Out of Region Payment | Template Builder toggle related to out-of-region payment handling on supported experiences. |
| Number of plans to be displayed | Number input controlling how many plans are shown in supported layouts (default example: 2). |
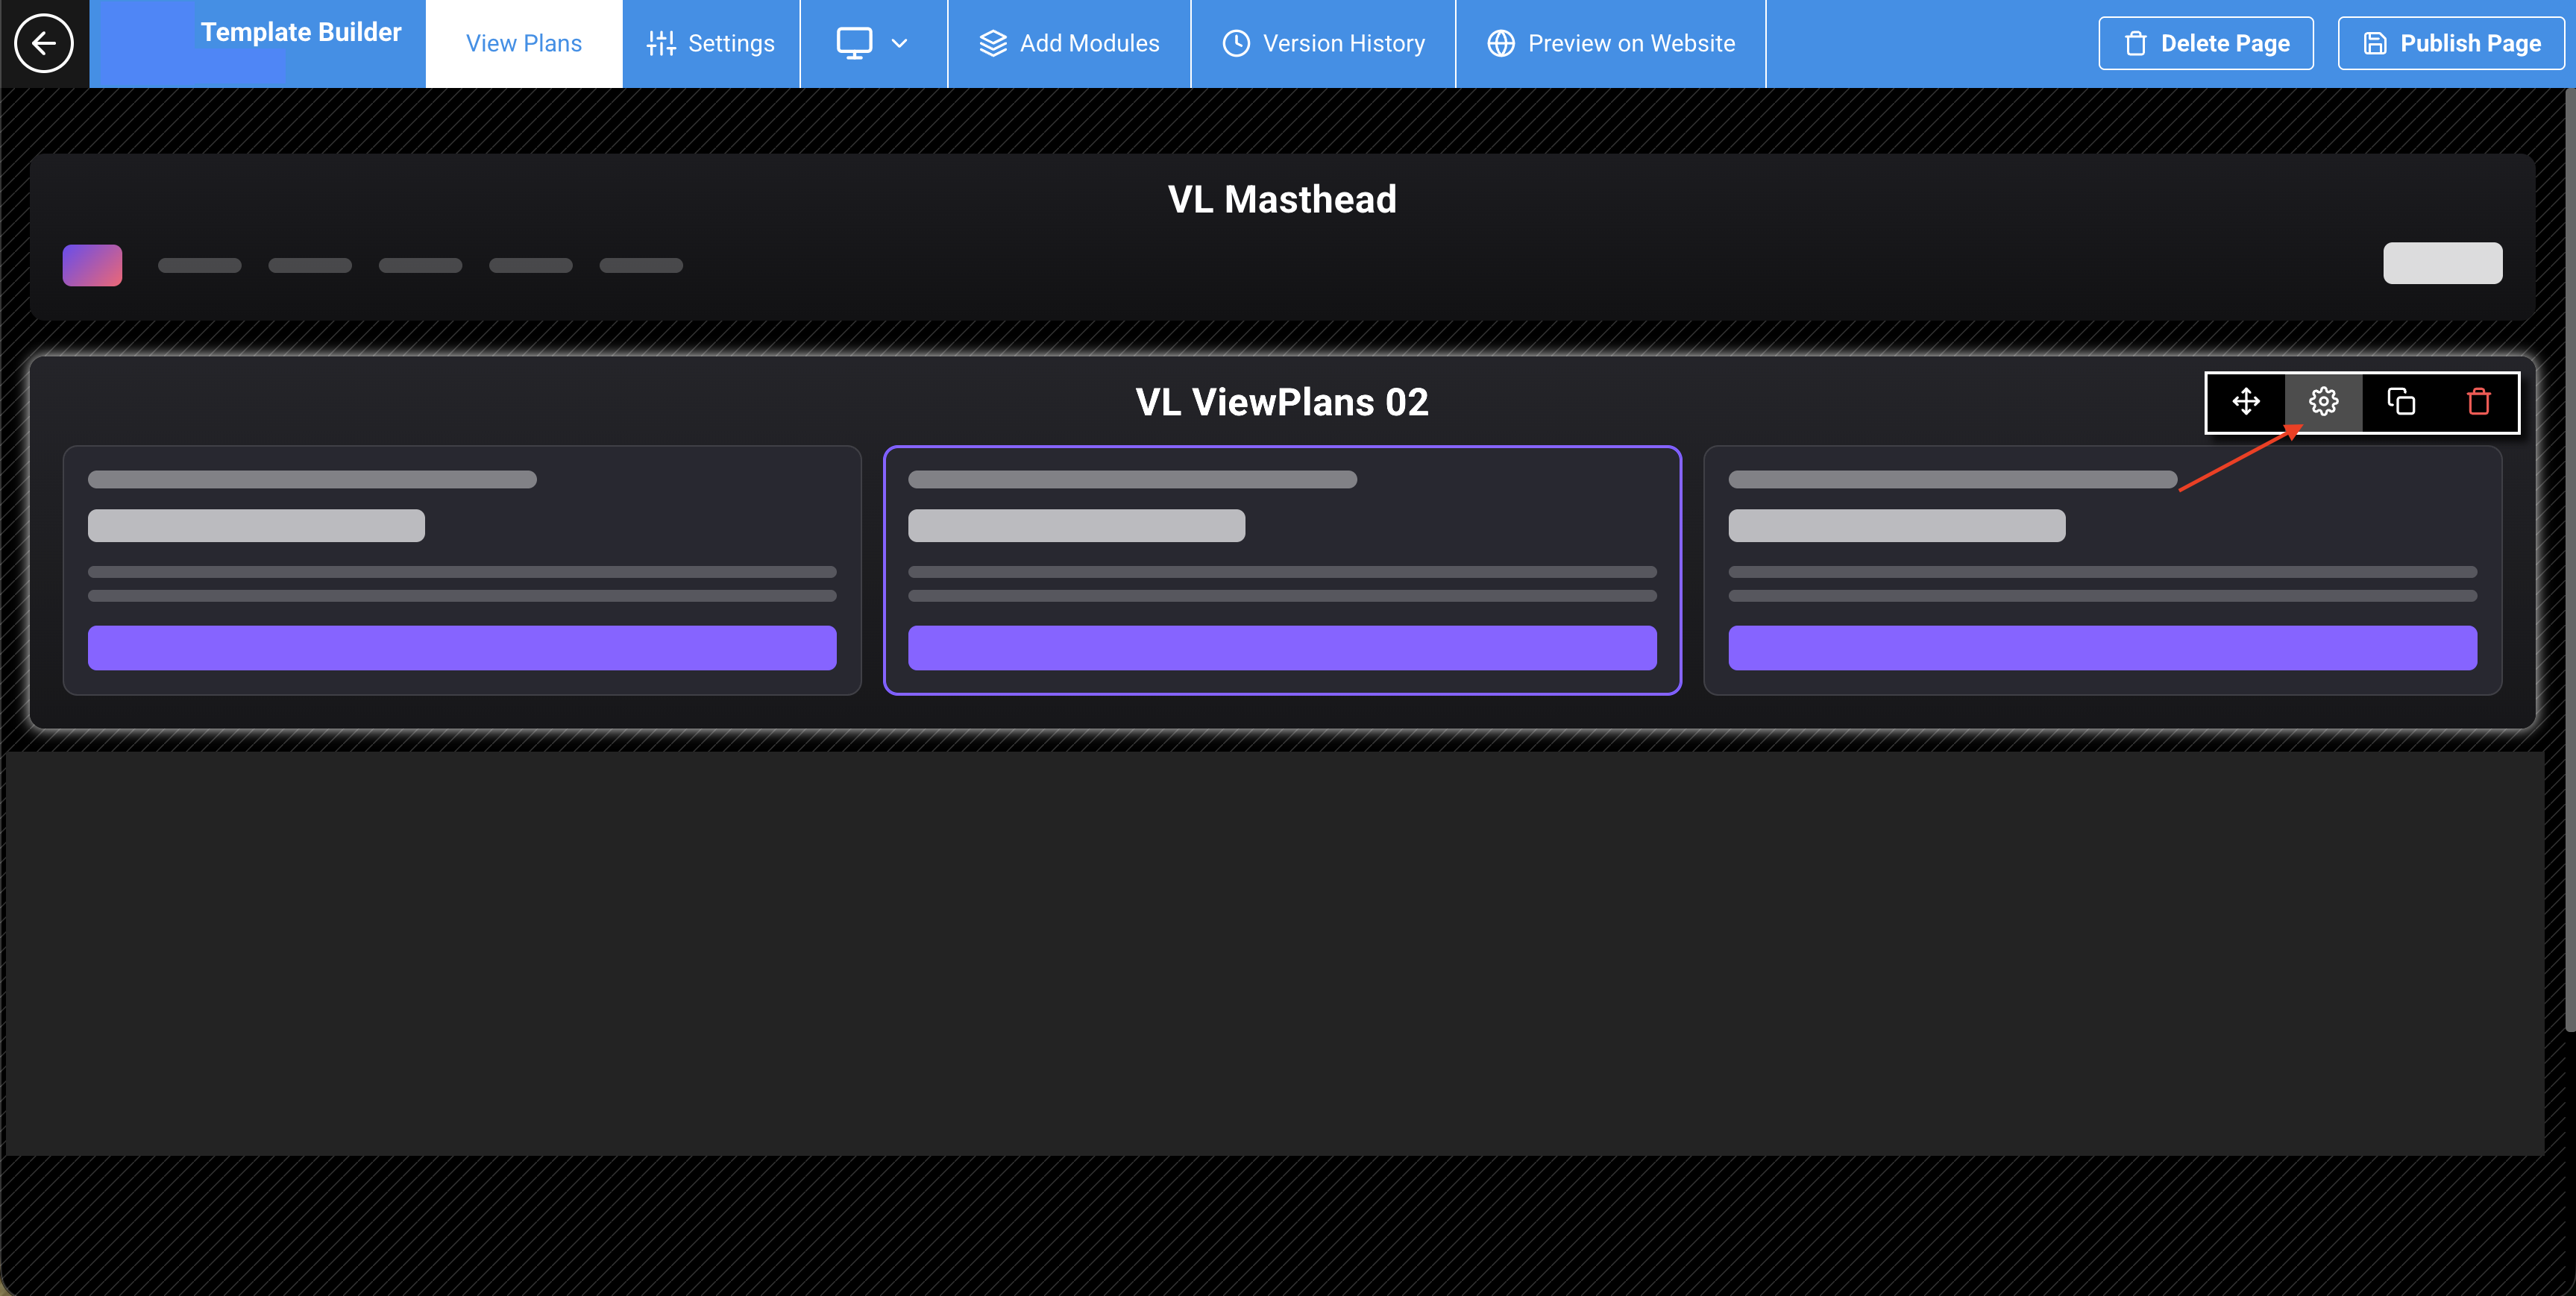
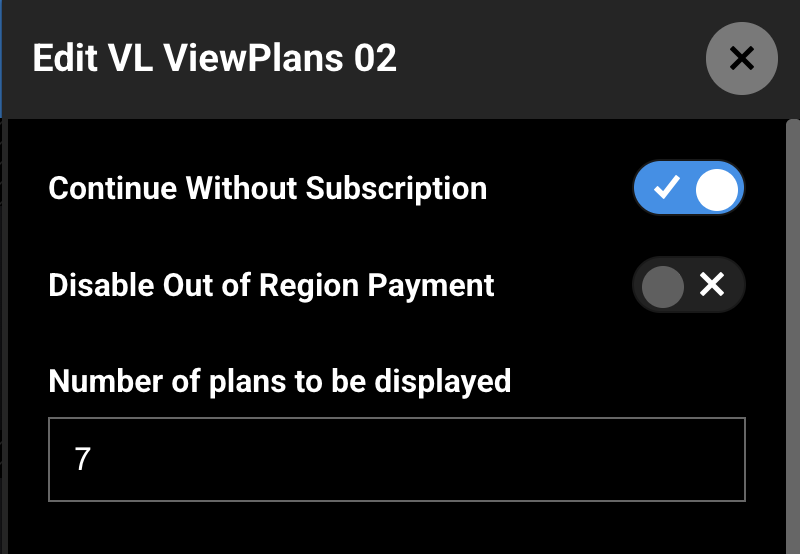
Figure 6. Module settings — Continue Without Subscription, Disable Out of Region Payment, and Number of plans to be displayed.
Step 5: Configure Localization — Labels
Expand Localization → Labels to edit customer-facing copy. Strings can be localized per language when site localization is enabled.
Plan comparison (website)
| Label | What it controls | Default example |
|---|---|---|
| Plan Heading Title | Heading column title on the comparison table | Choose A Plan |
| Subscriber CTA Text | Subscribe button after a plan is selected | Subscribe |
| Plan Renewal Label - Monthly | Monthly renewal wording | month |
| Plan Renewal Label - Yearly | Yearly renewal wording | year |
| Swipe To See Info Title | Hint text for swiping / browsing plan info | swipe to see plan features |
| Select Text / Selected Text | Select state labels on supported layouts | Select |
| Click Arrows to See More Plans Text | Desktop arrow hint when more plans are available | Click Arrows to See More Plans |
| Terms Apply Title Text | Link under the Subscribe button | Terms Apply |
| TermsApply Permalink Text | Path for the Terms Apply link | /tos |
No plans / skip
| Label | What it controls | Default example |
|---|---|---|
| No Plan Body Text | Message when no plans are returned | No plans are available at the moment |
| No Plan Area Text / No Plan Country Text | Area / country unavailable messaging | There are no plans in your area / country variant |
| No Plan Area Description Text | Longer out-of-territory explanation | Regional viewing territory copy |
| Without Subscription Text | CTA when no plans are shown | Continue without a subscription |
| FAQ Text | FAQ link text on the no-plans screen | For more information, visit our FAQs |
| Verify Later Text | Continue-and-verify-later style copy | Continue and verify later |
| Select Plan to Continue Label Text | “Select a plan or…” style copy | Select a plan or |
| Continue Without Plan CTA Label Text | Continue-without-plan button label | Continue without a subscription |
| Continue Without Plan CTA Permalink/Path | Optional path for continue-without-plan | (empty by default) |
Legal, promo, upgrade, and apps / OTT
| Label | What it controls |
|---|---|
| Privacy Policy Text / Terms Of Use Text | Legal link labels on supported platforms |
| Plans Policy Decsreption Text | Longer policy / subscription disclaimer copy |
| Terms Apply Label Text / Delimiter Label / Single Terms Apply Label | Terms Apply variants and delimiter replacement |
| Delimiters Links | Optional delimiter → label → permalink entries |
| Legal Agreement Title / Description / Zip / Subscription Terms (OTT) | OTT legal agreement screens and URLs |
| Continue Cta Text / Go Back Cta Text / Cancel Text / Confirm Text | General CTAs on supported flows |
| Add Promo Placeholder / Apply Code Text / Processing Text | Promo code UI copy on supported platforms |
| Upgrade Subscription Popup Title / Upgrade Description Text | Upgrade confirmation when a subscriber selects another plan |
| Restore Purchse Text / Confirm Password Text / iTunes Subscription Metadata 1–7 | App store / restore purchase copy |
| Scan QR Title / QR Suggestion 01–03 / Visit Website Text | QR and “visit website to subscribe” copy on supported devices |
| Fire TV Already Subscribed Message | Already-subscribed messaging on Fire TV |
| Plans Subscription Text / Subscription Text / Plans Price / Date / Cancel / Email Text | Additional plan summary labels on supported layouts |
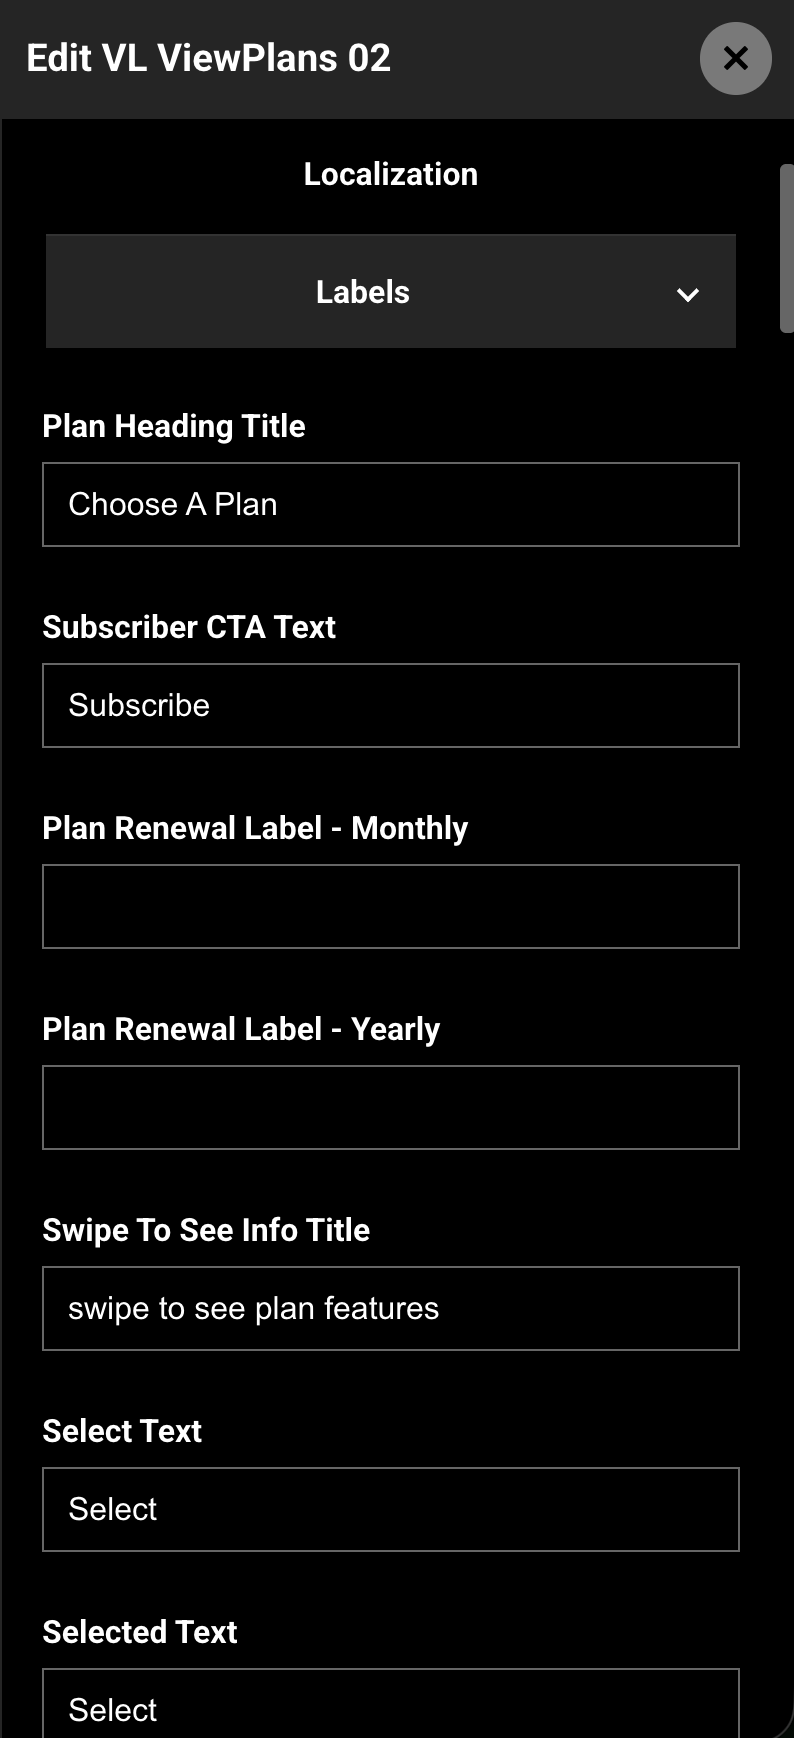
Figure 7. Localization → Labels. Edit plan heading, Subscribe CTA, Terms Apply, no-plans copy, and platform-specific strings.
Step 6: Configure Brand and Font Settings
Brand
Expand Brand to set plan-box colors:
| Setting | Description | Default (example) |
|---|---|---|
| PlanBox Primary Background Color | Selected / primary plan header background | #CF082C |
| PlanBox Secondary Background Color | Unselected plan header background | #394664 |
| Plan Box Selected Color | Selected plan feature column background | #0C1D41 |
| Plan Box UnSelected Color | Unselected feature column background | #838996 |
| Plan Box Selected Border Color | Border around the selected plan | #ffffff |
| Plan Box Cta BgColor | Subscribe button background | #CF082C |
| Plan Box Text Color | Primary text color on the plan UI | #ffffff |
| Swipe To See Info Title Color | Swipe / arrow hint text color | #838996 |
| Discount Badge Background Color | Discount badge background | #03A775 |
| Discount Badge Text Color | Discount badge text | #ffffff |
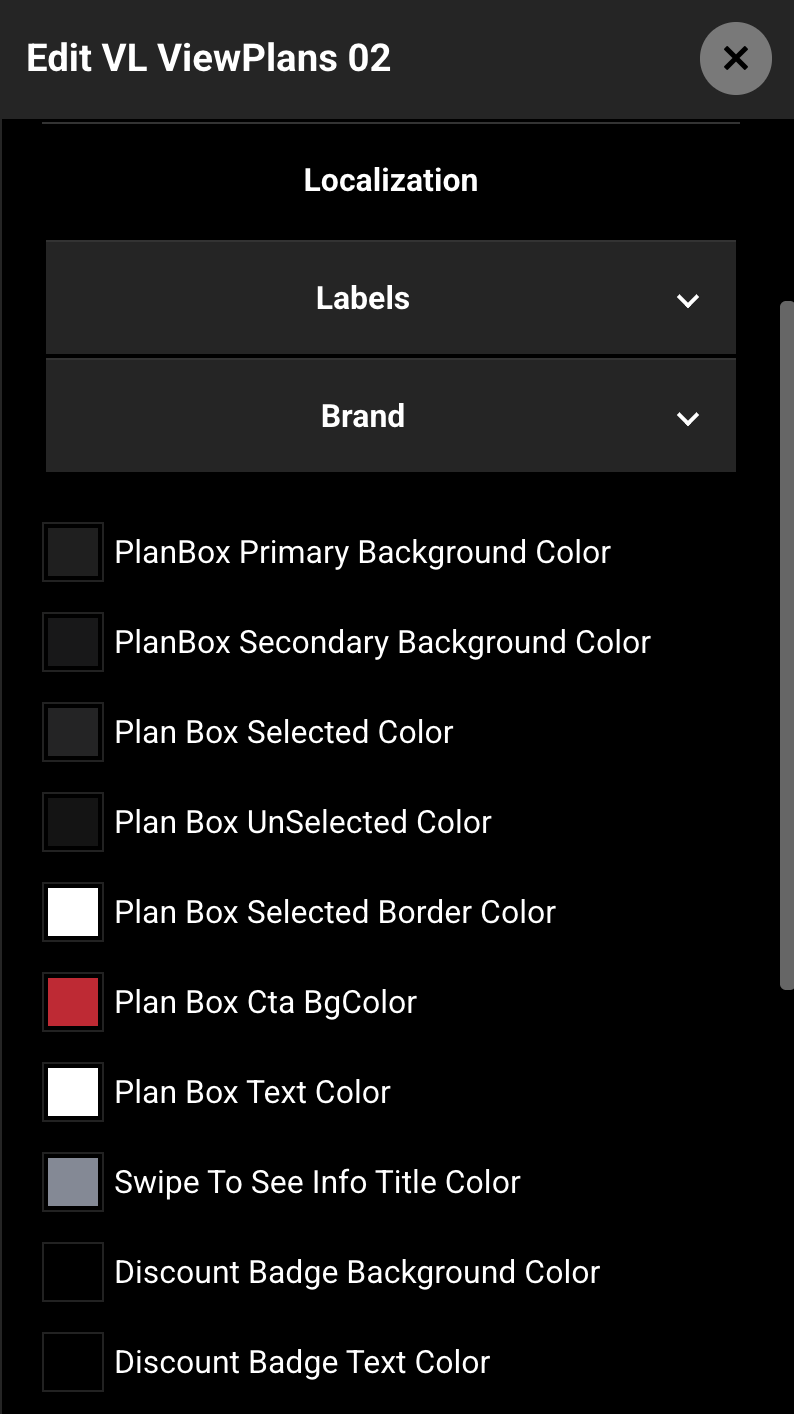
Figure 8. Module settings → Brand. Set plan box, CTA, and discount badge colors.
Font Settings
Font Settings let you customize typography for:
| Font setting | What it styles |
|---|---|
| Compare Plans Heading | “Choose A Plan” style heading |
| Plan Box Title | Plan name in the header |
| Plan Box Description | Plan description under the title |
| Plan Box Amount | Price text |
| Selected Plan Cta Text | Subscribe button text |
| Plan Features | Feature row text |
| Swipe To Info | Arrow / swipe hint text |
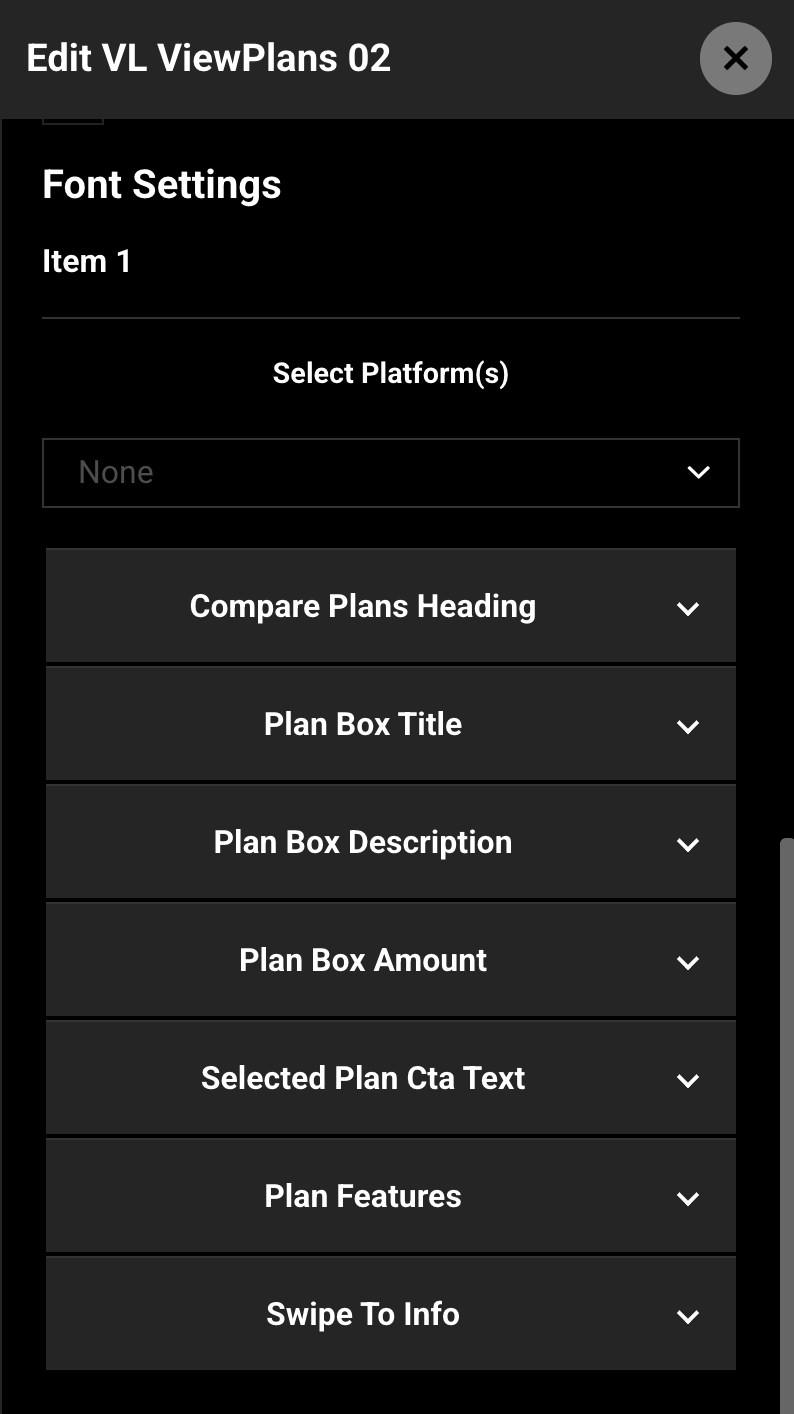
Figure 9. Font Settings for plan heading, titles, amounts, features, and CTAs.
Step 7: Save and publish the View Plans page
- Save the module settings.
- Review the page layout once more.
- Publish the View Plans page.
Until the page is published, apps and web will not show your latest View Plans configuration.

Figure 10. Publish the View Plans page after you finish module configuration.
Changes can take several minutes to appear because of caching. To verify sooner, use a private window, another browser, or clear cookies and cache.
Step 8: How it looks on the website
After publish, open your site’s View Plans URL, for example:
https://www.example.com/viewplans
Desktop (wide screens)
Customers typically see:
- A close (X) control to leave plan selection
- A comparison table with a heading column (from Plan Heading Title) and one column per plan
- Plan title, description, and price (with strike-through pricing when the plan provides it)
- Feature rows with checkmarks or values per plan
- Arrow controls and Click Arrows to See More Plans when more than one plan column is shown
- After selecting a plan column, a Subscribe button (from Subscriber CTA Text) and a Terms Apply link
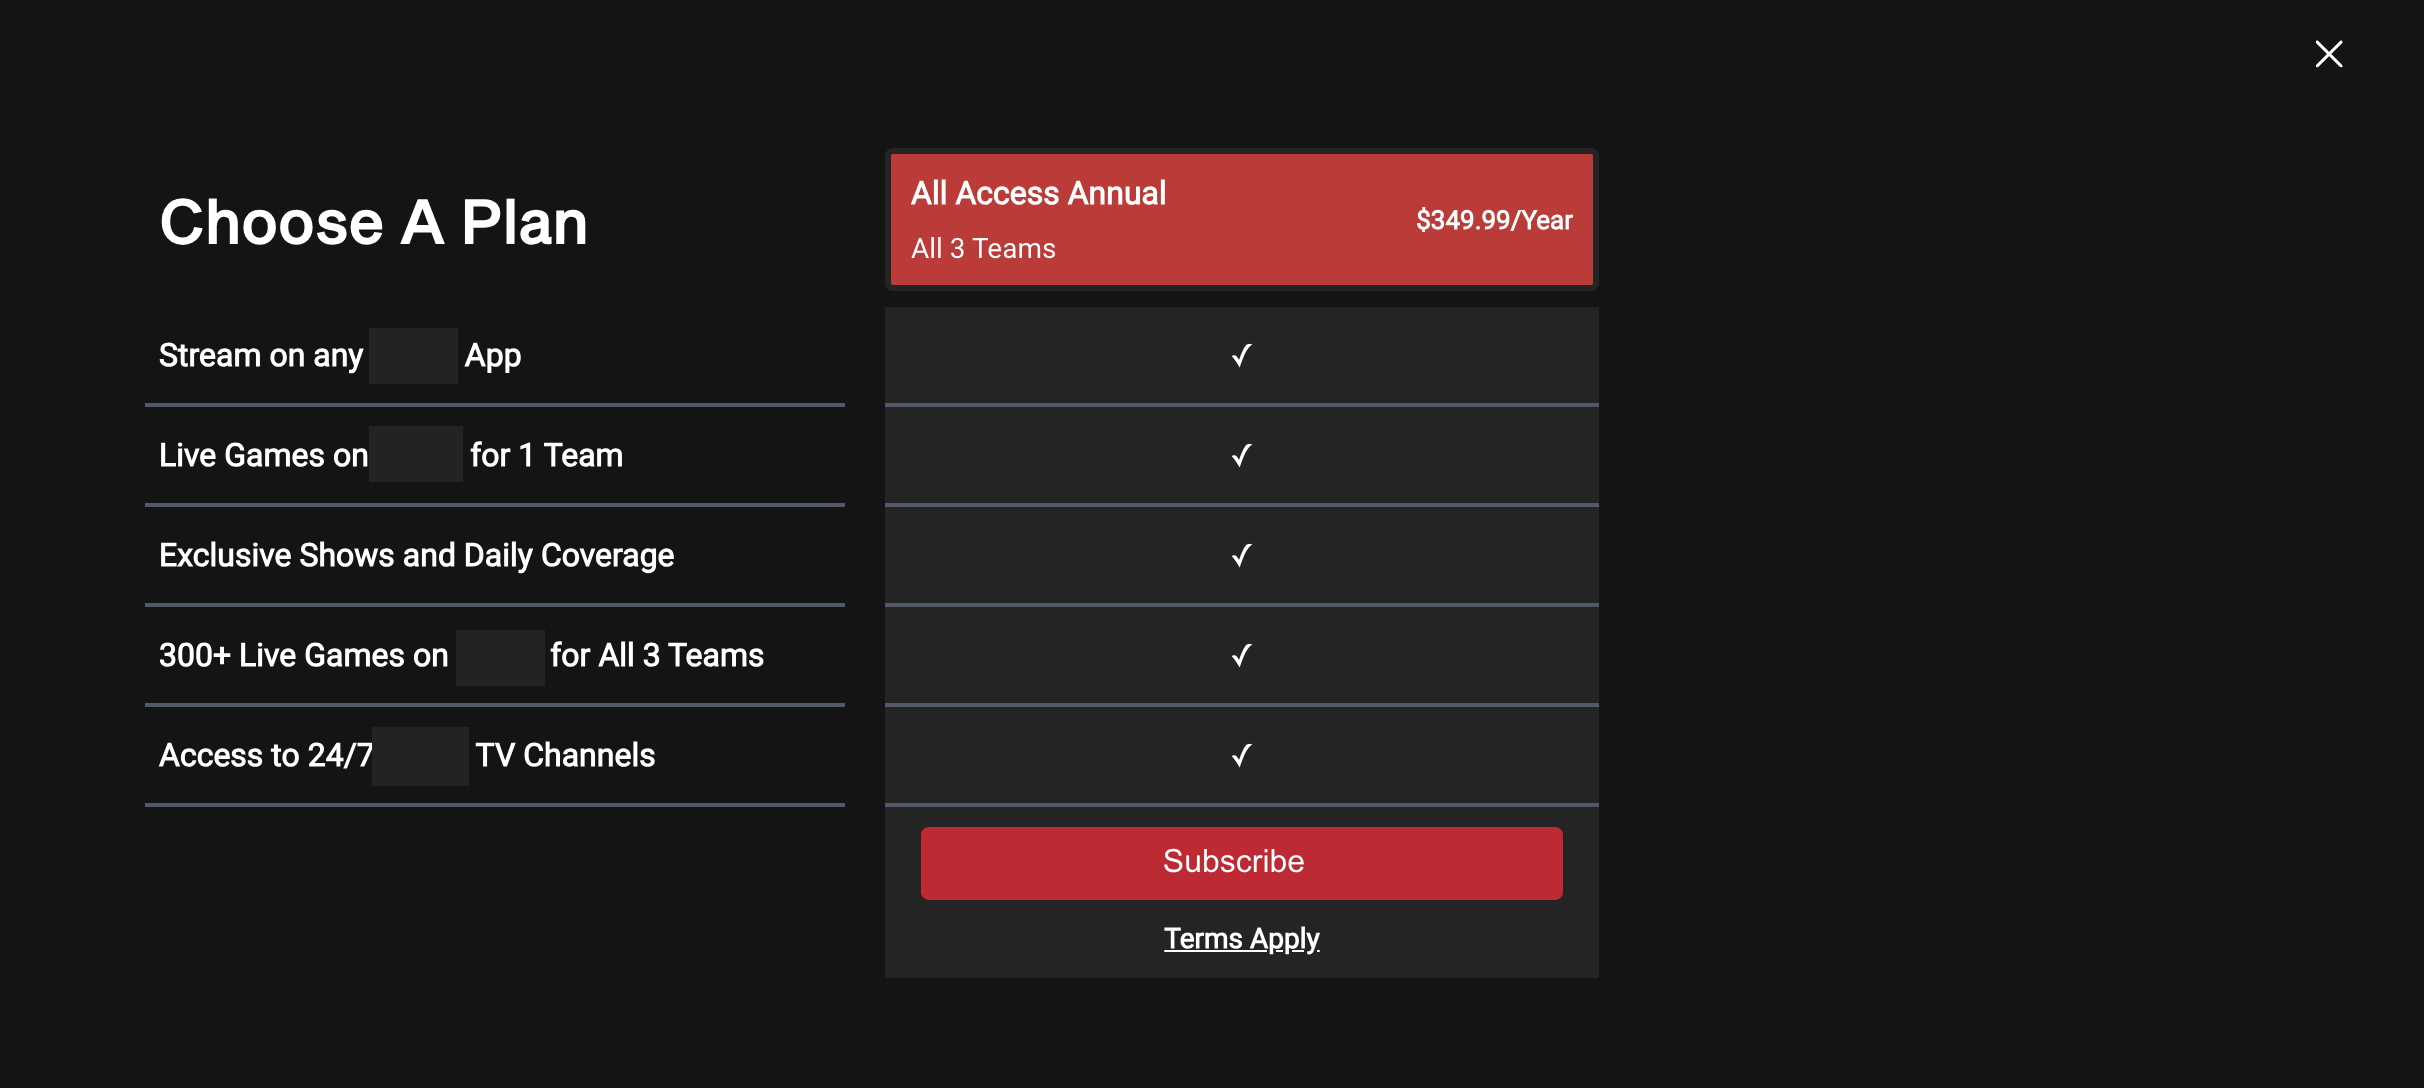
Figure 11. Website View Plans page on desktop. Comparison table, selected plan, Subscribe, and Terms Apply.
Mobile / narrow screens
On narrower viewports, customers see a stacked plan list instead of the wide comparison table. Selecting a plan still shows the Subscribe CTA and continues into the same redirect rules.
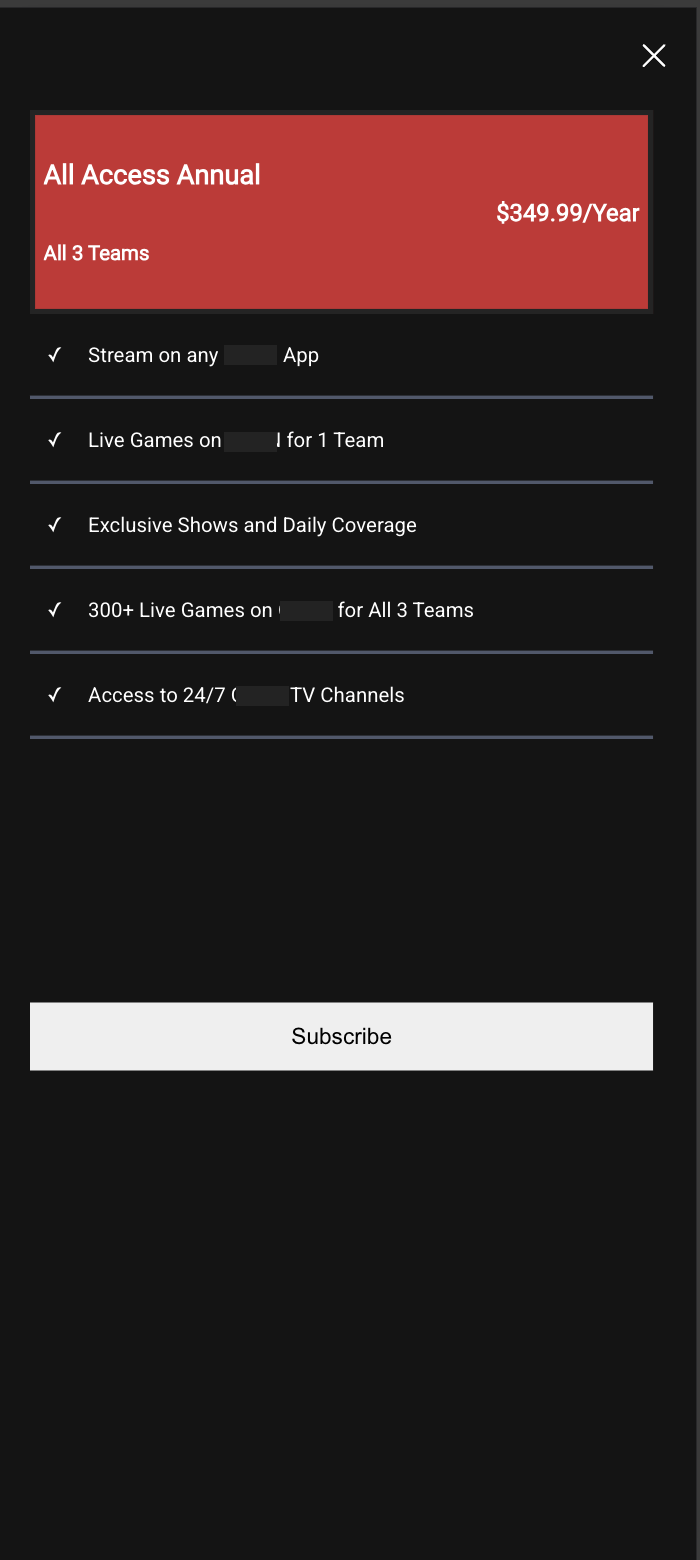
Figure 12. Website View Plans page on mobile. Stacked plans and Subscribe CTA.
When no plans are available
If no subscription plans are returned, customers see:
- A no-plans message (body from No Plan Body Text; heading uses
noPlansHeadingwhen provided in module metadata) - Continue without a subscription (from Without Subscription Text)
- A FAQ link (from FAQ Text) that opens
/faq
After the customer selects Subscribe
| Situation | Where the customer goes |
|---|---|
| Typical new or unsigned purchase path | Checkout page (/checkout) |
| Customer is already subscribed and eligible to upgrade | Upgrade subscription prompt on the View Plans experience |
| Session has a saved redirect destination | That saved path |
| Customer opened plans from an app webview and cancels | May return to the app when a return URL is configured |
Link View Plans from the site
- Confirm your View Plans page path in Page Settings (for example
/viewplans) and that the page is published. - Point Subscribe / View Plans links in Header Navigation, masthead, billing upgrade CTAs, and plan banners to that same path.
- Verify on the live site that choosing a plan and selecting Subscribe opens checkout.
Tip: Use one View Plans path across the site. Keep VL Checkout 01 published at
/checkoutso Subscribe can complete the purchase funnel.
Verification checklist
- View Plans page exists (recommended: Modular Page; Marketing/Ancillary also allow this module)
- Page path is
/viewplans(or the path your apps and CTAs expect) - VL ViewPlans 02 is on the layout
- Brand colors and Font Settings match your site
- Labels reviewed for launch language(s) (especially Plan Heading, Subscribe, Terms Apply)
- Terms Apply permalink points to a published Terms page
- Subscription plans are active in AppCMS
- Checkout page is published
- Page is published
- Website
/viewplansshows the comparison table (desktop) or plan list (mobile) - Selecting a plan and Subscribe continues to
/checkout(or upgrade when applicable)
Troubleshooting
| Problem | What to check |
|---|---|
| VL ViewPlans 02 is not in the module list | Use a page type that allows decorative modules (Modular Page recommended; Marketing Page or Ancillary Page also work). The module is not available on System Screens or User Pages. |
| Page path is wrong | Open Page Settings and set path to /viewplans. |
| No plans shown | Confirm subscription plans are active in AppCMS and available for the customer’s region. |
| Subscribe does nothing / wrong destination | Confirm VL Checkout 01 is published at /checkout, or check whether an upgrade prompt should appear for subscribed users. |
| Terms Apply goes to the wrong page | Set TermsApply Permalink Text (for example /tos) to a published page. |
| Labels do not change on the site | Save module settings, publish the page, and allow cache to clear. For localization, edit labels in the correct language. |
| Changes not visible | Confirm publish, then clear cache or use a private window. |
Best Practices
- Use one dedicated View Plans page (typically a Modular Page) at a stable path (
/viewplans). - Keep Checkout published at
/checkoutso Subscribe completes the funnel. - Match brand colors and fonts to checkout and the rest of the site.
- Keep Terms Apply pointing to a current published Terms page.
- Localize Labels when the site has multiple live languages.
- Test desktop and mobile layouts before launch.
- Publish after every meaningful change — draft pages do not update production.
FAQs
Q. What page type should I use for VL ViewPlans 02?
Modular Page is recommended for a dedicated View Plans page. You can also add the module on other page types that allow decorative modules (for example Marketing Page or Ancillary Page). It is not available on System Screens or User Pages.
Q. What is the recommended page path?
/viewplans.
Q. How is this different from VL ViewPlans 01?
They are separate modules with different layouts. VL ViewPlans 02 uses a comparison-table style experience on the website. This article covers VL ViewPlans 02 only.
Q. Where does Subscribe send the customer?
Usually to your checkout page (/checkout). Subscribed customers who can upgrade may see an upgrade prompt first. Other redirects can apply when a saved destination or app return URL is in use.
Q. Does this module process payment?
No. Payment is handled on checkout (VL Checkout 01). View Plans is for selecting a plan.
Q. Can I use ViewPlans 01 and ViewPlans 02 together?
Sites typically use one view-plans module on the /viewplans page. Choose the layout that matches your product design.
Important Information
- VL ViewPlans 02 is a decorative module. Modular Page is recommended for a dedicated
/viewplanspage; Marketing Page and Ancillary Page also allow it. It is not available on System Screens or User Pages. - Create the page, add the module, configure Labels / Brand / Fonts, then publish.
- Website Subscribe continues to checkout in the standard path; upgrade and saved redirects can change the next step.
- Plan names, prices, and features come from AppCMS plan configuration.
Glossary
| Term | Definition |
|---|---|
| Modular Page | Recommended Template Builder page type for a dedicated View Plans page. Decorative modules like ViewPlans can also be used on other page types that allow common (decorative/content) modules. |
| VL ViewPlans 02 | The Template Builder module documented in this article. |
| Plan comparison table | Desktop layout that shows plans in columns with shared feature rows. |
| Subscribe CTA | Button label from Subscriber CTA Text that continues into checkout or upgrade. |
| Checkout | Purchase page (typically /checkout with VL Checkout 01) where payment is completed. |
Contact Support
If you need help beyond this article, contact the ViewLift support team.
- Email: techsupport@viewlift.com
- Phone (US): +1-800-859-0420
- Phone (UK): +44-203-014-8921
Support hours: B2C requests are handled Monday to Friday. B2B support is available 24/7.