Introduction
VL Plan Banner 01 displays subscription plans and account-access options in a horizontal banner. It gives customers a direct route to checkout, sign-in, TV provider login, account creation, or a full plan-comparison page.
The banner is intended for customers who still need access. On the website, it is hidden for customers who already have an active subscription, VIP access, or TV provider access.
This article explains how to add the module, configure its plans and CTAs, publish the page, and verify the customer experience.
Purpose
Use this article to:
- Add VL Plan Banner 01 to a page
- Select and order subscription plans
- Add sign-in, sign-up, TV provider, and account-creation options
- Configure destinations for non-plan CTAs
- Configure country, brand, label, and font settings
- Verify plan selection, checkout, and no-plans behavior
Scope
This article covers:
- Adding and arranging plan and account CTAs
- Configuring platform and country selections
- Configuring the Compare Plans link
- Configuring the optional Create Account and No Plans tiles
- Customer-visible website behavior
It does not cover:
- Creating or pricing subscription plans
- Configuring payment providers
- Building the checkout page
- Configuring TV provider credentials
Prerequisites
Before you begin, ensure you have:
- Access to Template Builder
- At least one active subscription plan if the banner should advertise subscriptions
- Published destinations for sign-in, sign-up, TV provider login, and plan comparison, as applicable
- A published checkout experience
- Customer-facing titles, descriptions, colors, and country targeting requirements
Example used in this article
The examples use a Modular Page and/viewplansas the Compare Plans destination. Use the page and paths configured for your site.
Step 1: Open the page in Template Builder
- Log into ViewLift Tools.
- Open AppCMS → Edit Template Builder.
- Select the site and language you want to edit.
- Open an existing page or create a page for the banner.
For a general promotional or subscription page, a Modular Page is recommended. The module can also be added to other page types that support content modules, such as Marketing and Ancillary pages. It is not available on System Screens or User Pages.
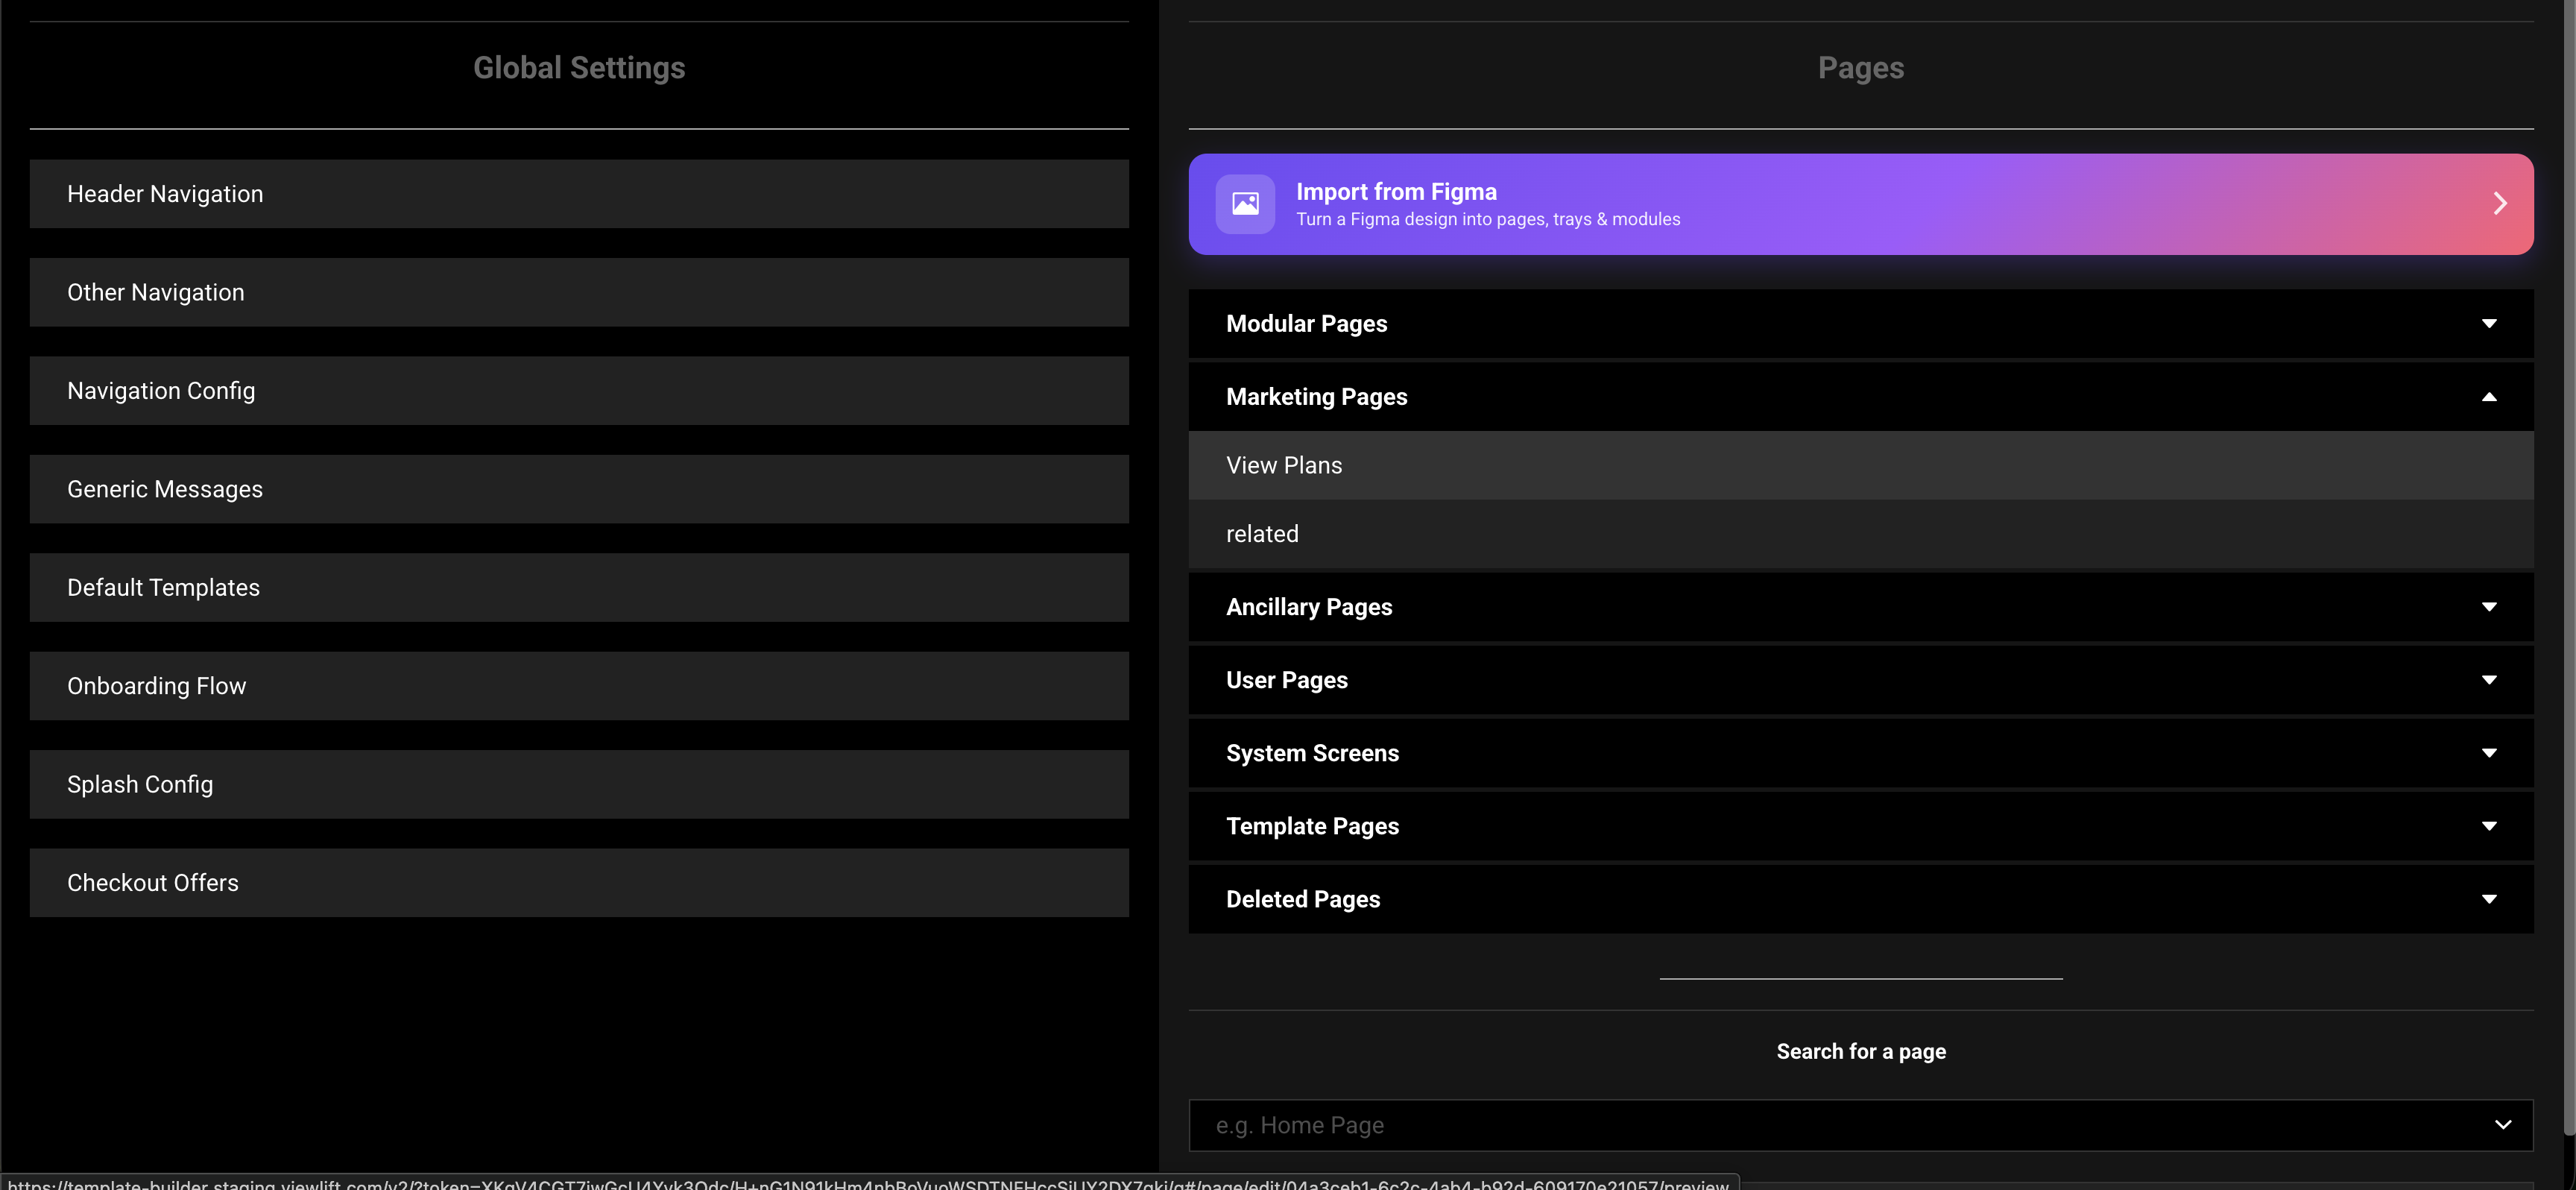
Figure 1. Template Builder page list. Open the page where customers should see the plan banner.
Step 2: Add VL Plan Banner 01
- Open the page.
- Select Edit Layout.
- Select Add a New Module.
- Find VL Plan Banner 01 under the content modules.
- Add it to the layout and place it where the subscription offer should appear.
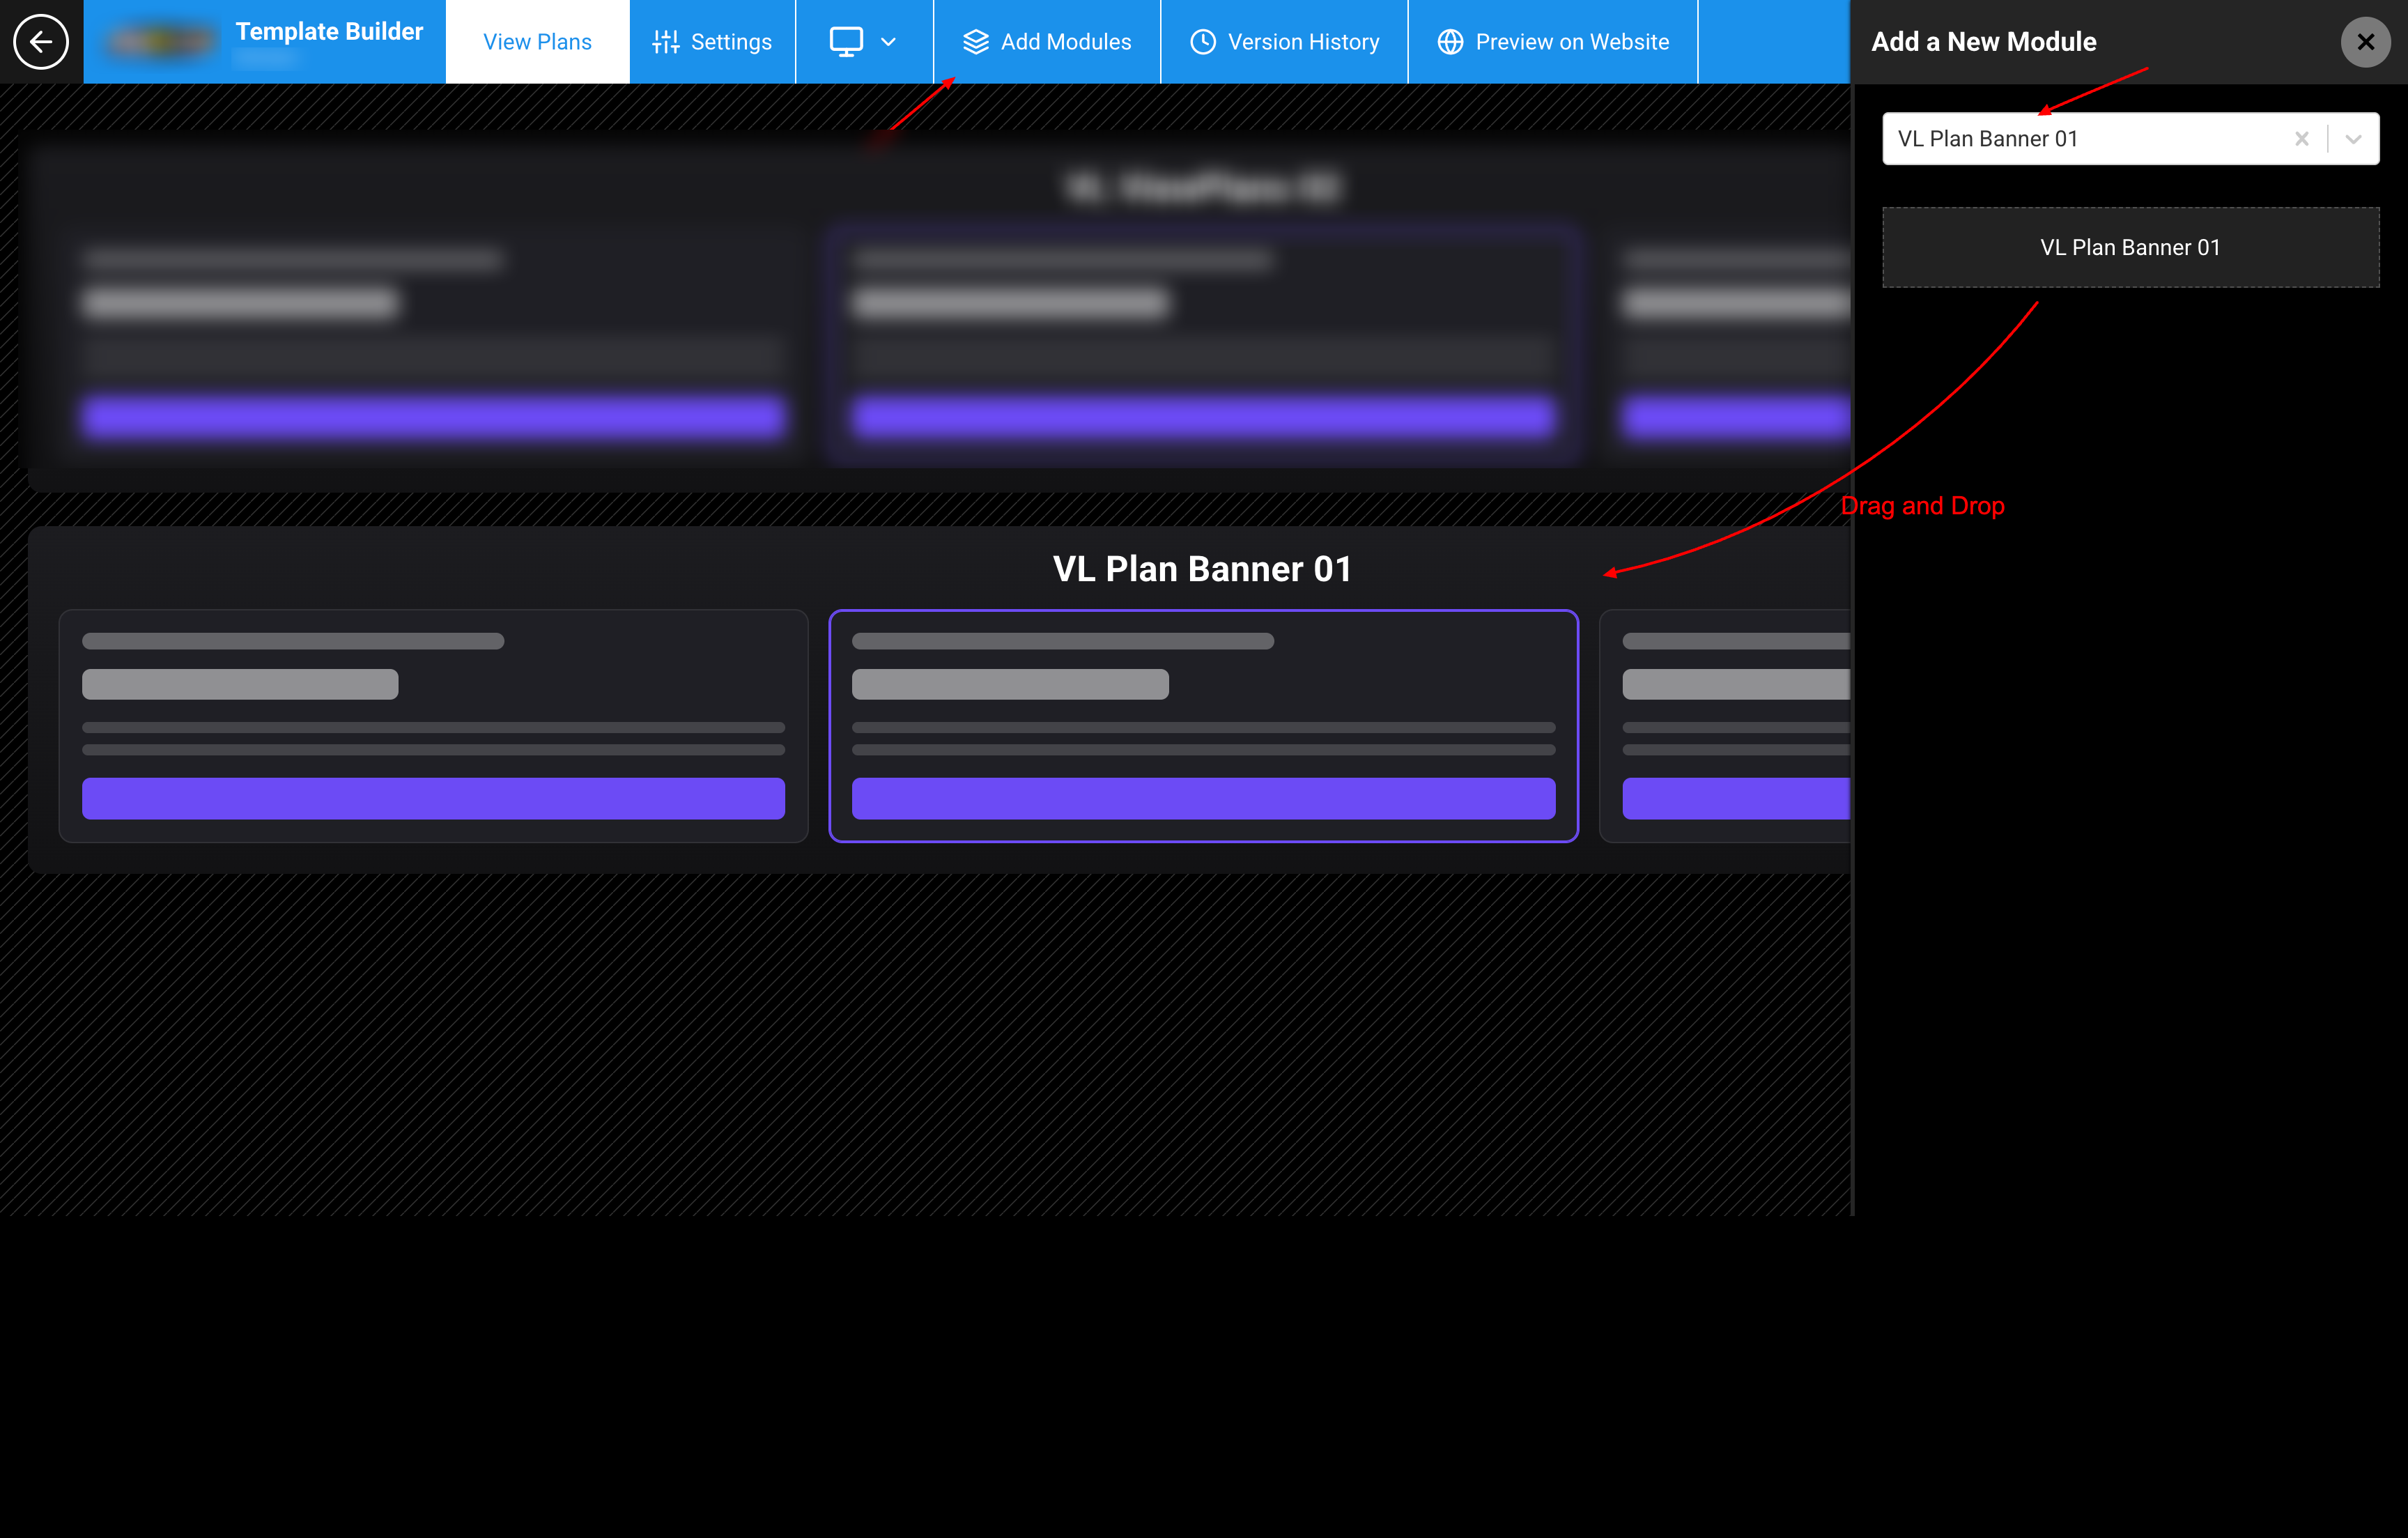
Figure 2. Add a New Module. Select VL Plan Banner 01 and place it in the page layout.
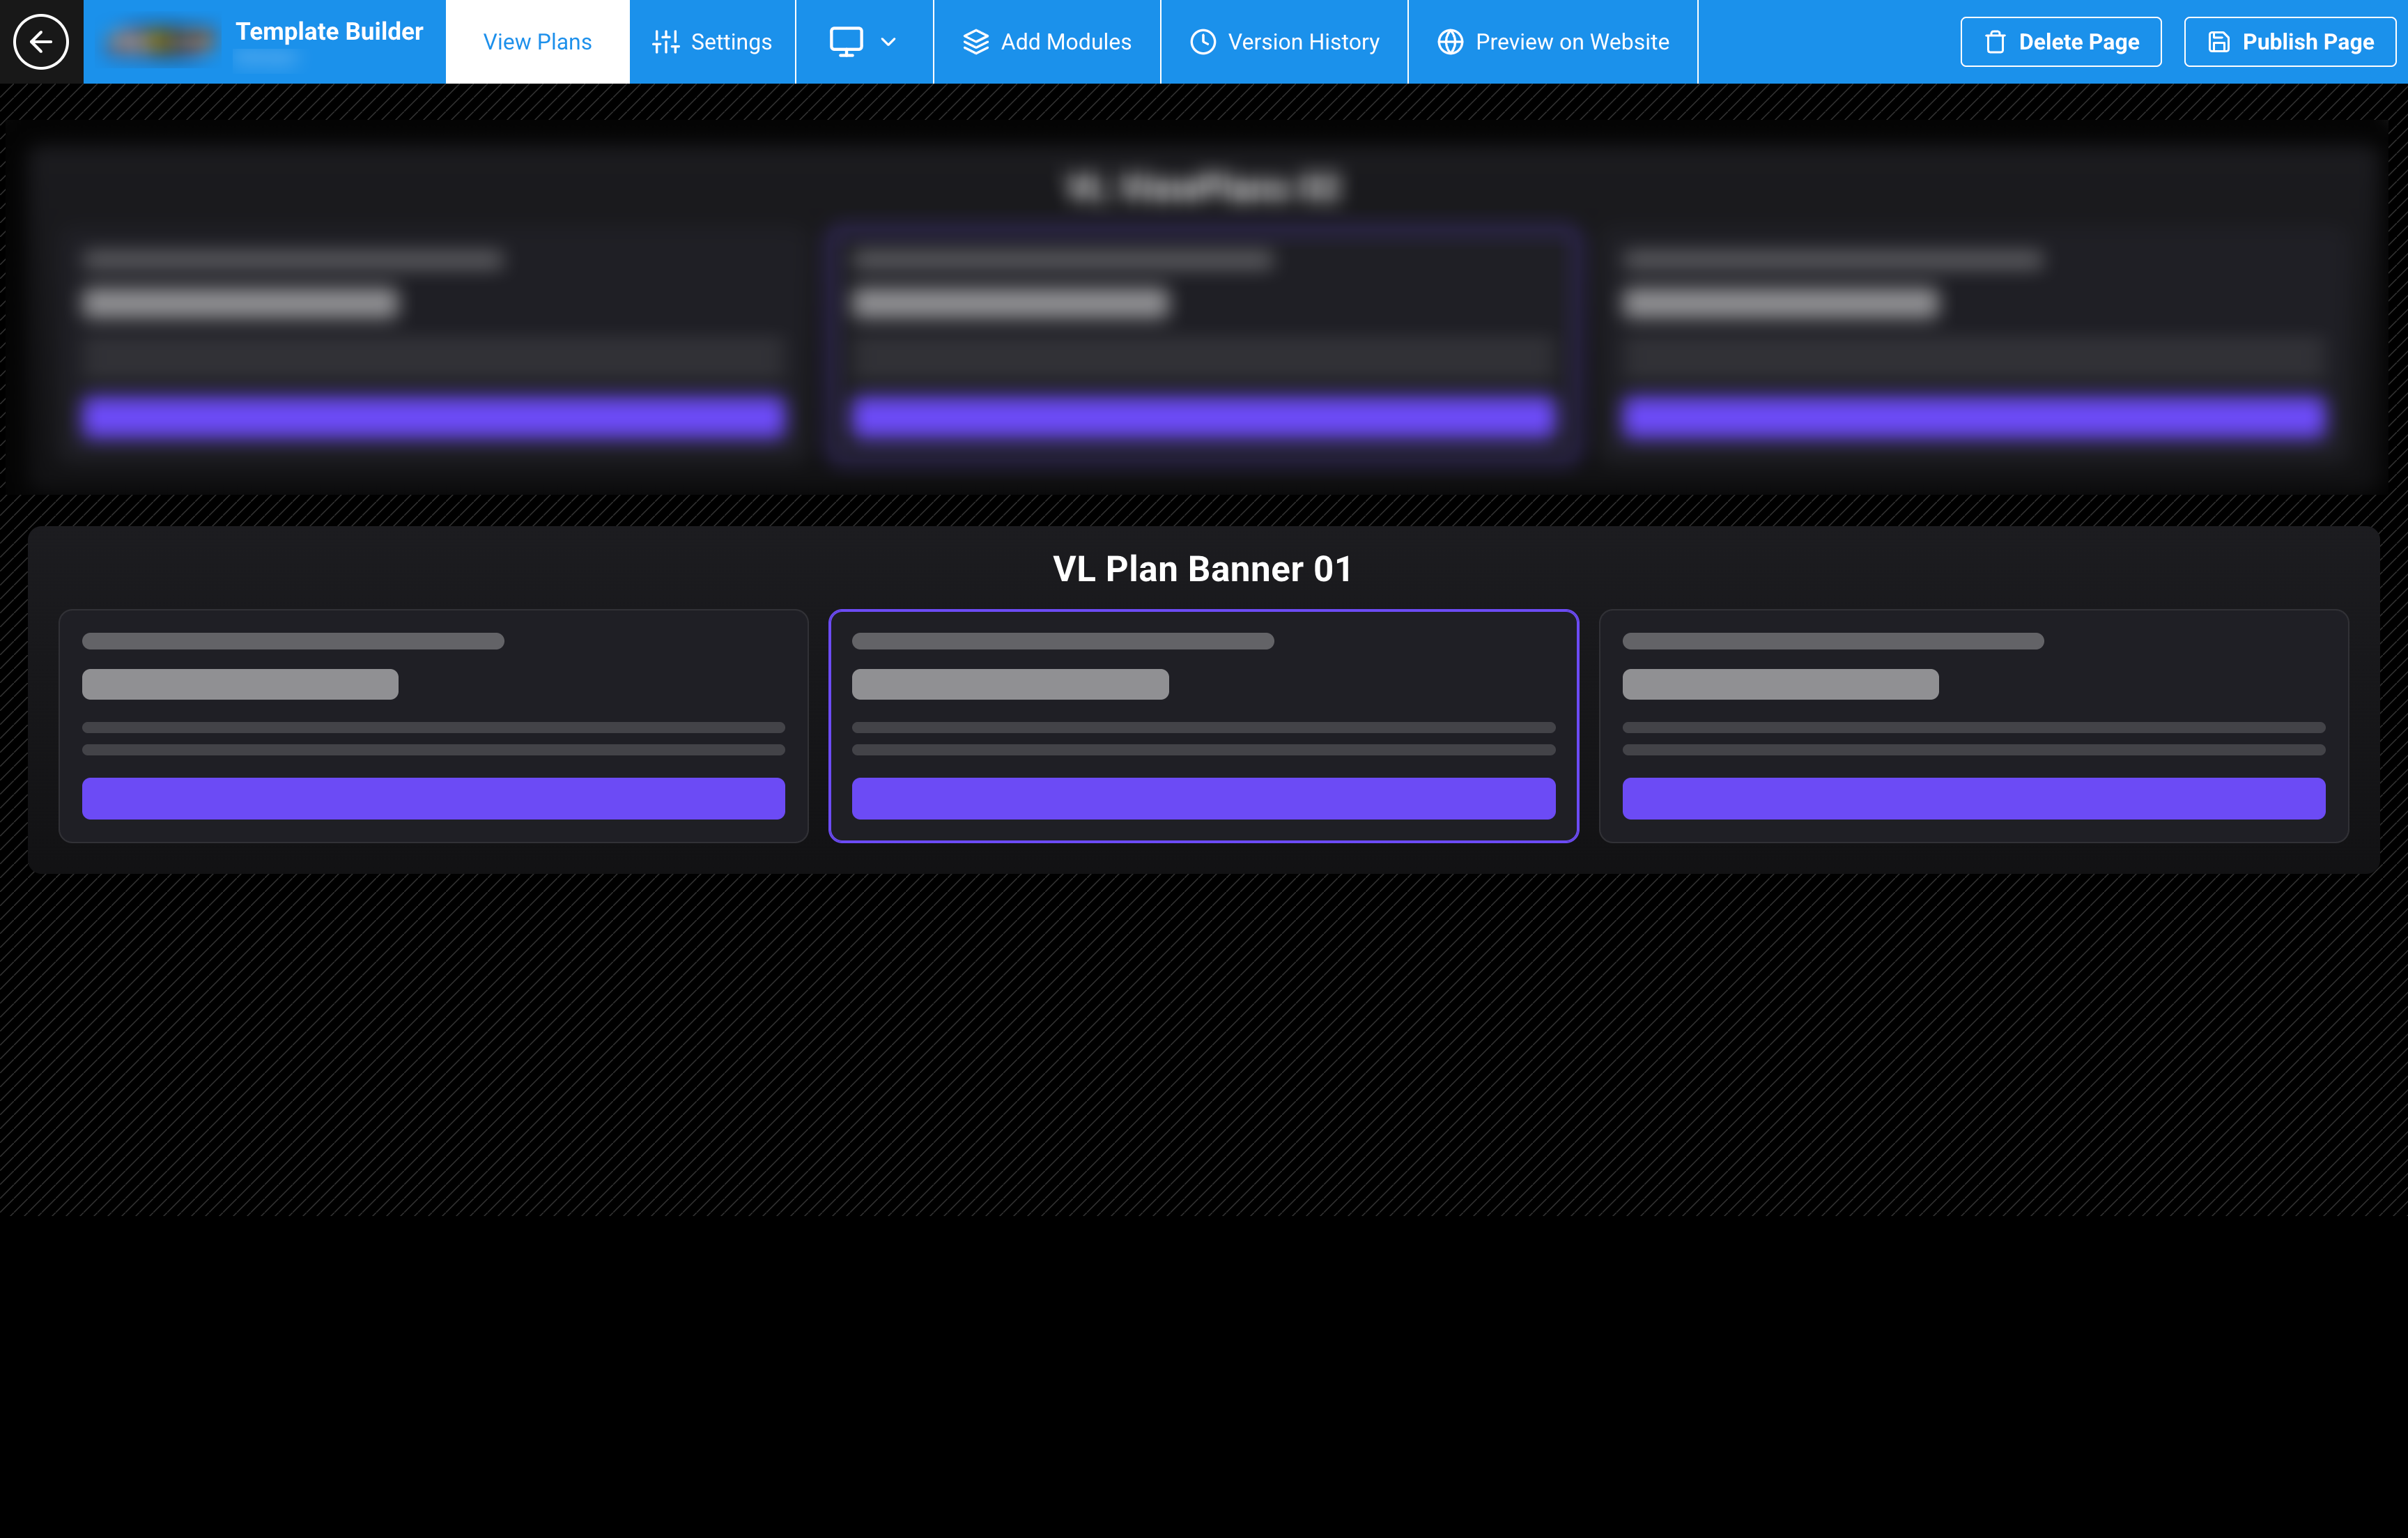
Figure 3. Page layout with VL Plan Banner 01 added.
Step 3: Configure Monetization Plan options
Open the module settings. Under Monetization Plan, search for plans and add the options the banner should display.
Available option types
| Option | Purpose | Customer destination |
|---|---|---|
| Subscription plan | Advertises a selected active plan | Checkout |
| Login TVE | Offers TV provider authentication | Path for Login TVE |
| Login | Offers account sign-in | Path for Login |
| SignUp | Offers account registration | Path for Signup |
| Create Account | Offers account creation without selecting a paid plan | Path for Create Account |
To add an option:
- Select Search Plan.
- Search for an active plan, or select one of the account-access options.
- Repeat for each option you want to show.
- Drag the selected items into the preferred display order.
- Remove an item with its × control when it is no longer required.

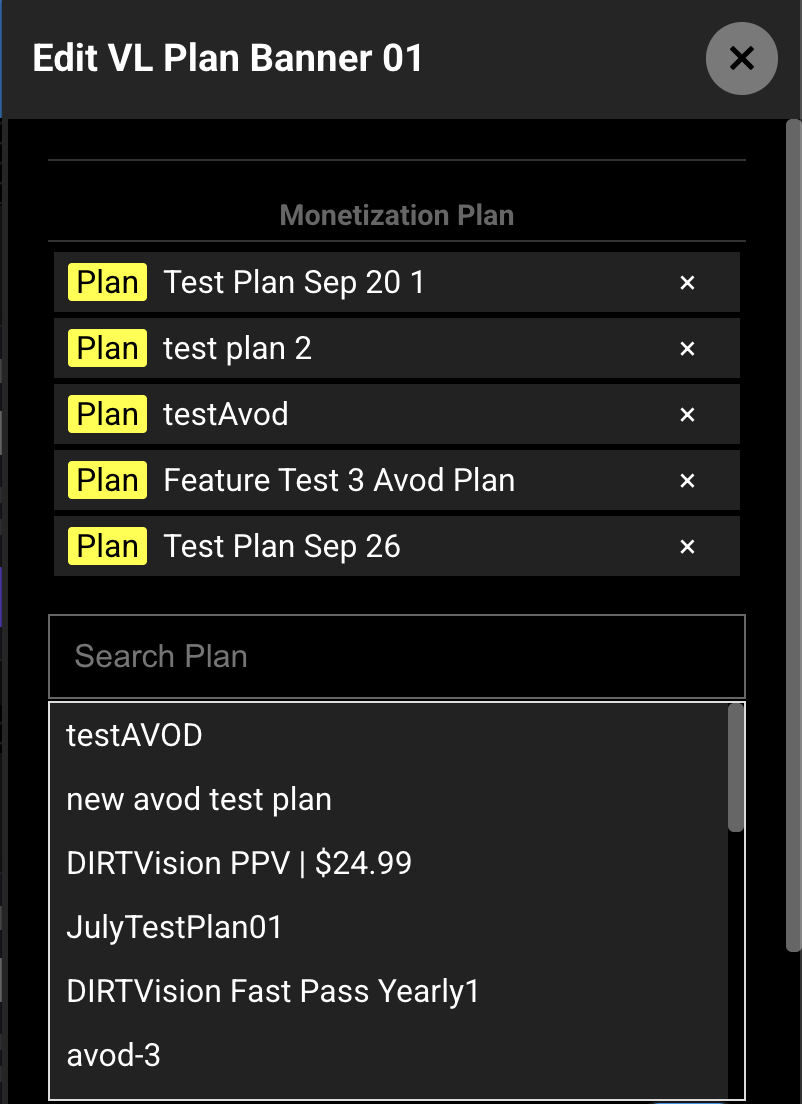
Figure 4. Monetization Plan settings. Search for plans and add account-access options.
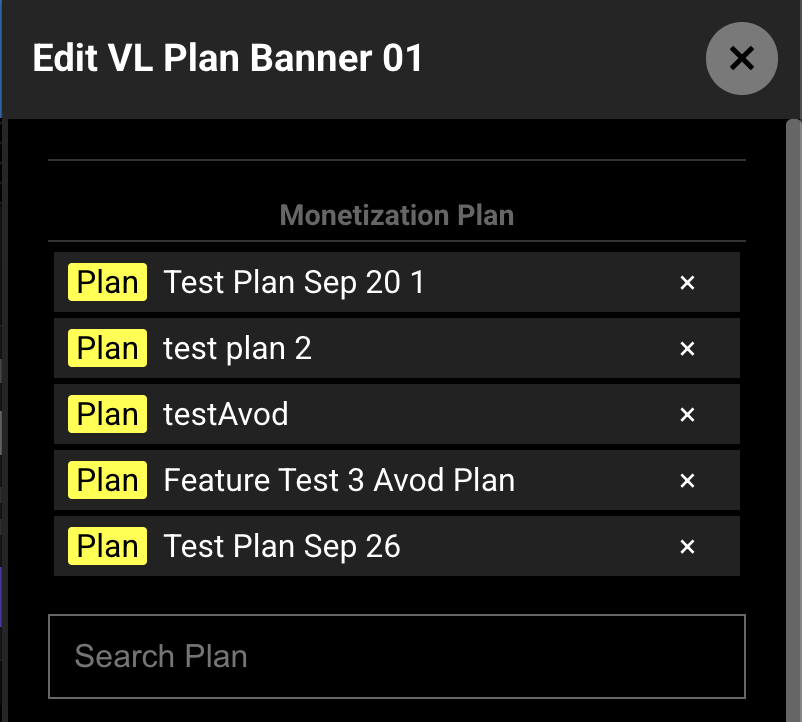
Figure 5. Drag selected plans and CTAs into the order customers should see.
Configure Login TVE
When Login TVE is selected, configure:
- Platform for Login TVE
- Path for Login TVE
- Title for Login TVE
- Description for Login TVE
The TV provider tile appears only when TVE is enabled for the site.
Configure Login
When Login is selected, configure:
- Platform for Login
- Path for Login
- Title for Login
- Description for Login
The website hides this tile after the customer signs in.
Configure SignUp
When SignUp is selected, configure:
- Platform for Signup
- Path for Signup
- Title for SignUp
- Description for SignUp
Configure Create Account
When Create Account is selected, configure:
- Platform for Create Account
- Path for Create Account
- Title for Create Account
- Description for Create Account
Important: Plan tiles always continue to checkout on the website. The configurable Path fields apply to Login TVE, Login, SignUp, and Create Account options.
Step 4: Configure country targeting and fallback tiles
Country targeting
| Setting | Purpose |
|---|---|
| Show Only in Selected Countries | Targets supported app experiences to the selected countries. All countries are selected by default. |
| Hide Only in Selected Countries | Excludes the selected countries on supported app experiences. No countries are excluded by default. |
Avoid selecting the same country in both fields. Country targeting may vary by platform; verify the published banner on every supported platform. Use the site’s web targeting controls when the banner must be restricted by country on web.
Show Create Account
Enable Show Create Account to add a Create Free Account tile for signed-out customers. On the website, this tile continues to checkout, where account creation can begin.
The tile uses the site’s Create Free Account title and subtitle. It does not appear after the customer signs in.
If you also add the separate Create Account option under Monetization Plan, test the banner to make sure customers do not see duplicate account-creation choices.
Show No Plans Cta
Enable Show No Plans Cta to display a No Plans tile when none of the selected subscription plans are available.
- If the site does not yet have the customer’s location, selecting the tile requests location access and reloads the page.
- If plans remain unavailable after location is known, confirm that the selected plans are active and available for that region.
Step 5: Configure labels and Compare Plans
Localization — Labels
| Field | Customer-facing use | Default example |
|---|---|---|
| Compare Plan Text | Link to the full plan comparison page | Compare Plans |
| Banner Title Text | Heading above the banner options | Replace the default placeholder with your final heading |
| Account Exist Title | Existing-account prompt on supported experiences | Already have an account? |
| Account Exist Desc Text | Existing-account supporting text on supported experiences | Log in here. |
The current website banner does not display the Account Exist title and description. Verify these labels on each supported app platform where they are required.
Compare Plans settings
- Set Compare Plan Text.
- Set Show Compare Plan CTA? for supported experiences.
- Set Compare Plan Page Path to the published page customers should open, for example
/viewplans.
Website note: The current website banner displays Compare Plan Text without applying the Show Compare Plan CTA? toggle. If you do not want a comparison link on web, leave the comparison text empty. When the text is shown, always configure a valid destination path.
Step 6: Configure Brand and Font Settings
Brand
| Setting | Purpose | Default |
|---|---|---|
| Module Background Color | Module background on supported experiences | #0D2148 |
| Discount Badge Background Color | Discount badge background | #03A775 |
| Discount Badge Text Color | Discount badge text | #ffffff |
The plan tile background and text use your site’s secondary monetization CTA style.
Font Settings
| Font setting | Applies to |
|---|---|
| Monetization Cta Heading | Plan or CTA title |
| Monetization Cta Sub Title | Plan or CTA description |
| Monetization Cta Price | Plan price and renewal period |
| Compare Plans Cta | Compare Plans link on supported experiences |
Website note: The current website banner does not apply Module Background Color or the Compare Plans Cta font setting directly. Verify the surrounding page background and Compare Plans styling after publishing.
Step 7: Save and publish
- Review the order, titles, descriptions, paths, targeting, and colors.
- Allow the module changes to finish saving automatically.
- Save the page layout if prompted.
- Publish the page.
Changes can take several minutes to appear because of caching. If necessary, verify in a private window or clear the browser cache.
Step 8: Verify the website experience
Signed-out customer
Confirm that:
- Selected plans show the expected name, description, price, renewal period, and discount
- Login, SignUp, TV provider, and account-creation tiles show only when intended
- Compare Plans opens the configured page
- Selecting a paid plan opens checkout with that plan selected
- On tablet and mobile, horizontal arrows allow access to additional tiles
The current website banner does not filter individual tiles by their Platform selections. If a CTA must not appear on web, remove it from this module or use a separate page configuration for web.

Figure 6. Website Plan Banner with plan and account-access tiles.
Signed-in customer without access
Confirm that:
- The Login tile is removed
- A manually configured Create Account option intended for signed-out users is removed
- Eligible plan and other configured options remain available
Customer who already has access
The website hides the entire banner for:
- Active subscribers
- VIP customers
- Customers authenticated through a TV provider
This prevents customers who already have access from seeing an unnecessary purchase prompt.
Responsive layout
- Desktop shows up to approximately five horizontal tiles when space allows.
- Tablet shows approximately two tiles per view.
- Mobile shows one tile per view.
- On tablet and mobile, customers use the previous and next arrows to move through additional options.
Verification checklist
- VL Plan Banner 01 is added to a supported page
- Selected plans are active and available for the intended regions
- Plans and CTAs are in the intended order
- Every Login, SignUp, TVE, and Create Account tile has the correct platform, title, description, and path
- Country targeting is configured and tested
- Show Create Account is set as intended
- Show No Plans Cta is set as intended
- Compare Plans text and page path are correct
- Brand and font settings match the site
- The page is published
- A paid plan opens checkout with the selected plan
- The banner is hidden for subscribed, VIP, and TV provider customers
- Desktop, tablet, and mobile layouts have been checked
Troubleshooting
| Problem | What to check |
|---|---|
| Module is not available in the picker | Use a page type that supports content modules. A Modular Page is recommended; System Screens and User Pages do not support this module. |
| Banner does not appear | Test with a customer who does not already have an active subscription, VIP access, or TV provider access. For app platforms, also check country targeting. |
| Selected plan does not appear | Confirm the plan is active, still selected in the module, and available for the customer’s location. |
| TV provider tile does not appear | Confirm TVE is enabled for the site and the Login TVE option includes the target platform. |
| Login tile does not appear | The Login tile is hidden for signed-in customers. Test in a signed-out session. |
| Create Account tile does not appear | Enable Show Create Account and test while signed out. |
| Two account-creation tiles appear | Disable Show Create Account or remove the separate Create Account option, then publish again. |
| No Plans tile does not appear | Enable Show No Plans Cta, confirm the selected plans are unavailable, and publish. |
| No Plans remains after sharing location | Confirm plan availability for the detected region. |
| Compare Plans opens the wrong page | Correct Compare Plan Page Path and confirm the destination page is published. |
| Compare Plans remains visible after its toggle is off | On the current website banner, clear Compare Plan Text to hide the link. |
| Updated labels or colors do not appear | Allow the module to finish saving, publish the page, and allow the cache to clear. Verify background and Compare Plans styling separately on web. |
| A label change appears in more than one language | Recheck each published language. If the module does not retain different values per language, use shared wording or contact ViewLift Support. |
Best Practices
- Show only the most relevant plans and CTAs.
- Put the preferred option first.
- Keep titles and descriptions short enough to scan in a horizontal banner.
- Configure a valid Compare Plans destination before publishing.
- Use country and platform targeting only when required, and test every targeted combination.
- Avoid duplicate Create Account choices.
- Test with signed-out, signed-in, subscribed, VIP, and TV provider customer states.
- Publish after every meaningful change.
FAQs
Q. What page type should I use?
A Modular Page is recommended for a general promotional plan banner. The module can also be used on other pages that support content modules, such as Marketing and Ancillary pages.
Q. Where do subscription plan tiles send customers?
On the website, selecting a subscription plan opens checkout with that plan selected.
Q. Can I send Login, SignUp, and TV provider tiles to different pages?
Yes. Configure the Path field for each selected option.
Q. Why does the banner disappear after sign-in?
Signing in alone removes the Login tile. The entire banner is hidden when the customer has an active subscription, VIP access, or TV provider access.
Q. Where do plan names, descriptions, and prices come from?
They come from the selected plan’s configuration. The banner can use the plan-level title and description when that site setting is enabled.
Q. Does the banner process payment?
No. It sends the selected plan to checkout, where the customer completes account and payment steps.
Q. What happens when no selected plans are available?
If Show No Plans Cta is enabled, customers see a No Plans tile. It can request their location when location information is missing.
Important Information
- The module is intended for customers who still need an access option.
- Active subscribers, VIP customers, and TV provider customers do not see the banner on the website.
- Paid plan selection continues to checkout.
- Non-plan CTAs use their configured paths.
- The banner displays only subscription plans selected directly in its Monetization Plan list; it does not automatically inherit plans associated with page content.
- Plan availability can vary by customer location.
- The page must be published before customers receive the latest configuration.
Glossary
| Term | Definition |
|---|---|
| Plan Banner | Horizontal module that presents plans and account-access options. |
| Monetization Plan | Section where plans and Login, SignUp, TVE, and Create Account options are selected and ordered. |
| TVE | TV Everywhere; authentication through a participating television provider. |
| No Plans tile | Optional tile displayed when the selected subscription plans are unavailable. |
| Compare Plans | Optional link to a page where customers can review plans in more detail. |
Contact Support
If you need help beyond this article, contact the ViewLift support team.
- Email: techsupport@viewlift.com
- Phone (US): +1-800-859-0420
- Phone (UK): +44-203-014-8921
Support hours: B2C requests are handled Monday to Friday. B2B support is available 24/7.