Introduction
VL Standalone AI Search is a System Screen module in Template Builder. It powers a conversational search page — customers ask in their own words (or by voice), then see a chat reply and matching video cards.
On the website this experience typically lives at /ai. When Enable AI Search is on, keyword search can also show Dive Deeper in AI Mode, which opens this page.
This article explains how to create the AI Search page in Template Builder, configure VL Standalone AI Search, turn on AI Search in site settings, publish it, and verify the experience on the web.
Purpose
The purpose of this article is to help you:
- Create an AI Search System Screen (or Search Screen) in Template Builder
- Add and configure VL Standalone AI Search
- Edit welcome copy, placeholders, conversation settings, and chat layout
- Turn on Enable AI Search so customers can open AI Mode from keyword search
- Understand what customers see on
/ai - Publish and verify the live AI Search page
Scope
This article covers:
- Creating an AI Search page in Template Builder
- Adding VL Standalone AI Search to the page layout
- Module settings: Should Prioritize Server Config, Localization, Dev Config, Chat Settings, and Font Settings
- Enabling AI Search in ViewLift Tools → AppCMS → Settings → Search
- How AI Search appears on the website
It does not cover:
- VL StandaloneSearch (keyword search results at
/search) - Building the masthead search icon (see the Masthead module)
- Search indexing or catalog setup
- Voice or microphone settings on customer devices
Prerequisites
Before you begin, ensure you have:
- Access to Template Builder for your site
- Access to ViewLift Tools / AppCMS to turn on Enable AI Search (and Enable Search if customers will start from the header)
- Copy ready: welcome title, description, and input placeholder
- A published keyword Search page at
/searchif you want Dive Deeper in AI Mode from that page
Example used in this article
Throughout the steps below we use an AI Search page named AI Search at path/ai. Replace the sample values with your own. For a sports site you might welcome fans with “Ask about City United fixtures and match highlights.”
AI Search flow overview (website)
The flowchart below shows the typical customer journey on the website when VL Standalone AI Search is published at /ai.
.png)
Notes
- The website AI Search path is
/ai. Keyword search stays at/search. - Dive Deeper in AI Mode appears on keyword search only when Enable AI Search is on in AppCMS Search settings.
- A term typed in keyword search can be carried into
/aiwhen the customer opens AI Mode. - The welcome screen uses Search Title, Search Description, and Search Input Placeholder.
- Voice search needs microphone permission in the browser. If the mic is blocked, the site shows a permission message.
- Stop ends the voice session. Video cards open the title’s page.
Step 1: Open Template Builder
- Log into ViewLift Tools.
- Open AppCMS → Edit Template Builder (or open Template Builder for your site from your usual entry point).
- Confirm you are on the correct site and language (if localization is enabled, use the language selector on the Template Builder home screen before editing page copy).
.png)
Template Builder home. From here you create pages and open System Screens.
Step 2: Create the AI Search page
The AI Search page must be a System Screen or Search Screen so that VL Standalone AI Search is available in the module picker.
- In Template Builder, go to Pages.
- Select + ADD NEW (or Create a New Page).
- Enter New Page Name:
AI Search(or your preferred name). - In New Page Type * Developers Only, select System Screen or Search Screen.
- Optionally set Target Language (If localized Page) if you are creating a language-specific AI Search page.
- Select CREATE.
Set the page path
- On Page Settings, set the page path to
/ai. - Confirm the page type is System Screen or Search Screen.
- Save page settings if prompted.
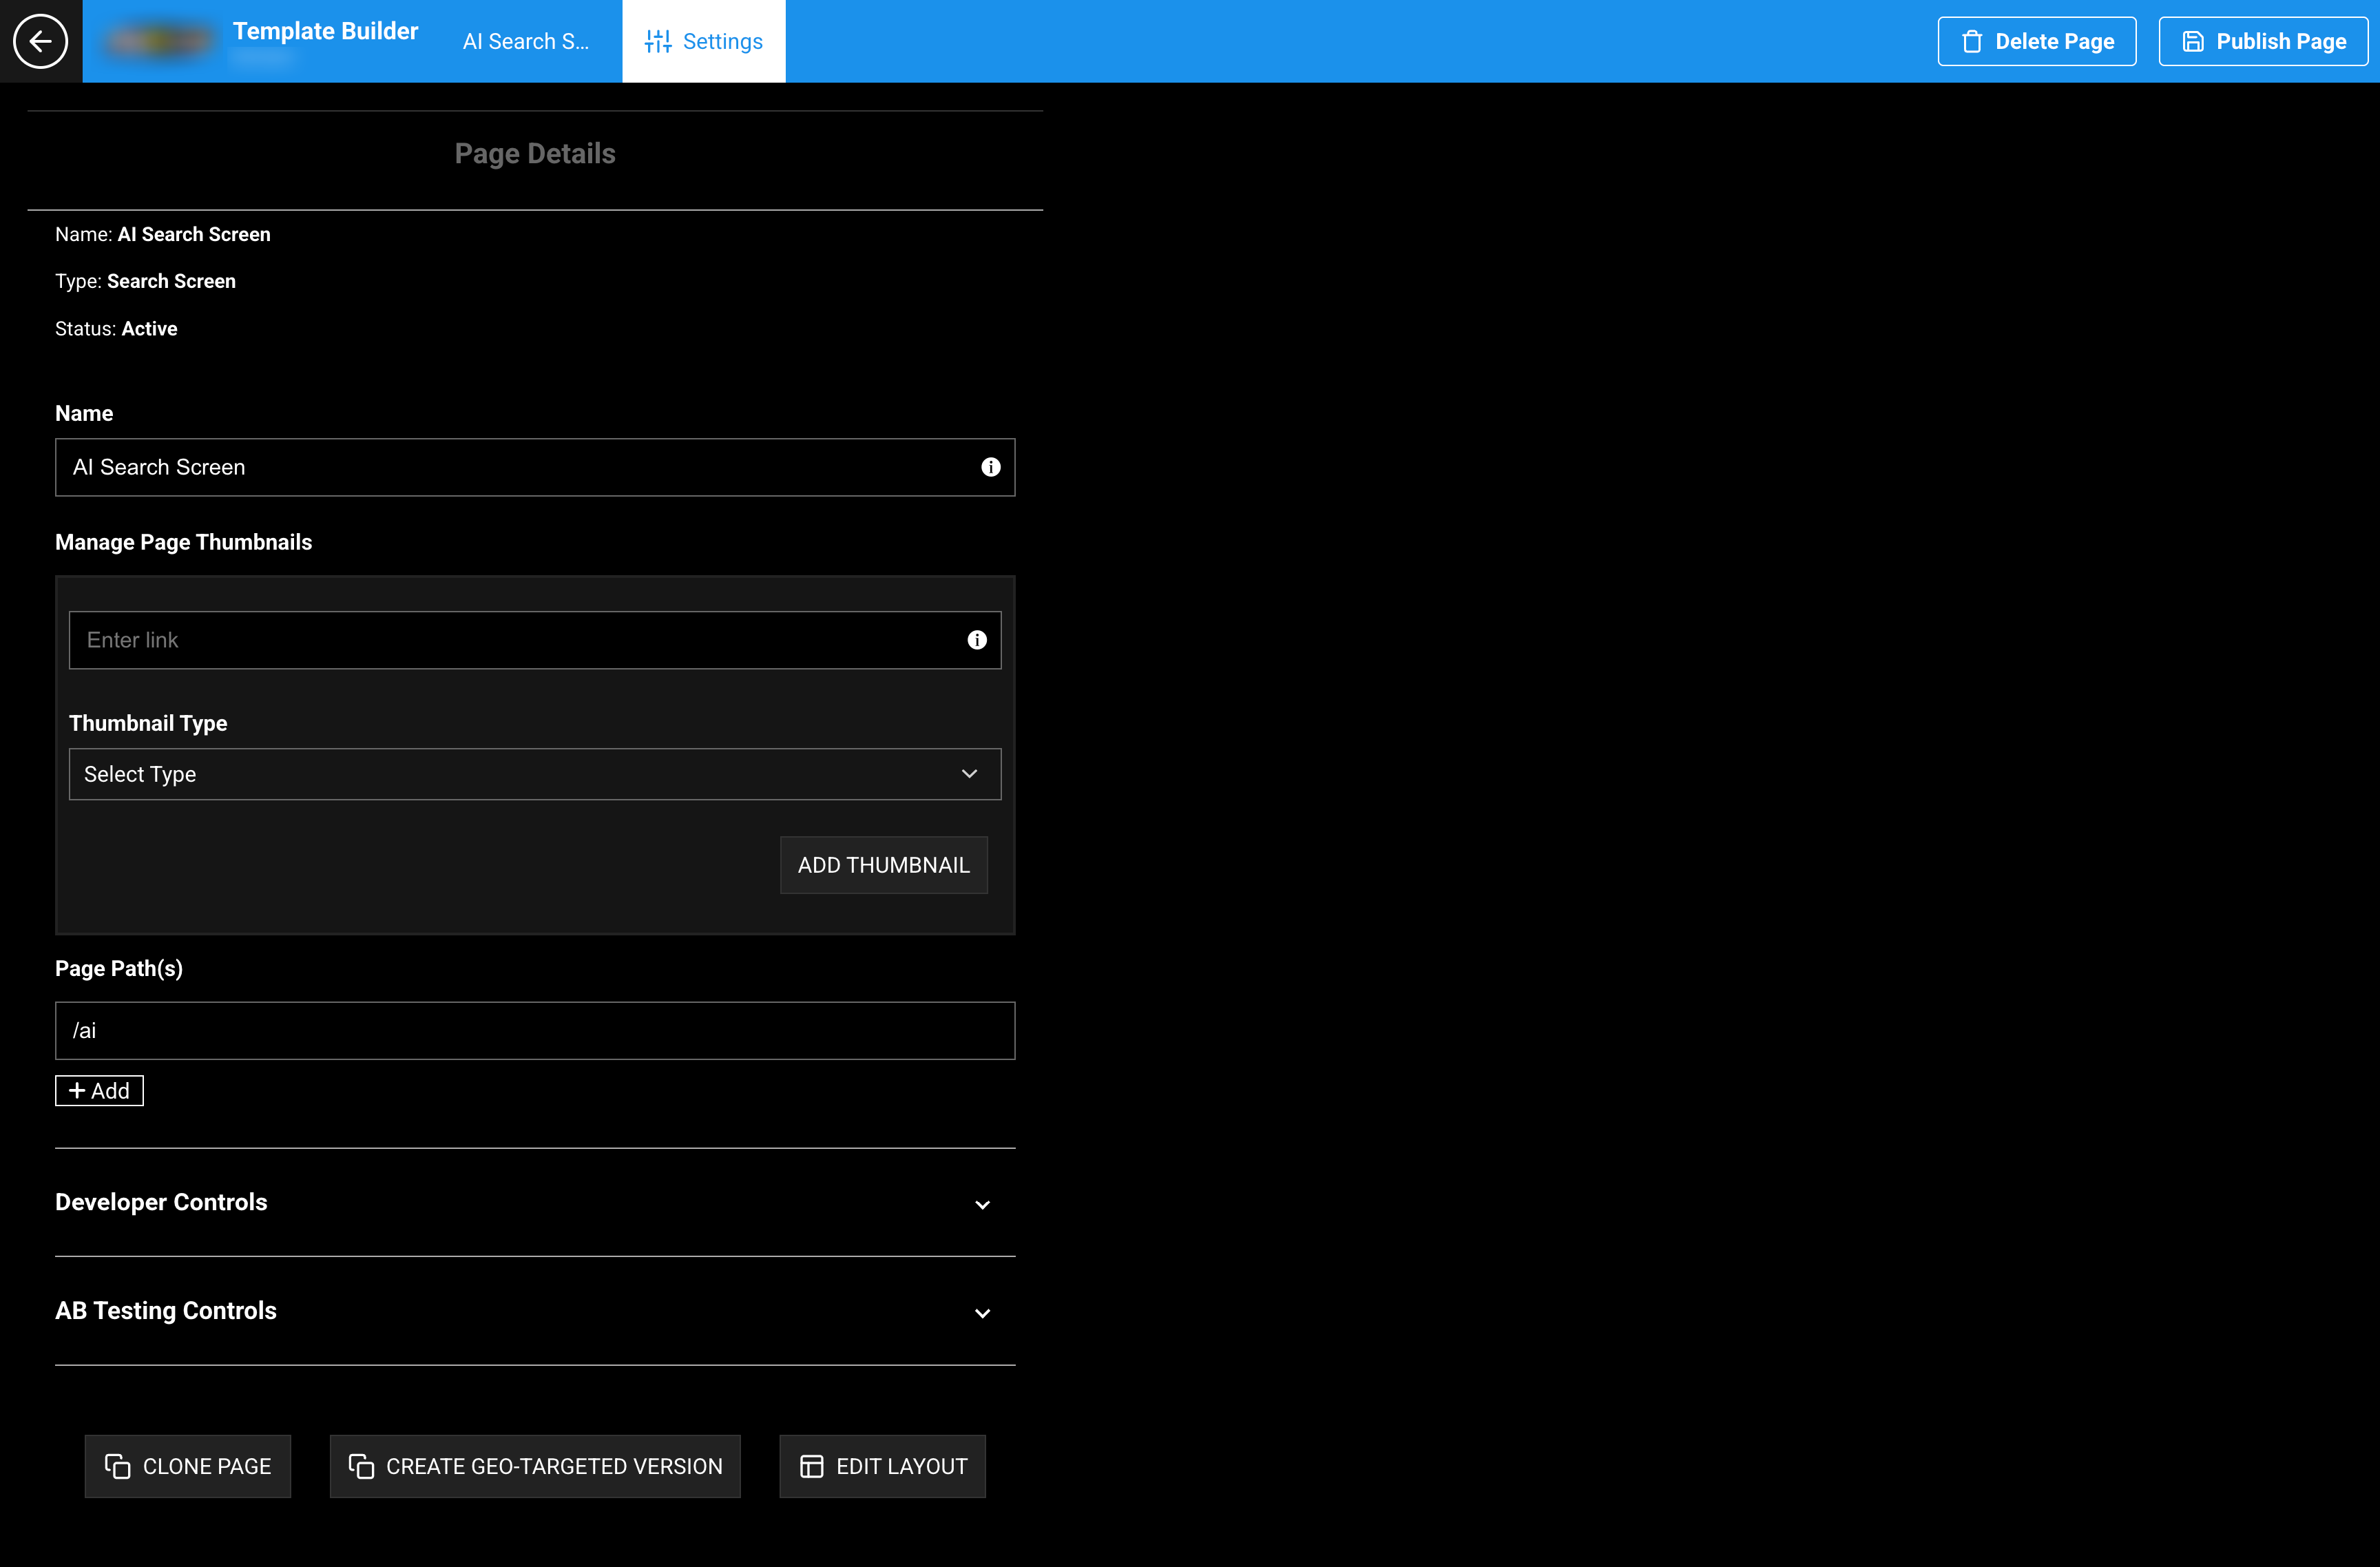
Page Settings. Set the path to /ai so AI Mode from keyword search and direct visits resolve correctly.
Tip: Keep
/aifor this module and/searchfor VL StandaloneSearch. They are different pages.
Step 3: Add VL Standalone AI Search to the layout
- Open the AI Search page.
- Select Edit Layout.
- Select Add a New Module.
- Search for or select VL Standalone AI Search.
- Insert the module into the page layout.
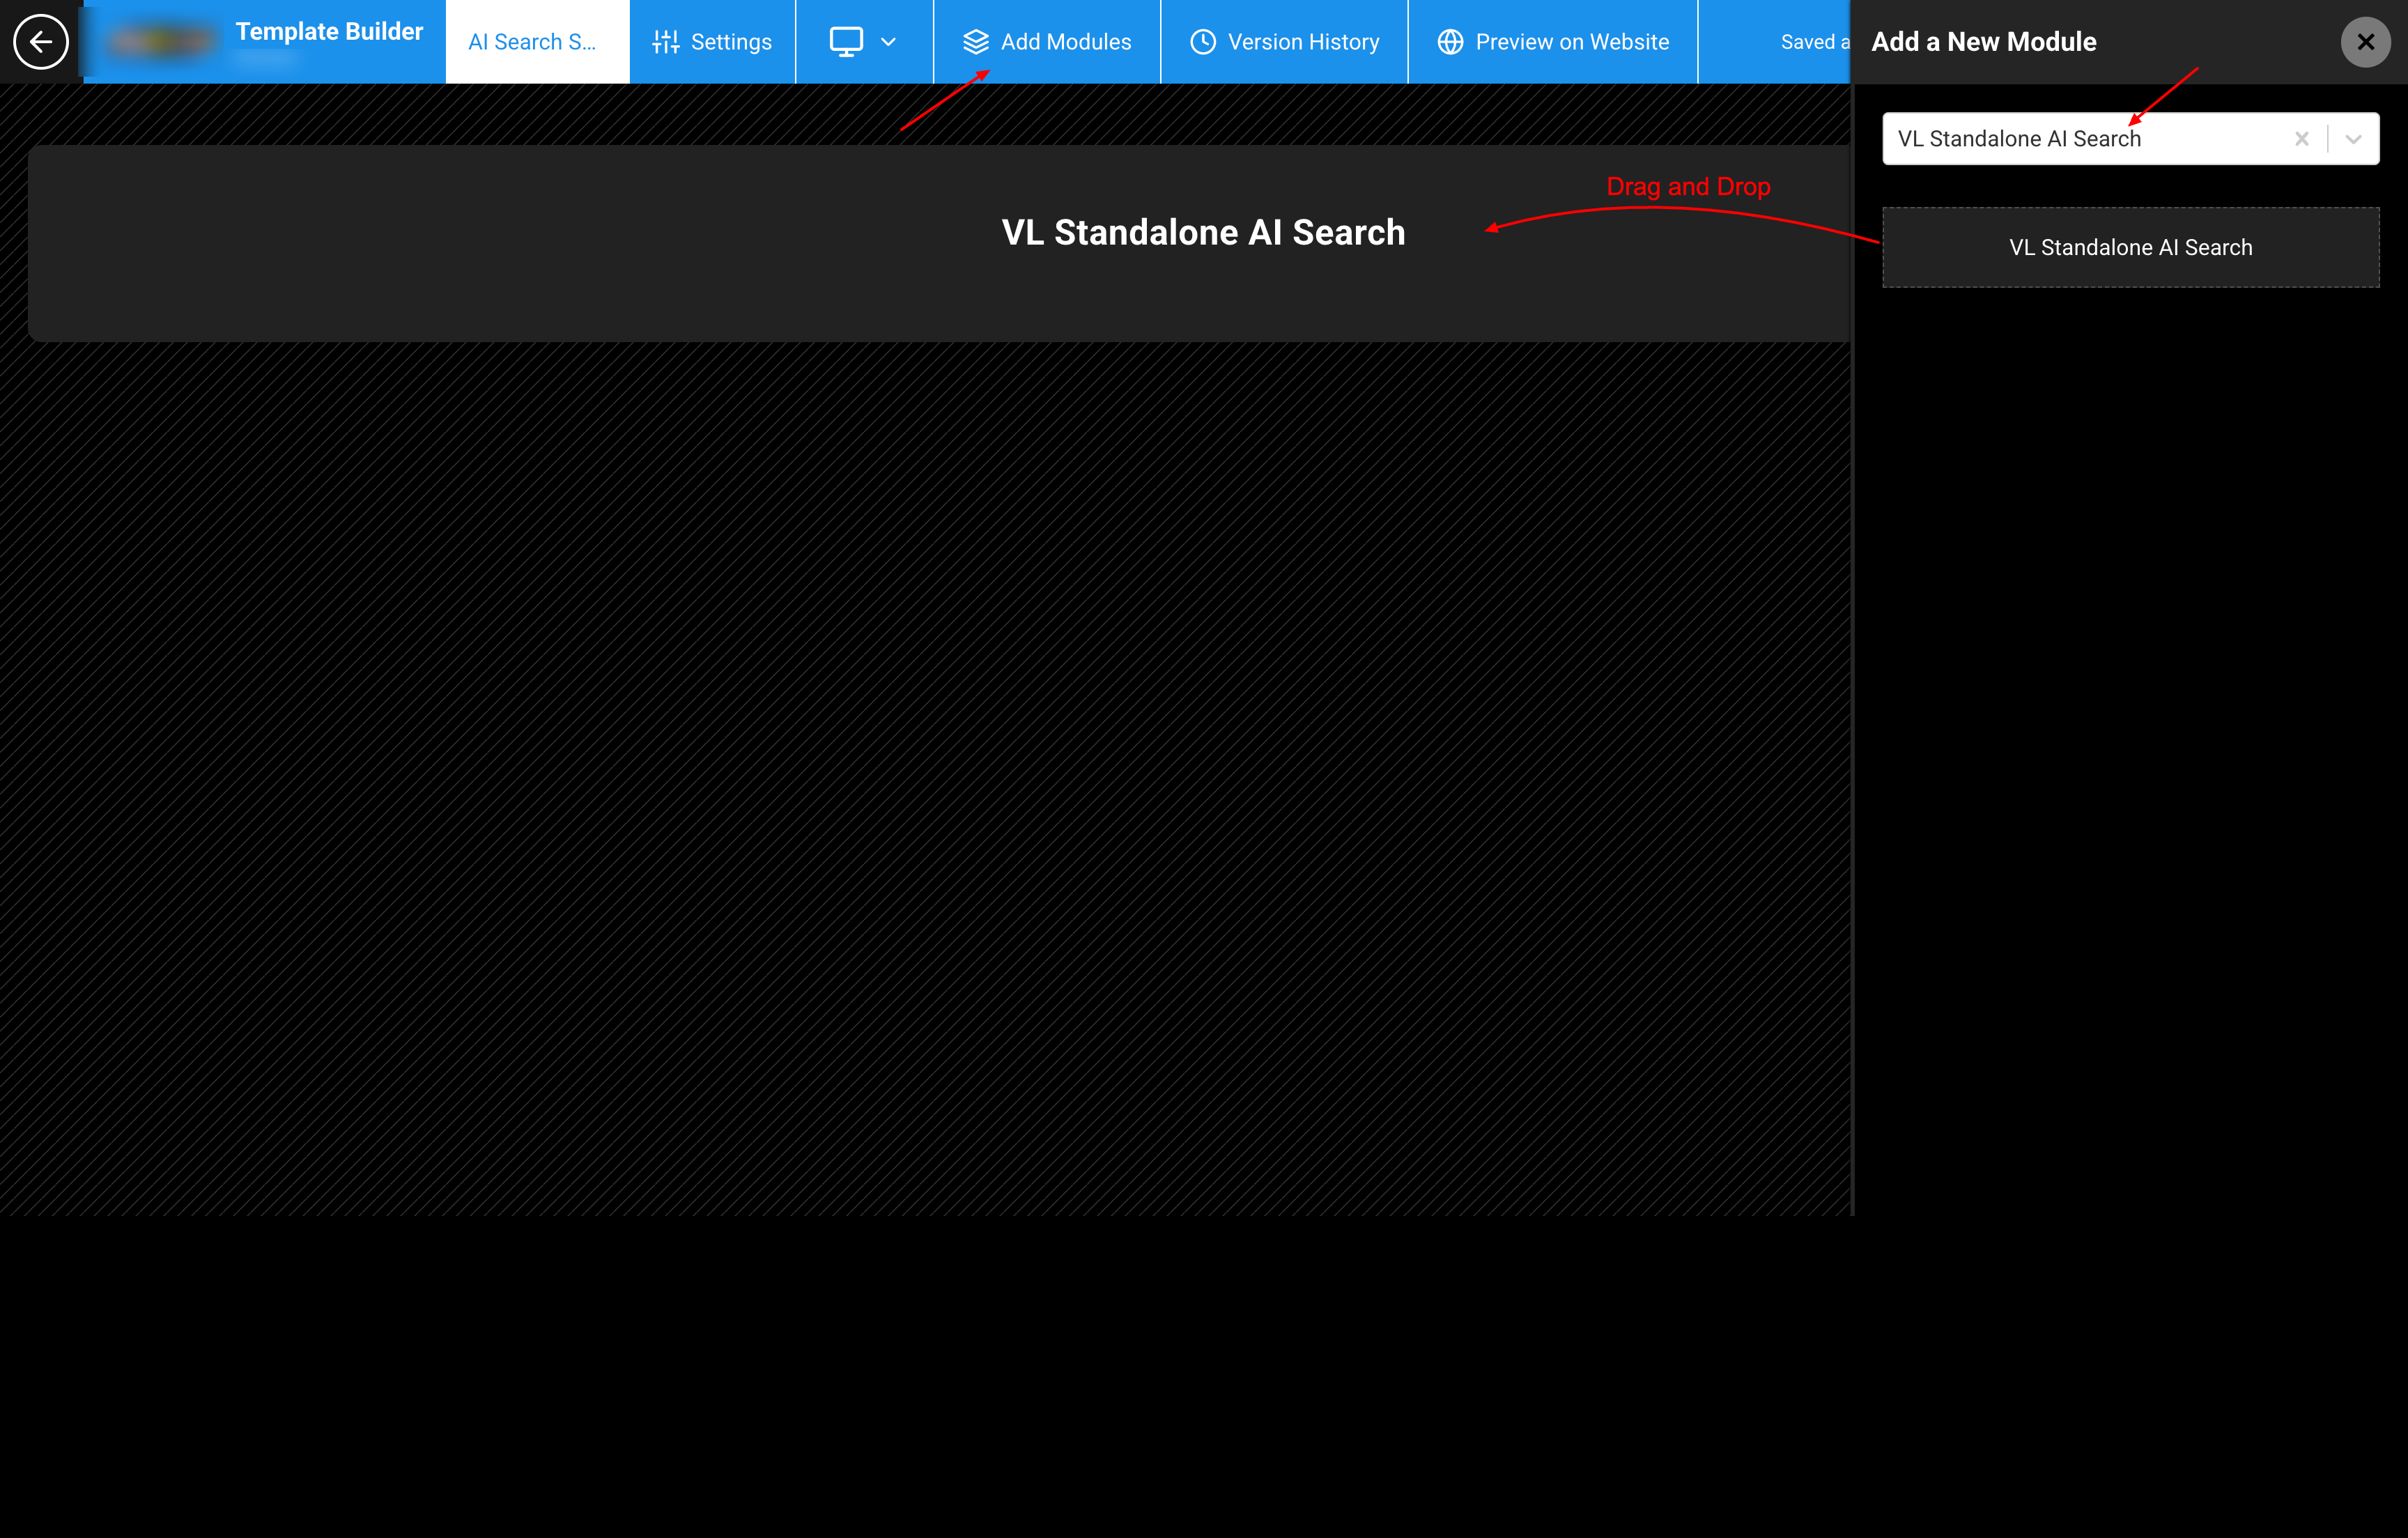
Edit Layout → Add a New Module. Search for and insert VL Standalone AI Search.
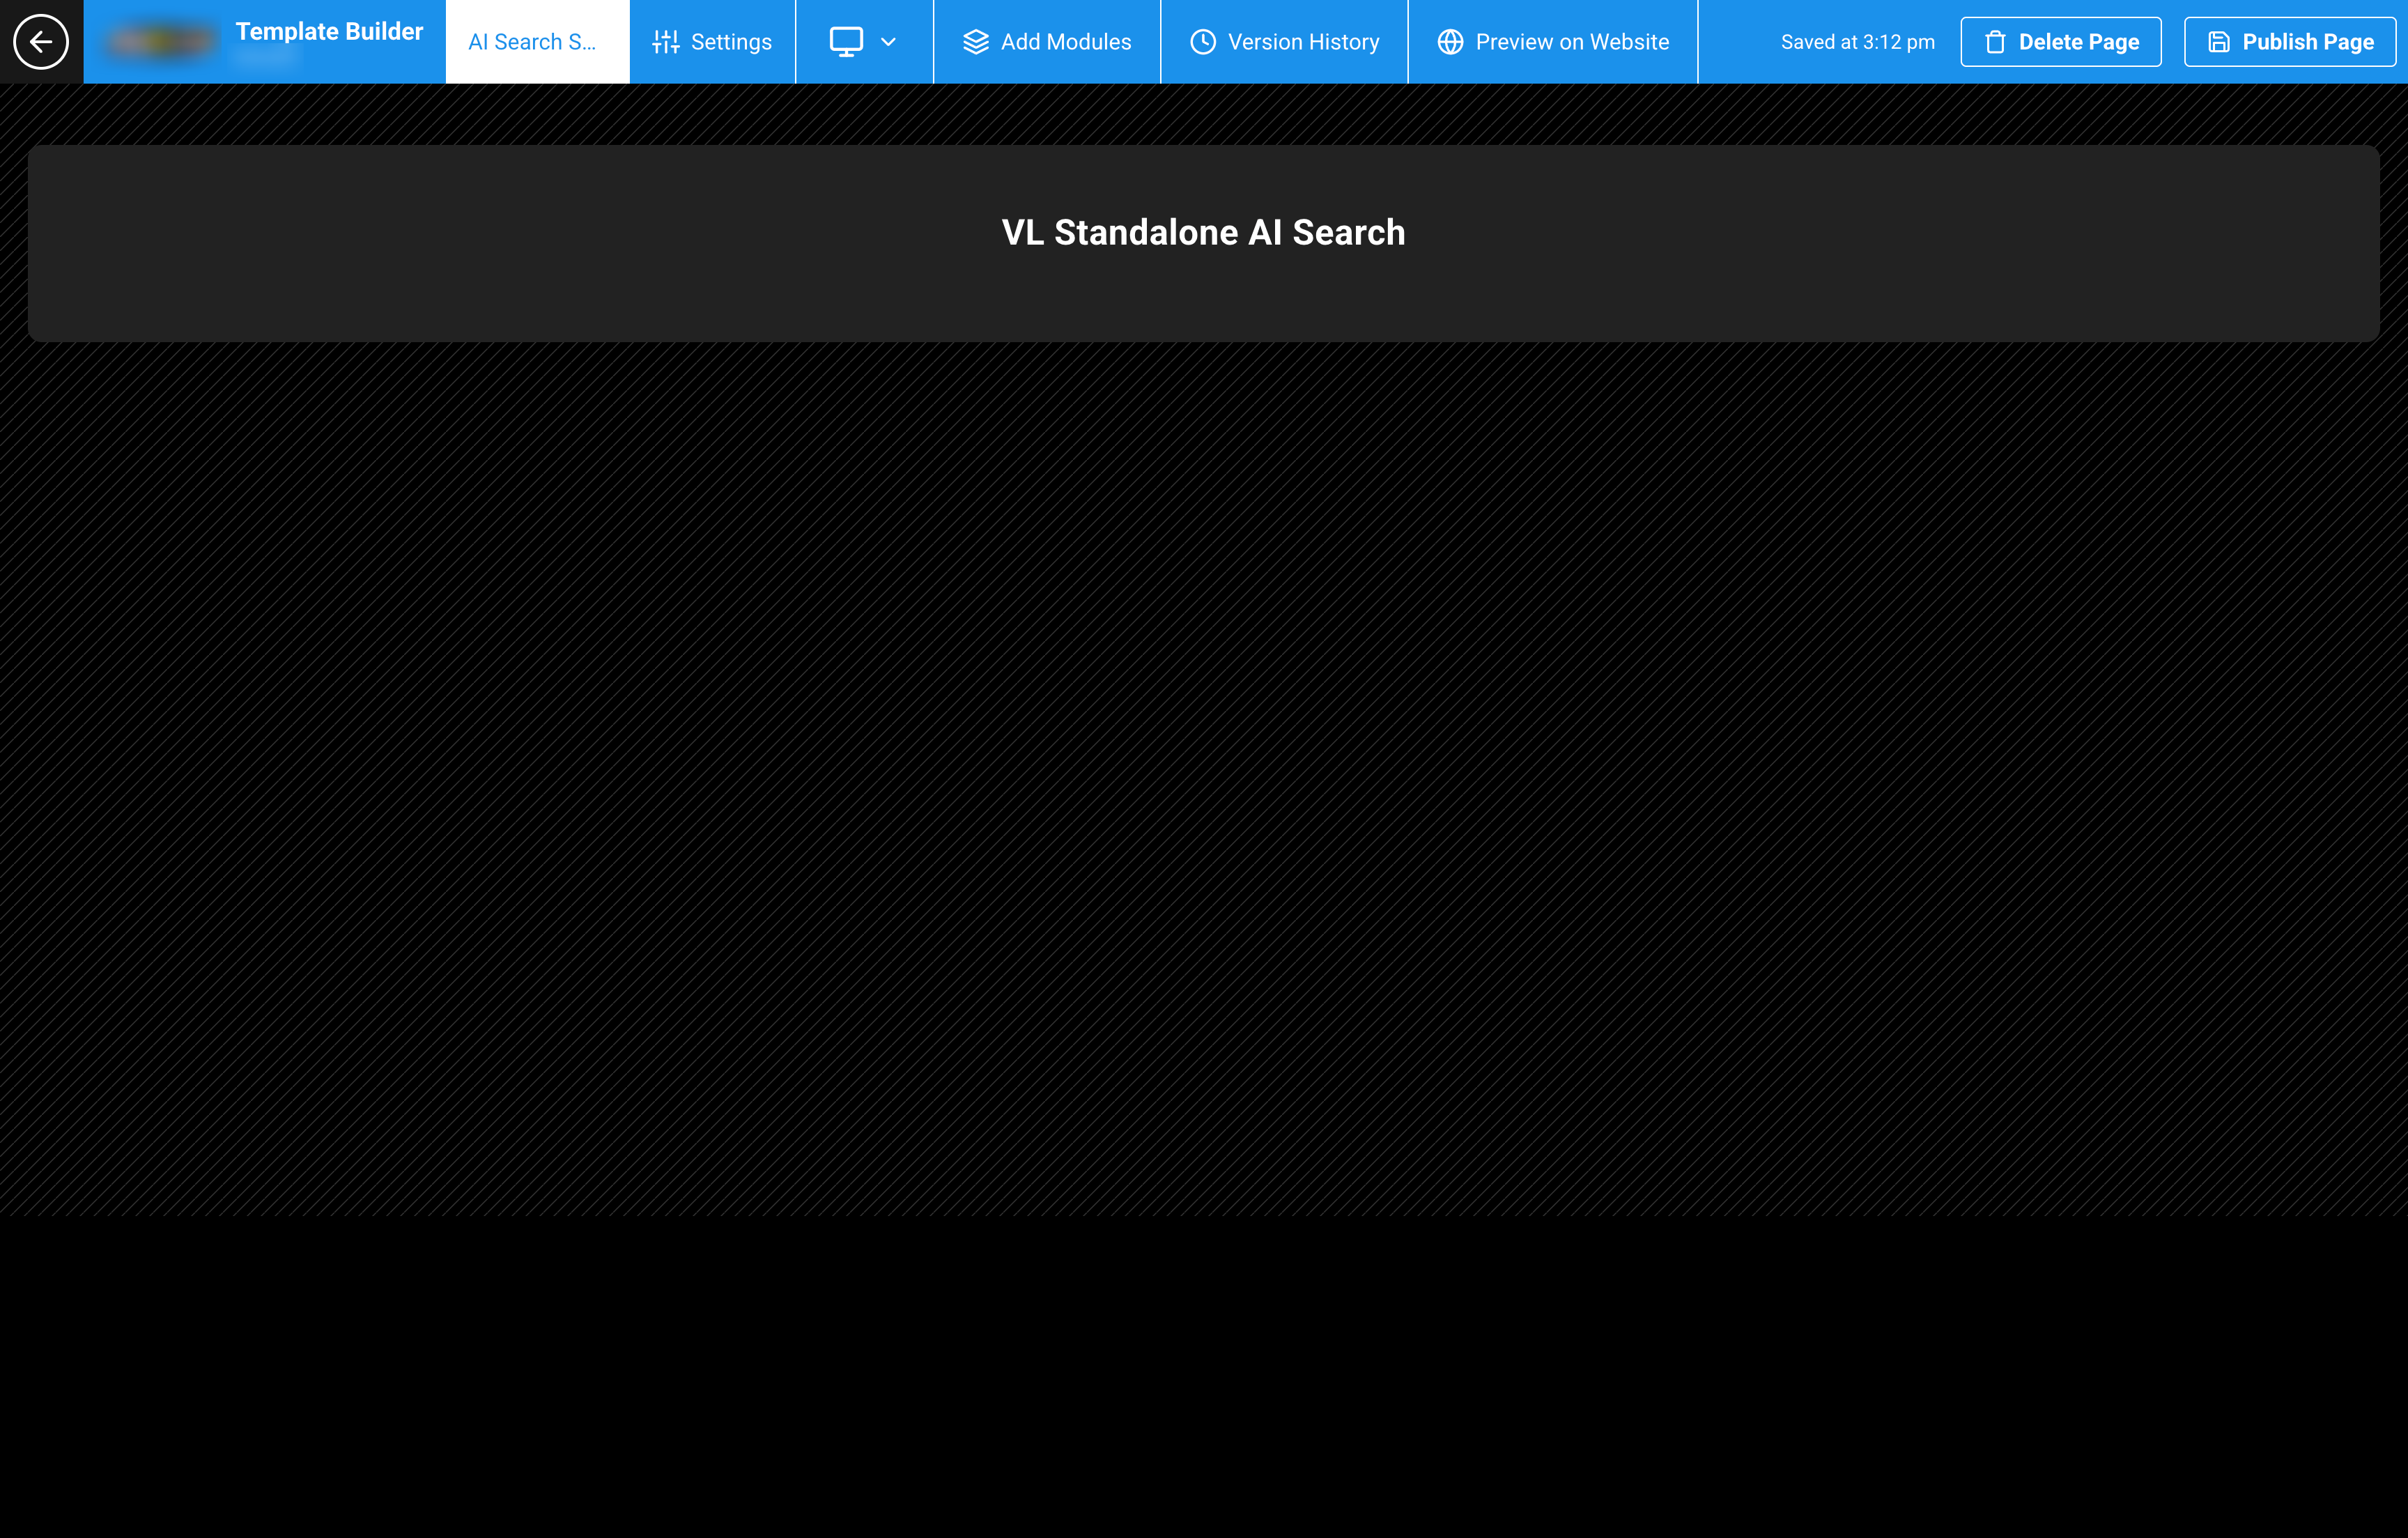
AI Search page layout with VL Standalone AI Search placed on the page.
This module is in the default system picker. On Sports templates you will also see VL StandaloneSearch — that module is for /search, not this page.
System Screens typically use a single primary system module.
Step 4: Configure Should Prioritize Server Config
Open the VL Standalone AI Search module settings.
| Field | Description | Default example |
|---|---|---|
| Should Prioritize Server Config | Template Builder switch on the module. | On |

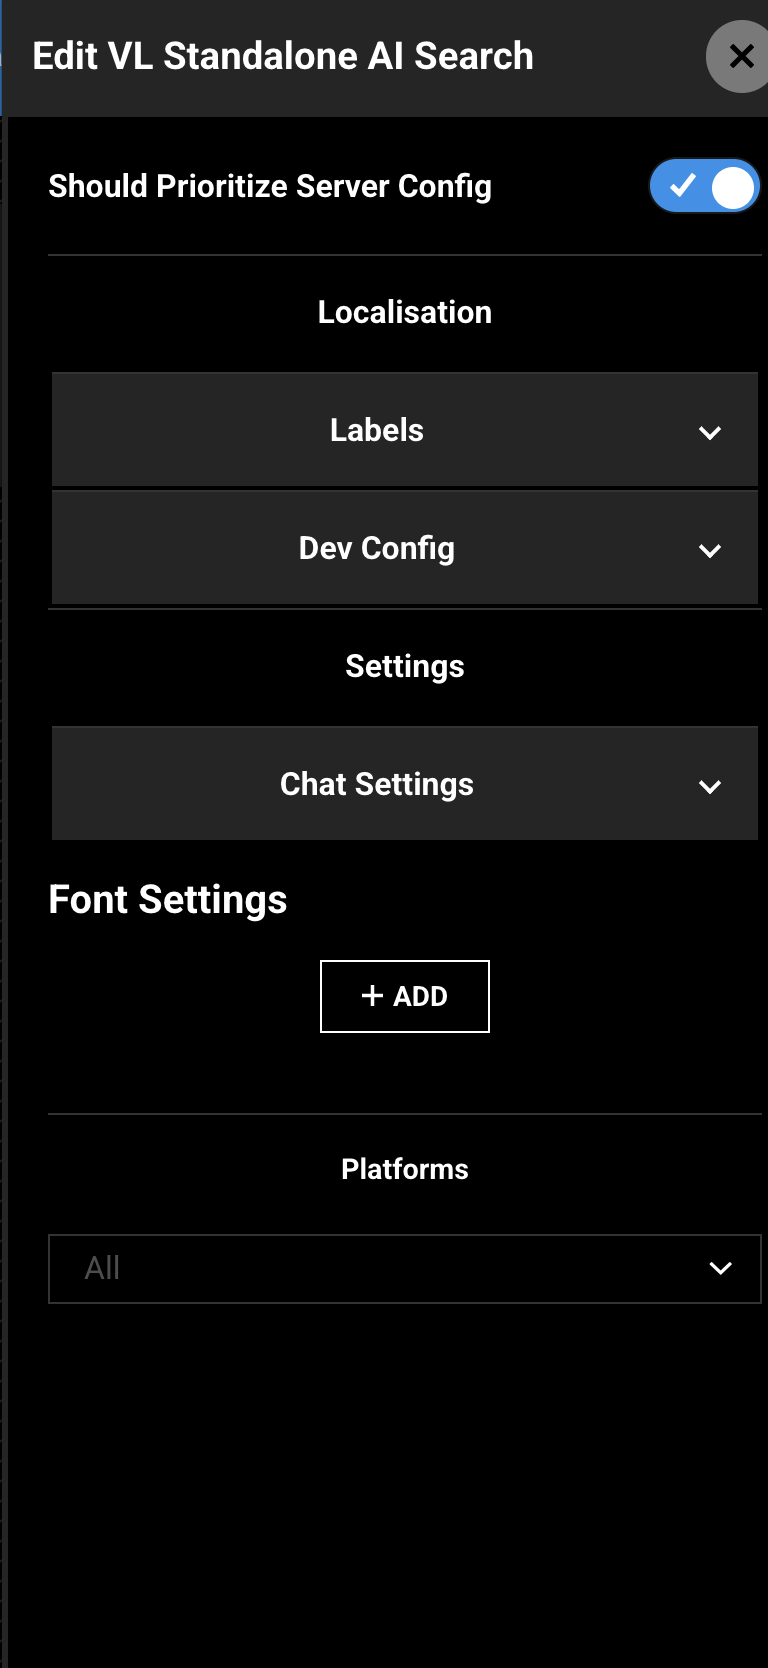
Should Prioritize Server Config at the top of the module settings.
Step 5: Configure Localization — Labels
Expand Localisation → Labels.
| Label | What it controls | Default example |
|---|---|---|
| Search Title | Welcome heading on /ai before a conversation starts. |
Welcome to AI Search |
| Search Description | Welcome line under the title. | Ask me about shows and hunting, fishing and shooting topics that interest you. |
| Search Input Placeholder | Placeholder in the ask field (welcome screen and conversation). | Start Searching |
| Back Link Text | Label in Template Builder. | Back |
Replace the default description with copy that matches your catalog. For a championship site, use something fans would actually ask, such as City United fixtures or match highlights.
Step 6: Configure Localization — Dev Config
Expand Localisation → Dev Config.
| Field | Description | Default example |
|---|---|---|
| AI Base URL | Connection field in Template Builder. | (empty) |
| Agent URL | Conversation service URL in Template Builder. | https://api.openai.com/v1/realtime |
| Agent Model | Model name used for the conversation when set. | gpt-realtime-2025-08-28 |
| Agent Prompt | Instructions for the conversational assistant when set. | (default companion prompt) |
| Agent Voice | Voice used for spoken replies when set. | alloy |
| Audio Transcription Model | Model used to turn speech into text when set. | whisper-1 |
Change Agent Prompt so the assistant speaks in your brand voice and only discusses your catalog. Leave model, voice, and transcription values as provided unless your team gives you replacements.
Step 7: Configure Chat Settings and Font Settings
Expand Settings → Chat Settings.
| Field | Description | Default example |
|---|---|---|
| Chat Background Color | Chat background color in Template Builder. | #000000 |
| Chat Text Color | Chat text color in Template Builder. | #FFFFFF |
| Thumbnail Type | Aspect ratio for result thumbnails. Options use an asterisk (for example 16*9). |
16*9 |
| Mobile | Number of display items on phones. | 3 |
| Tablet | Number of display items on tablets. | 4 |
| Desktop | Number of display items on desktop. | 6 |
| OTT (TV) | Number of display items on TV / OTT. | 6 |
The form groups Mobile, Tablet, Desktop, and OTT (TV) under Number of Display Items.
Font Settings include Title, Subtitle, and Chat Text.
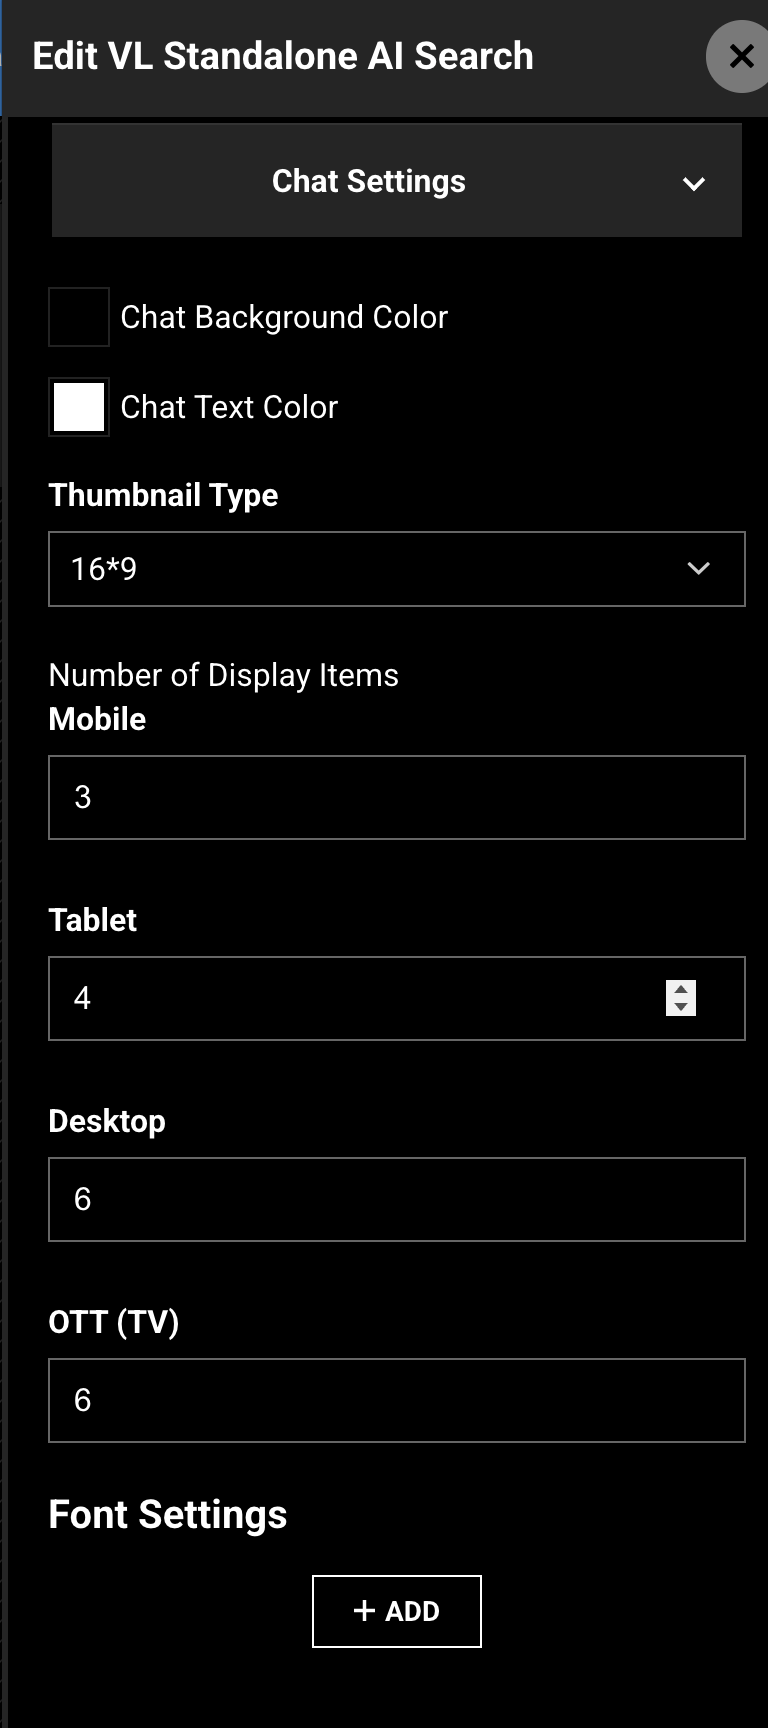
Settings → Chat Settings. Background, text color, thumbnail type, and display-item counts.
Step 8: Enable AI Search in site settings
The page at /ai is only half of the experience. Customers also need the site-level AI Search switch if they should open AI Mode from keyword search.
- In ViewLift Tools, open AppCMS → Settings.
- Open Search.
- Turn on Enable Search if the masthead search icon should appear.
- Turn on Enable AI Search.
- Save the settings.
When Enable AI Search is off, the AI Mode button is hidden on keyword search and customers cannot start AI support from that page.
Step 9: Save and publish the AI Search page
- Save the module settings.
- Review the page layout once more.
- Publish the AI Search page.
Until the page is published, /ai will not show your latest welcome copy.
Changes can take several minutes to appear because of caching. To verify sooner, use a private window, another browser, or clear cookies and cache.
Step 10: How it looks on the website
After publish, open:
https://www.example.com/ai
Or type a term on /search and select Dive Deeper in AI Mode (when Enable AI Search is on).
Welcome screen
When no conversation has started:
- Search Title
- Search Description
- Ask field with Search Input Placeholder
- Microphone control
- Send control
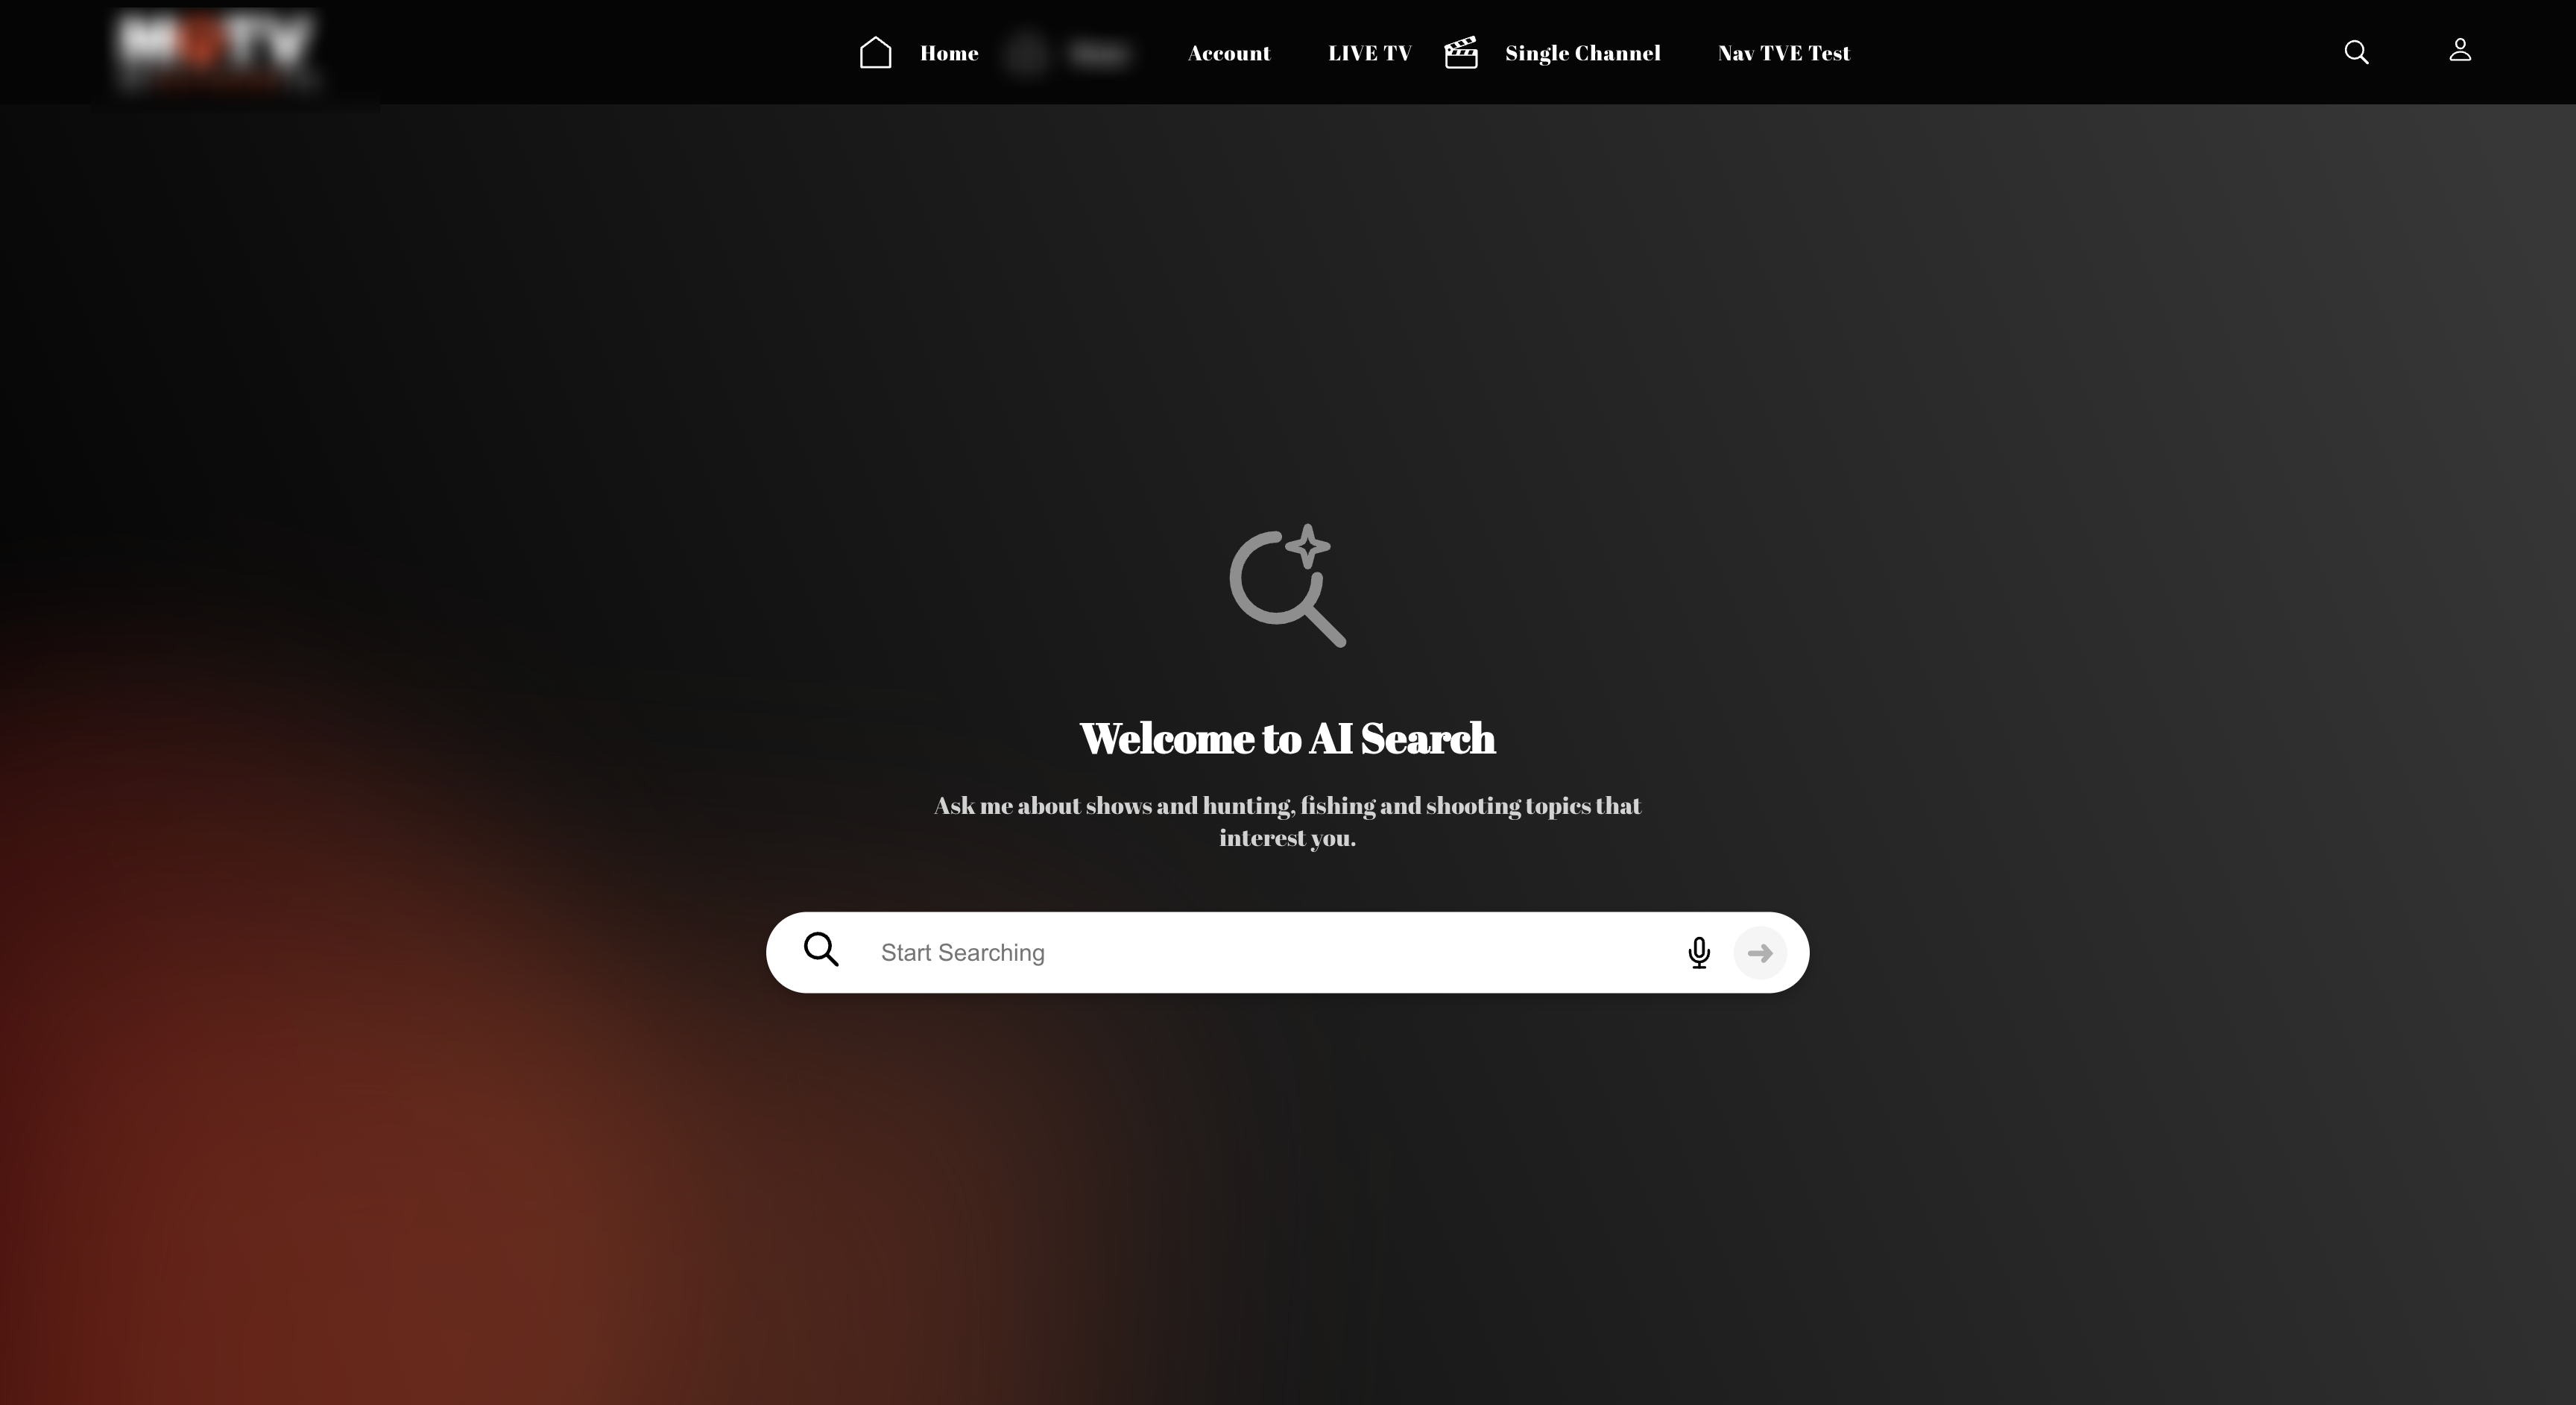
Conversation
After the customer types a question or starts voice:
- Their message in the chat
- The assistant reply
- Matching videos under Search Results, with a count (for example “Search Results (6 videos found)”)
- Each card shows a thumbnail, title, category, and tags. Series items can show Series and the series title
- Selecting a card opens that title
- Speaker control (when voice is active)
- Microphone mute / unmute
- Stop to end the voice session
- The same ask field, still using Search Input Placeholder (if that label is empty, the conversation field can fall back to
Voice is active, just speak or type to search...)
Errors and permissions
- If the page cannot start, customers see an error. The website default is
Oops! Something went wrong. Please try again later. - If the browser blocks the microphone:
Microphone access blocked. Please enable permissions to use voice search.
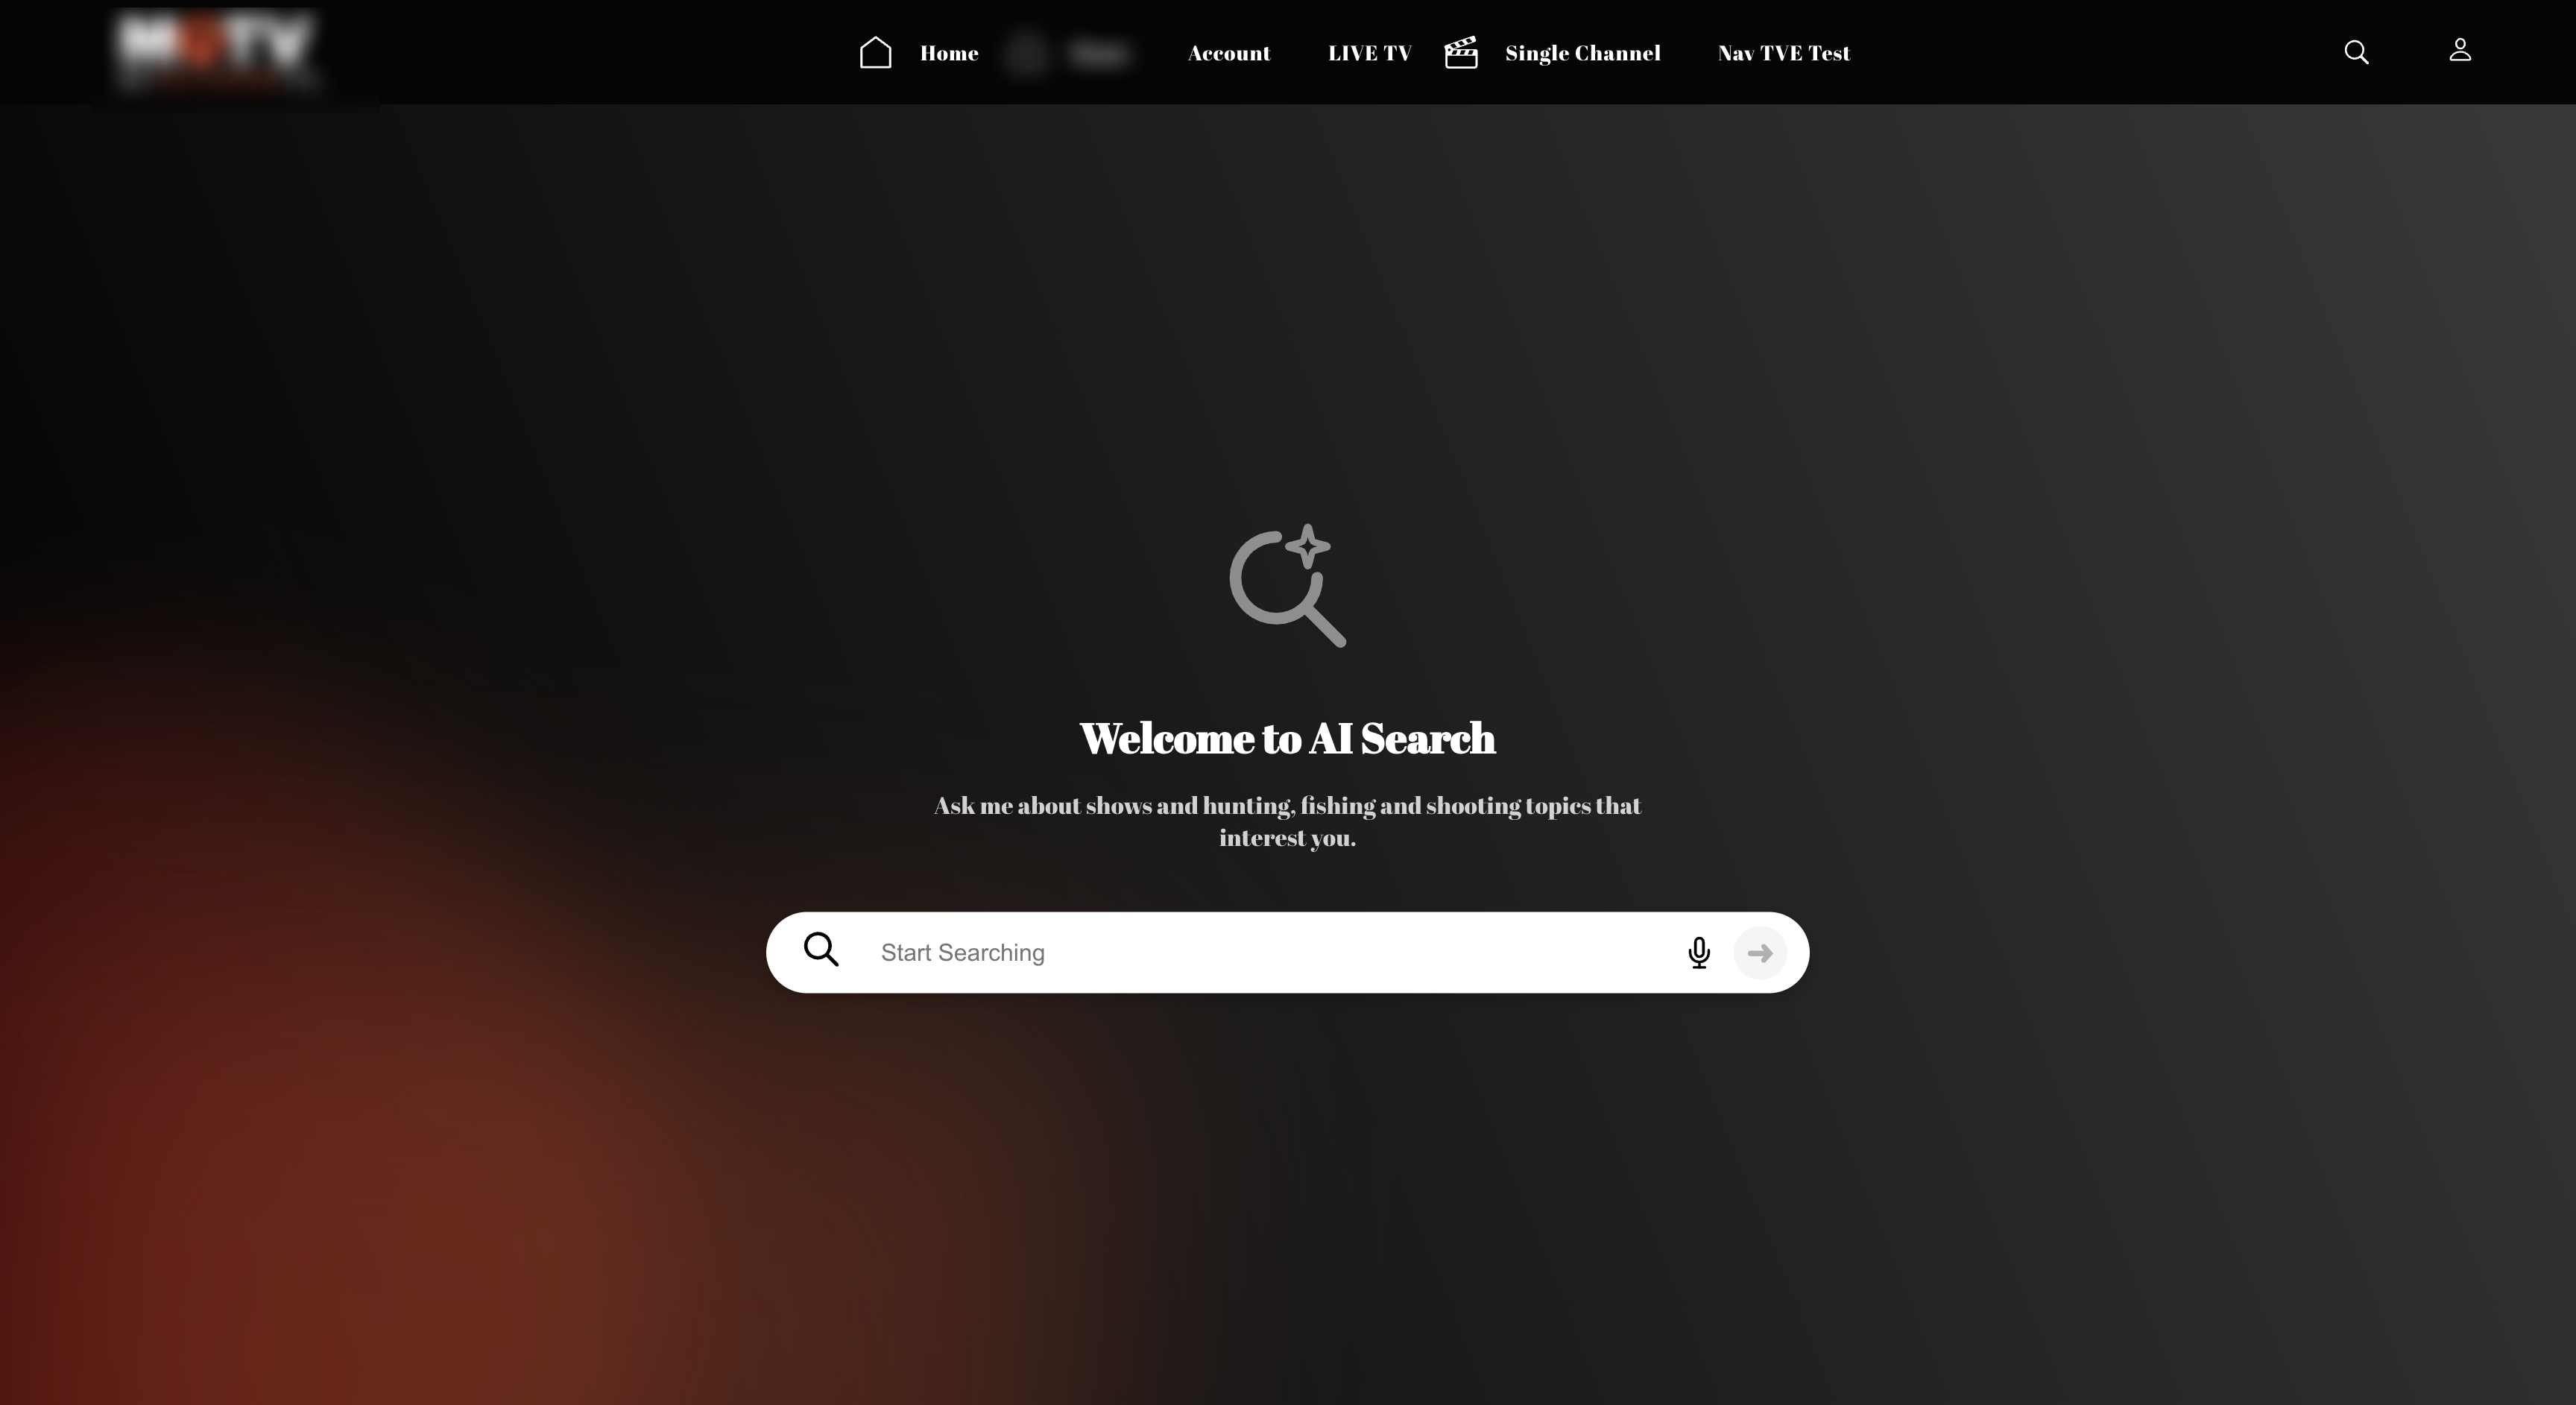
Website /ai welcome screen with title, description, ask field, and microphone.
Verification checklist
- AI Search page exists as a System Screen or Search Screen
- Page path is
/ai - VL Standalone AI Search is on the layout (not VL StandaloneSearch)
- Search Title, Search Description, and Search Input Placeholder match the brand
- Agent Prompt matches the catalog and language you want
- AppCMS Search has Enable AI Search on
- AppCMS Search has Enable Search on if the header search icon is required
- Page is published
/aishows the welcome title and description- Typing a question starts a conversation
- Matching titles appear as video cards and open the correct page
- Dive Deeper in AI Mode appears on
/searchwhen AI Search is enabled - Blocking the microphone shows the permission message
- Stop ends the voice session
Troubleshooting
| Problem | What to check |
|---|---|
| VL Standalone AI Search is not in the picker | Page type must be System Screen or Search Screen. Do not confuse it with VL StandaloneSearch. |
| Page path is wrong | Set path to /ai. Keyword search uses /search. |
| No Dive Deeper in AI Mode on keyword search | Turn on Enable AI Search under AppCMS → Settings → Search. Publish /search as well. |
/ai shows an error instead of the welcome screen |
Publish the page, allow cache to clear, and try again in a private window. The default error is Oops! Something went wrong. Please try again later. |
| Welcome copy does not change | Save Search Title / Search Description, publish, and confirm you edited the correct language. |
| Voice does not start | Allow microphone access in the browser. If it stays blocked, customers see the permission message. |
| Customer expected keyword trays, not a chat | That is VL StandaloneSearch at /search. |
| Assistant talks about the wrong topics | Update Agent Prompt to your brand and catalog, then publish. |
Best Practices
- Use
/aifor this module and/searchfor keyword search. - Rewrite the default description so it matches your catalog, not the sample hunting and fishing line.
- Turn on Enable AI Search when you want the AI Mode button on keyword search.
- Keep Agent Prompt short and on-brand.
- Test type, voice, blocked microphone, and a title with no match before launch.
- Localize title, description, and placeholder when the site has multiple live languages.
- Publish after every meaningful change.
FAQs
Q. What page type should I use?
System Screen or Search Screen. Set the path to /ai.
Q. What is the module name in the picker?
VL Standalone AI Search (this is the Template Builder caption for VL Standalone AI Search 01).
Q. How is this different from VL StandaloneSearch?
VL StandaloneSearch is keyword search with recent history and result trays at /search. This module is a conversational / voice experience at /ai.
Q. Why don’t I see Dive Deeper in AI Mode?
That button appears on keyword search when Enable AI Search is on in AppCMS Search settings.
Q. Do customers have to start from /search?
No. They can open /ai directly. Starting from keyword search can carry the typed term into AI Mode.
Q. Where do I turn AI Search on for the site?
ViewLift Tools → AppCMS → Settings → Search → Enable AI Search.
Important Information
- Search the picker for VL Standalone AI Search.
- Place the module on a System Screen or Search Screen at
/ai. - Turn on Enable AI Search in AppCMS Search settings if customers should open AI Mode from keyword search.
- Create the page, add the module, configure copy and Dev Config, then publish.
- Cache can delay frontend updates by several minutes.
Glossary
| Term | Definition |
|---|---|
| VL Standalone AI Search | System module for the conversational /ai page. |
| AI Mode | The conversational search experience opened from keyword search or /ai. |
| Enable AI Search | AppCMS Search switch that shows Dive Deeper in AI Mode on keyword search. |
| VL StandaloneSearch | Separate keyword-search module at /search. |
| Dev Config | Template Builder fields for the assistant URL, model, prompt, voice, and transcription. |
Contact Support
If you need help beyond this article, contact the ViewLift support team.
- Email: techsupport@viewlift.com
- Phone (US): +1-800-859-0420
- Phone (UK): +44-203-014-8921
Support hours: B2C requests are handled Monday to Friday. B2B support is available 24/7.