Introduction
VL Link Your Account / Activate Device is a System Screen module in Template Builder. It powers the page where a customer enters a code from a TV or OTT device so that device is linked to their ViewLift account.
On the website, this experience typically lives at /activate. Signed-in customers submit a code, see a success or error message, and are sent to the homepage after a successful activation. Signed-out customers are sent to sign in first, then return to /activate.
This article explains how to create the Activate Device page in Template Builder, configure VL Link Your Account / Activate Device, publish it, and verify the experience on the web.
Purpose
The purpose of this article is to help you:
- Create an Activate Device System Screen in Template Builder
- Add and configure VL Link Your Account / Activate Device
- Edit labels and error messages
- Understand what customers see when they activate a device on the website
- Publish and verify the live Activate Device page
Scope
This article covers:
- Creating a System Screen (or Link Account Page) for device activation in Template Builder
- Adding VL Link Your Account / Activate Device to the page layout
- Module settings: web title and URL options, Localization, and Errors
- How activate-device appears on the website, including sign-in and success/error states
It does not cover:
- VL TVE Activate 01 (TVE device activation at
/tveactivate, including Choose a Provider) - VL TVE 01 (TV provider connect at
/tve) - VL Redeem (gift-card / offer codes at
/redeem) - VL Authentication 01 / VL Authentication 02 as the main sign-in page (except how this page sends unsigned customers to sign in)
- Managing devices after they are linked (Device Management on the account page)
Prerequisites
Before you begin, ensure you have:
- Access to Template Builder for your site
- A test activation code from a TV or OTT device
- Copy ready: web title, subtitle, placeholder, Activate button, success message, invalid-code message, and tooltip
Example used in this article
Throughout the steps below we use an Activate Device page named Activate Device at path/activate. Replace the sample values with your own.
Activate Device flow overview (website)
The flowchart below shows the typical customer journey on the website when VL Link Your Account / Activate Device is published at /activate.
.png)
Notes
- Customers often arrive from a TV or OTT device that displays a code, or from a deep link such as
/activate?code=YOURCODE. - Unsigned customers are sent to Authentication before the form stays on screen. After sign-in they return to
/activate(with the code in the URL when it was stored). - A signed-in customer who opens
/activate?code=YOURCODEcan have that code submitted automatically. - After success, the success message is shown, then the customer is sent to the homepage.
This page links a device to the customer’s account. It does not open a TV provider picker. Provider connect and TVE device activation use VL TVE 01 and VL TVE Activate 01.
Step 1: Open Template Builder
- Log into ViewLift Tools.
- Open AppCMS → Edit Template Builder (or open Template Builder for your site from your usual entry point).
- Confirm you are on the correct site and language (if localization is enabled, use the language selector on the Template Builder home screen before editing page copy).
.png)
Template Builder home. From here you create pages and open System Screens.
Step 2: Create the Activate Device page
The Activate Device page must be a System Screen (or Link Account Page) so that VL Link Your Account / Activate Device is available in the module picker.
- In Template Builder, go to Pages.
- Select + ADD NEW (or Create a New Page).
- Enter New Page Name:
Activate Device(or your preferred name). - In New Page Type * Developers Only, select System Screen (or Link Account Page).
- Optionally set Target Language (If localized Page) if you are creating a language-specific Activate Device page.
- Select CREATE.
Set the page path
- On Page Settings, set the page path to
/activate(recommended). - Confirm the page type is System Screen or Link Account Page.
- Save page settings if prompted.
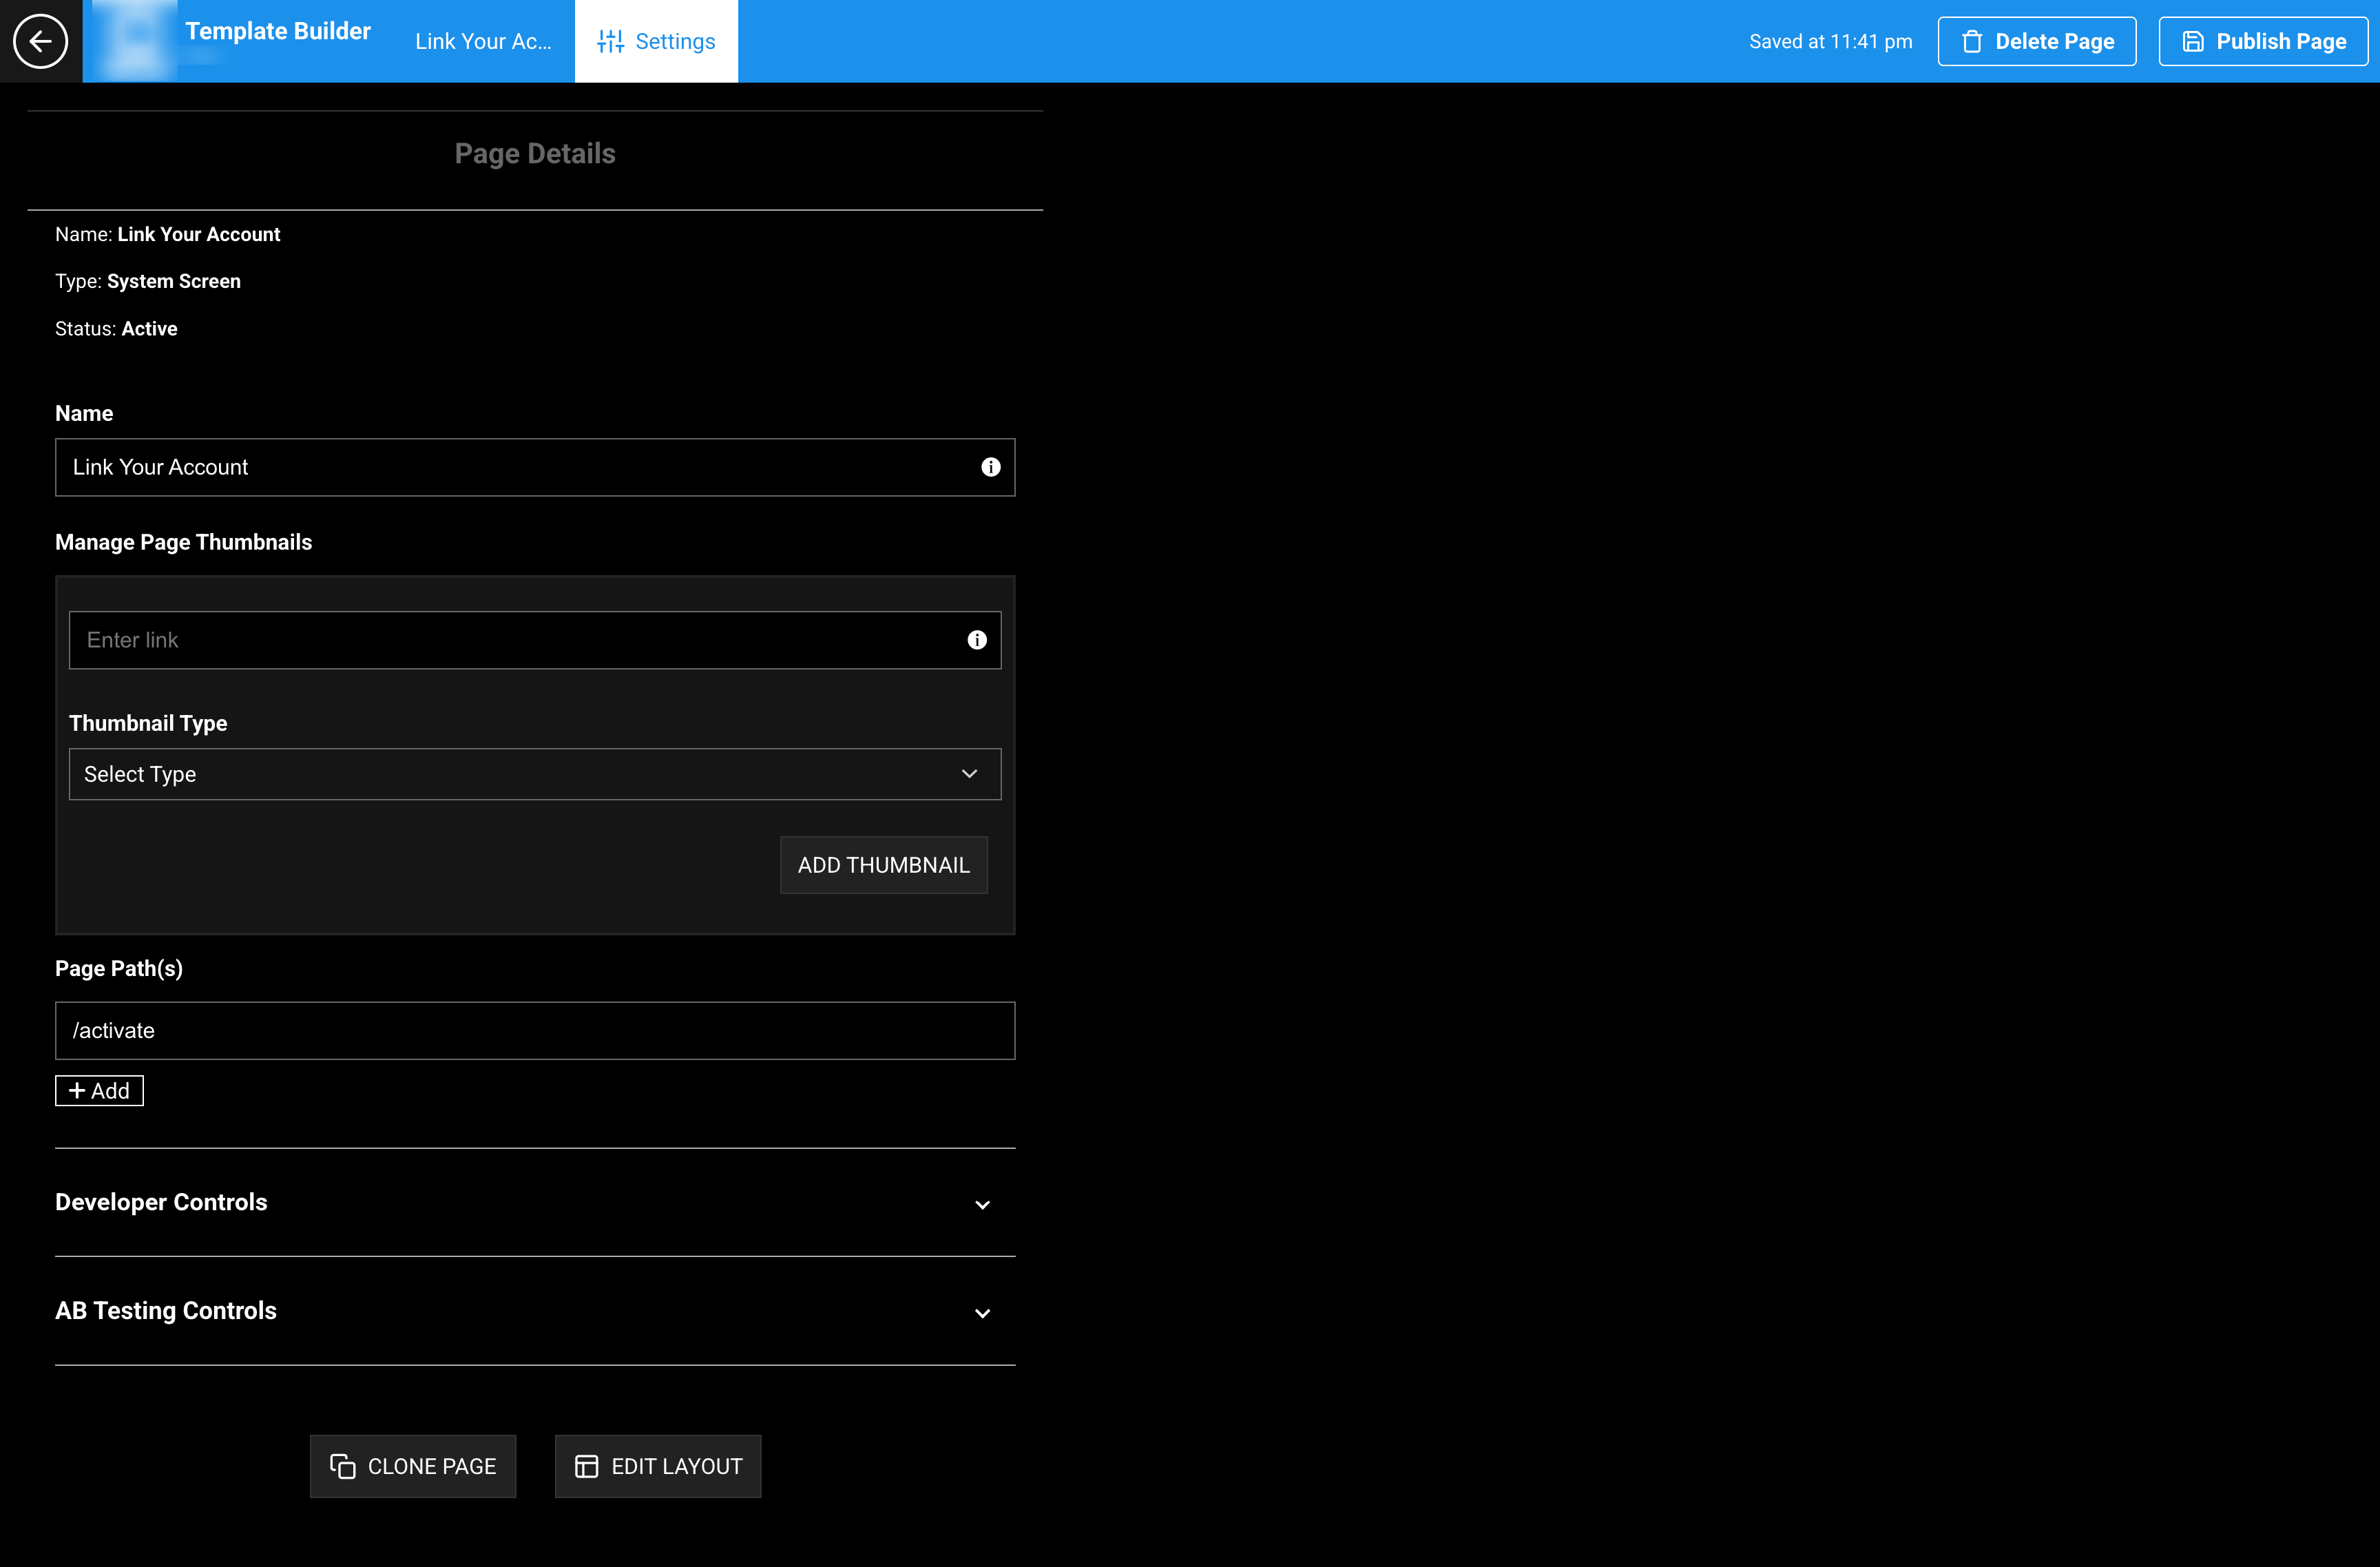
Page Settings. Set the path to /activate so TV device links and post-login return URLs resolve correctly.
Tip: Keep
/activateconsistent. Deep links can include a code, for example/activate?code=YOURCODE. TVE device activation uses a different page (/tveactivate) with VL TVE Activate 01.
Step 3: Add the module to the layout
- Open the Activate Device page.
- Select Edit Layout.
- Select Add a New Module.
- Because the page is a System Screen (or Link Account Page), the picker shows system modules.
- Search for or select VL Link Your Account / Activate Device.
- Insert the module into the page layout.
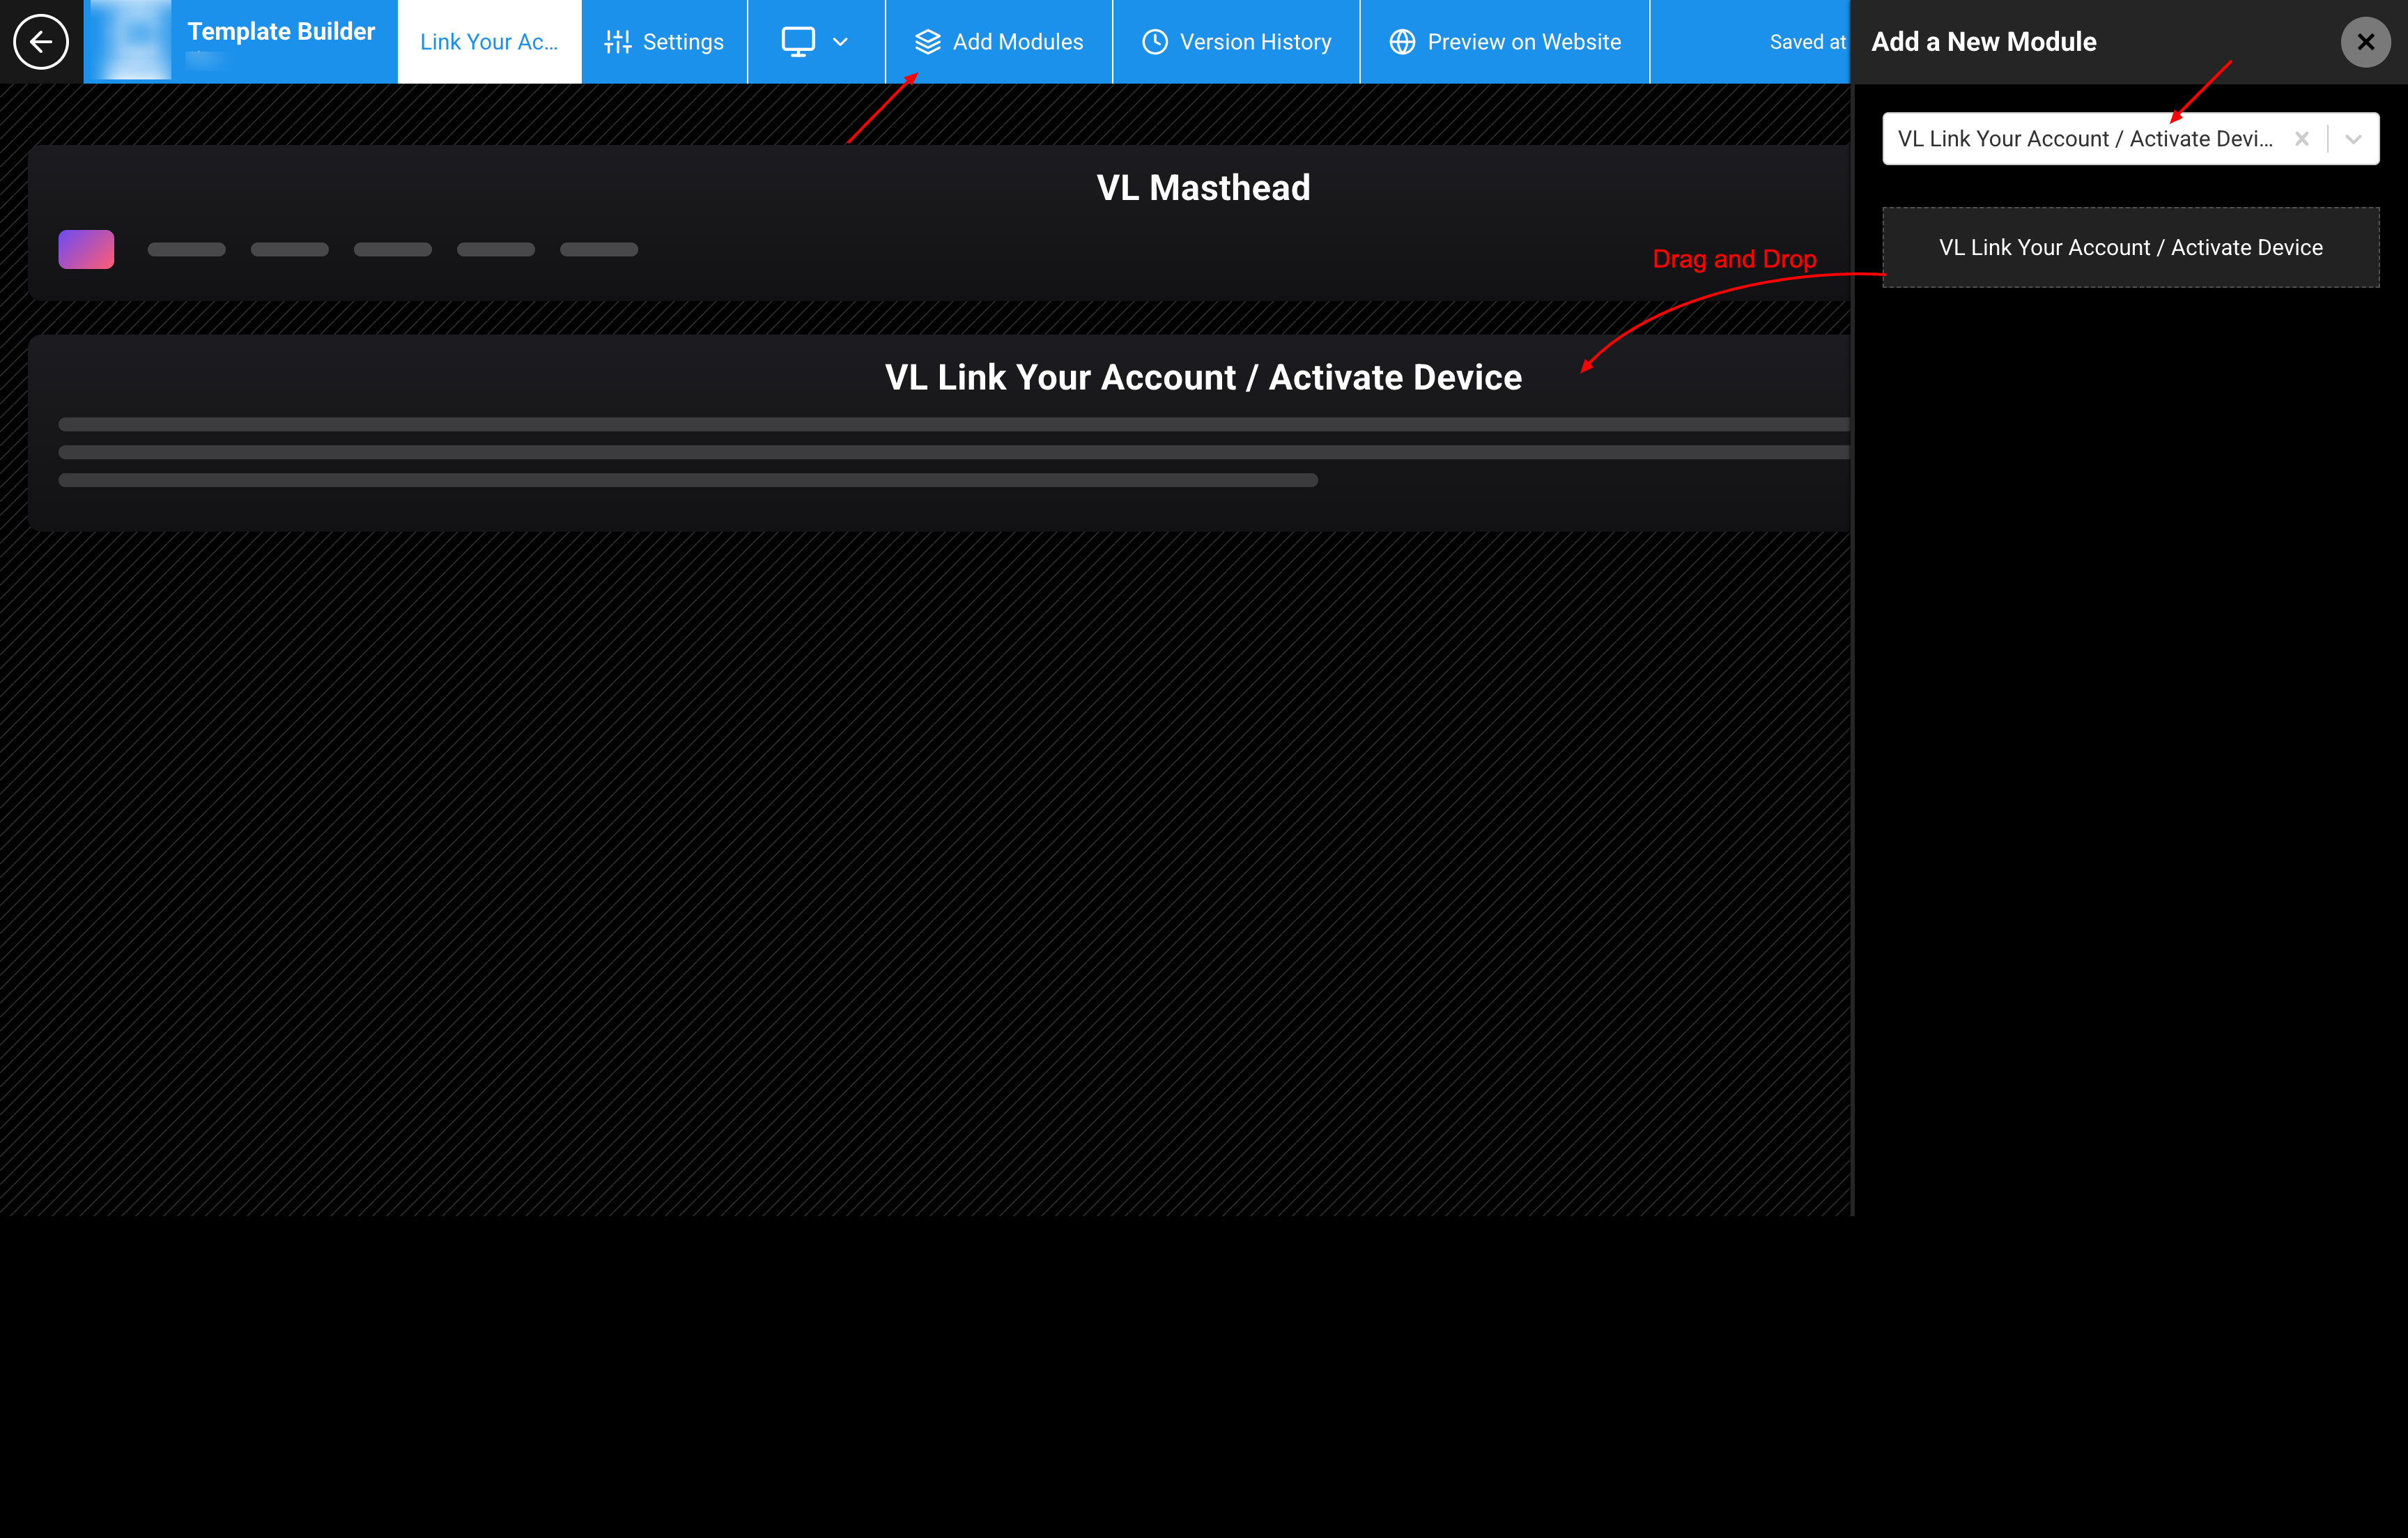
Edit Layout → Add a New Module. Search for and insert VL Link Your Account / Activate Device.
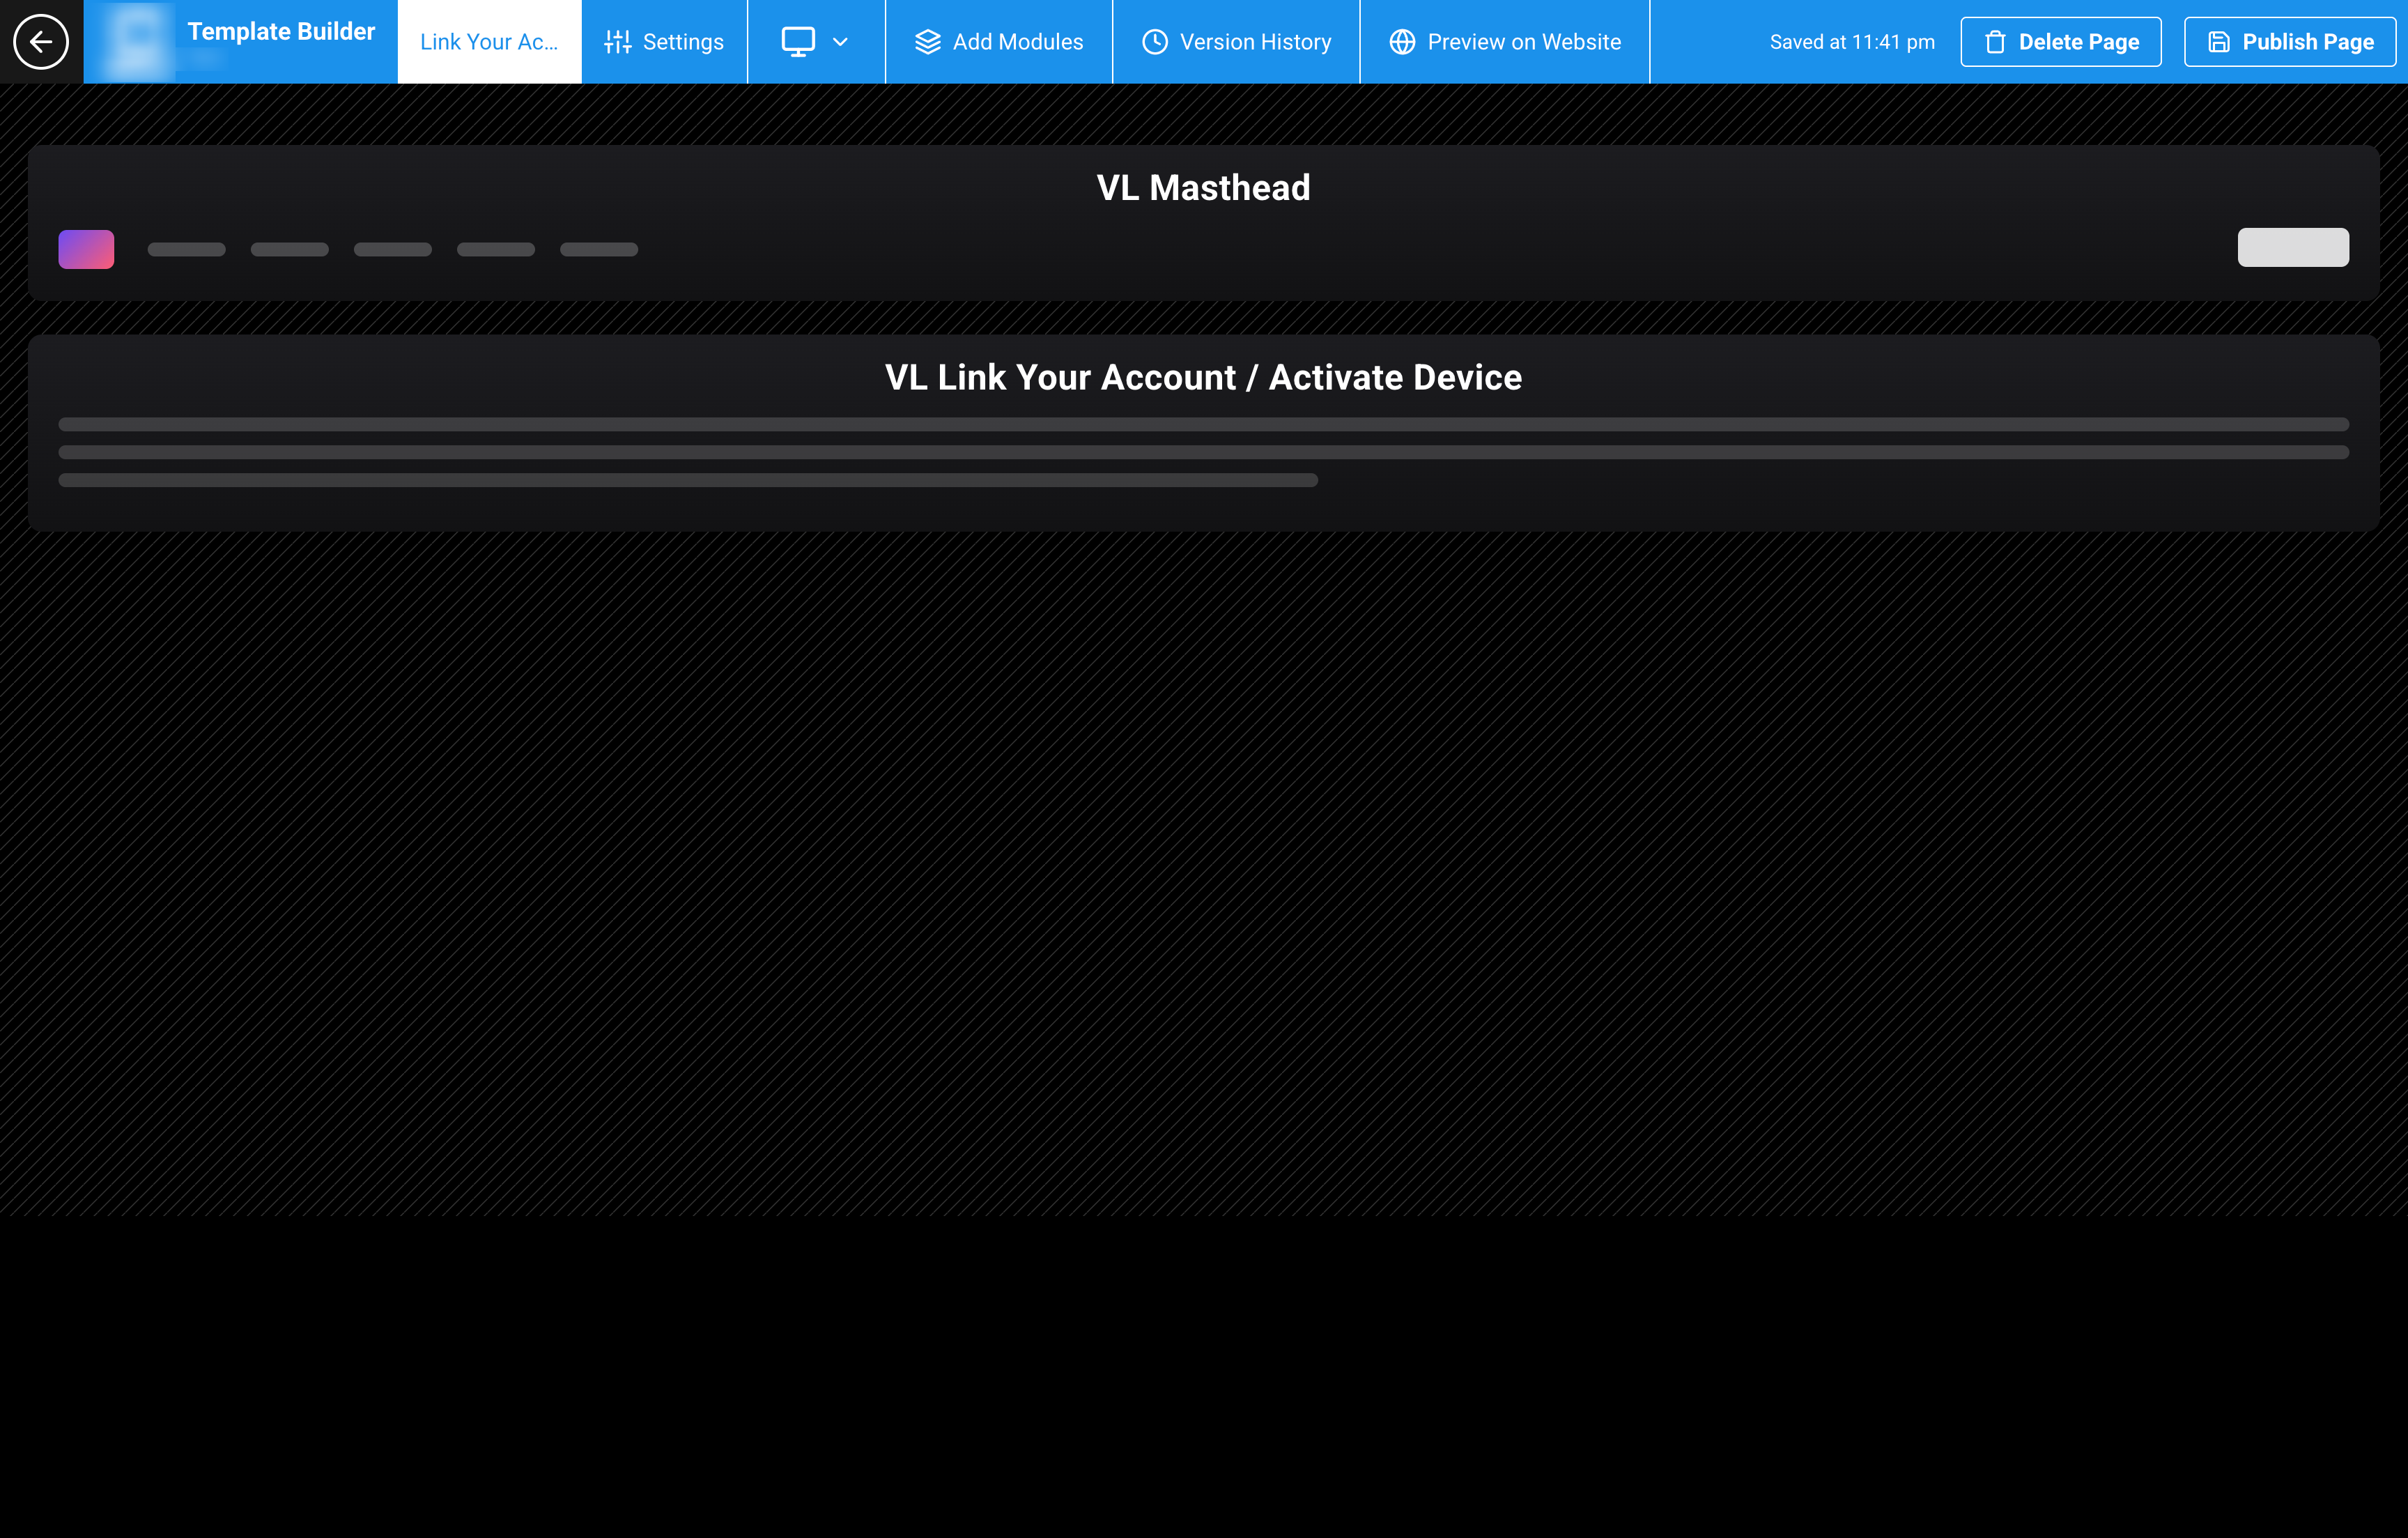
Activate Device layout with VL Link Your Account / Activate Device placed on the page.
System Screens typically use a single primary system module. Avoid stacking unrelated content trays on this page.
Step 4: Configure activation options
Open the module settings. These fields sit above Localization.
| Field | Description | Default example |
|---|---|---|
| Activate Device (Web) title | Headline on the website form. | Activate Device |
| Activate Device (Web) subTitle | Supporting line under the headline. | Have activation code? Enter it below to enjoy content today! |
| Activate Device Url | Device activation URL you can store on the module. | (empty) |
| Page URL | Optional page URL stored on the module. | (empty) |
| Toggle QR Image | Show or hide the QR image on device screens that use a QR option. | Off |
| Use Gigya | Gigya option for sites that use that sign-in setup. | Off |

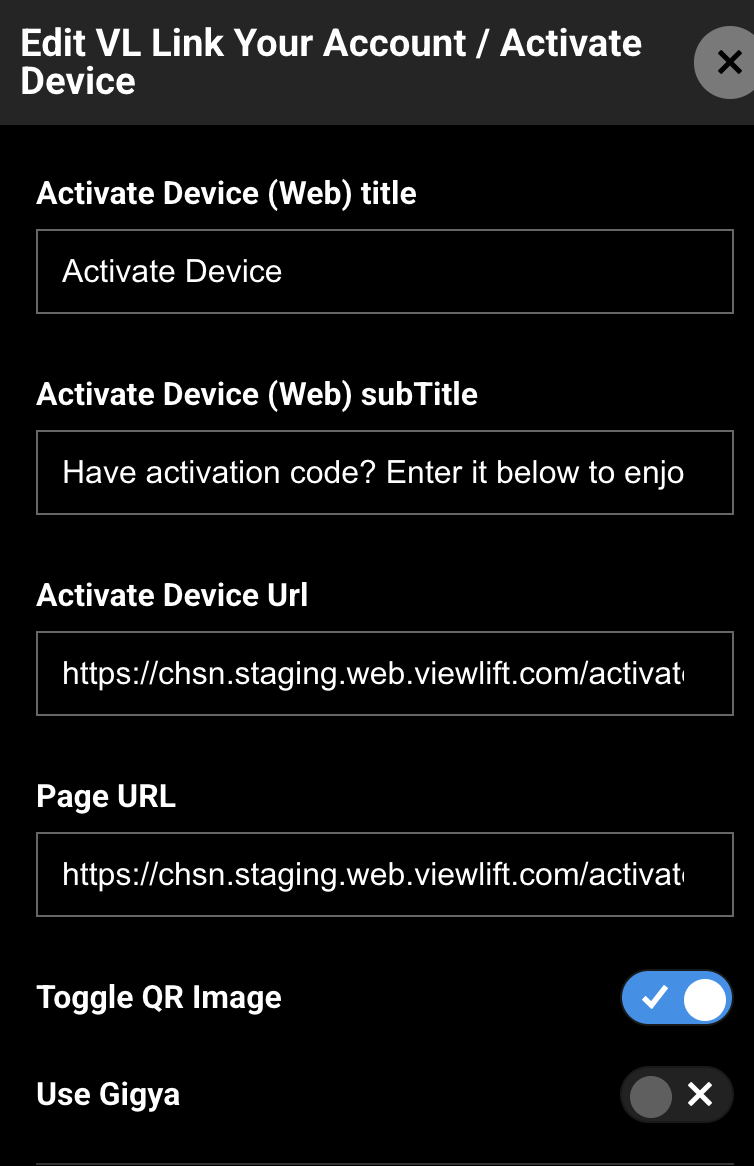
Activate Device (Web) title and subTitle, URL fields, Toggle QR Image, and Use Gigya.
On the website form, customers see Activate Device (Web) title, Activate Device (Web) subTitle, the code field, tooltip, and Activate. Activate Device Url, Page URL, and Toggle QR Image do not change that web form layout.
Step 5: Configure Localization
The Localization block includes additional titles and device-screen copy.
| Label | What it controls | Default example |
|---|---|---|
| Activate Device Title | Device / activation title. | Activate Device |
| Activation Code Description | Instructions for entering the code on a device screen. | Sign in or create an account, then enter the code: When connected, this page automatically updates. |
| Go To Label | “Go to” prefix used with the activation URL on device screens. | Go to |
| Get New Code CTA | Request a new device code. | Get New Code |
| Option Label | Divider between code entry and QR (for example OR). | OR |
| QR Code Title | QR section heading. | Scan QR code |
| QR Code Description | QR section instructions. | Use your camera app or QR code reader on your mobile device.Make sure the QR code is clearly visible on your device’s screen. When connected, this page automatically updates. |
| Device Code Fetch Error | When a new device code cannot be loaded. | Error in fetching code. Please try again later. |
| Input Box Placeholder Text | Placeholder in the code field. | Enter Code |
| Processing Text | Overlay text while the request is in progress. | Processing |
| Activation Success Message Text | Message after a successful activation. | (empty — the website uses Device has been Activated! if this is blank) |
| Activate | Submit button on the web form. | Activate |
| Case Sensitive Tooltip Text | Tooltip next to the code field. | This code is case sensitive |
The website form uses Activate Device (Web) title, Activate Device (Web) subTitle, Input Box Placeholder Text, Processing Text, Activation Success Message Text, Activate, and Case Sensitive Tooltip Text. Device-oriented lines (Go To, Get New Code, QR title and description) are for activation screens that show those elements.
Step 6: Configure Errors
Expand Errors.
| Label | When it is used | Default example |
|---|---|---|
| Not Valid Activation Code | The website shows this when activation fails (invalid or rejected code). | This code is not valid |
| Default error | General processing failure. | There was an error processing your request. |
| Device Limit Exceeded | Too many devices on the subscription. | You have exceeded the maximum number of devices allowed for your subscription. Please log out of one or more devices |
| Cross Country Error | Phone number is not allowed in the customer’s region. | This phone number is not allowed to use in this region |
| SignIn/ SignUp error | No account found for the email. | Sorry, we can't find an account with this email address. Please enter a registered email address and try again. |
| Facebook sign-in failed. | Facebook login failed |
|
| Google sign-in failed. | Google login failed |
|
| Amazon Code Fetch Error | Amazon code could not be loaded. | Error in fetching code from amazon. Please try again later. |
| Amazon Login Error | Amazon account configuration failed. | Error in getting configuration from amazon account. Please try again later. |
| Password Length Error | Password length is outside the allowed range. | Password should be between 5 and 50 characters |
| Incorrect email/password | Email or password is wrong. | Your email or password is not correct. Please try again. |
| Name validation | Name length is invalid. | Name should contain minimum 3 characters & maximum 100 characters |
| Email Not Exist | No user for the email. | Failed to find user with the provided email. |
| Email Already Linked | Email is already linked to another account. | This email address is already linked to an existing account. Please login using the account. |
| Email Verification Failed | Email is not valid. | Email address is NOT valid. Please check your email and use the valid one. If you still get this error reach out to customer support. |
| Password Not Valid | Password does not meet length rules. | Password should contain minimum 5 & maximum 50 characters |
| Phone Not Valid | Phone number format is invalid. | Phone Number is Not Valid. Please Enter a Valid Phone Number |
| Phone Already Linked | Phone is already linked to another account. | This Phone Number is Already Linked to an Existing Account. |
| Verify OTP Failed | OTP is incorrect. | OTP IS NOT CORRECT. PLEASE ENTER THE CORRECT OTP |
| Send OTP Failed | OTP could not be sent. | Sending OTP to your Number has failed. Please try again using a different number |
| Phone Not Linked | Phone is not linked to an account. | This Phone Number is not Linked to any account |
| Invalid Request Params | Request could not be processed. | Error Processing Request |
On the website activation form, a failed submit uses Not Valid Activation Code. Sign-in during activation uses your published Authentication page; keep matching sign-in error copy there as well.
Step 7: Save and publish the Activate Device page
- Save the module settings.
- Review the page layout once more.
- Publish the Activate Device page.
Until the page is published, apps and web will not show your latest Activate Device configuration.
Changes can take several minutes to appear because of caching. To verify sooner, use a private window, another browser, or clear cookies and cache.
Also publish an Authentication page (see VL Authentication 01) at the path your site uses for sign-in (typically /authentication). Unsigned customers who open /activate are sent there first.
Step 8: How it looks on the website
After publish, open your site’s Activate Device URL, for example:
https://www.example.com/activate
Access check
| Condition | What happens |
|---|---|
| Customer is not signed in | Customer is sent to Authentication. After sign-in they return to /activate (with ?code= when a code was stored). |
| Customer is signed in | The activation form is shown. |
Activation form
Signed-in customers usually see:
- Activate Device (Web) title
- Activate Device (Web) subTitle
- Code field with Input Box Placeholder Text
- Tooltip with Case Sensitive Tooltip Text
- Activate
- Processing Text (with a loading overlay) while the code is submitted
- Success or invalid-code text above the form when an attempt finishes
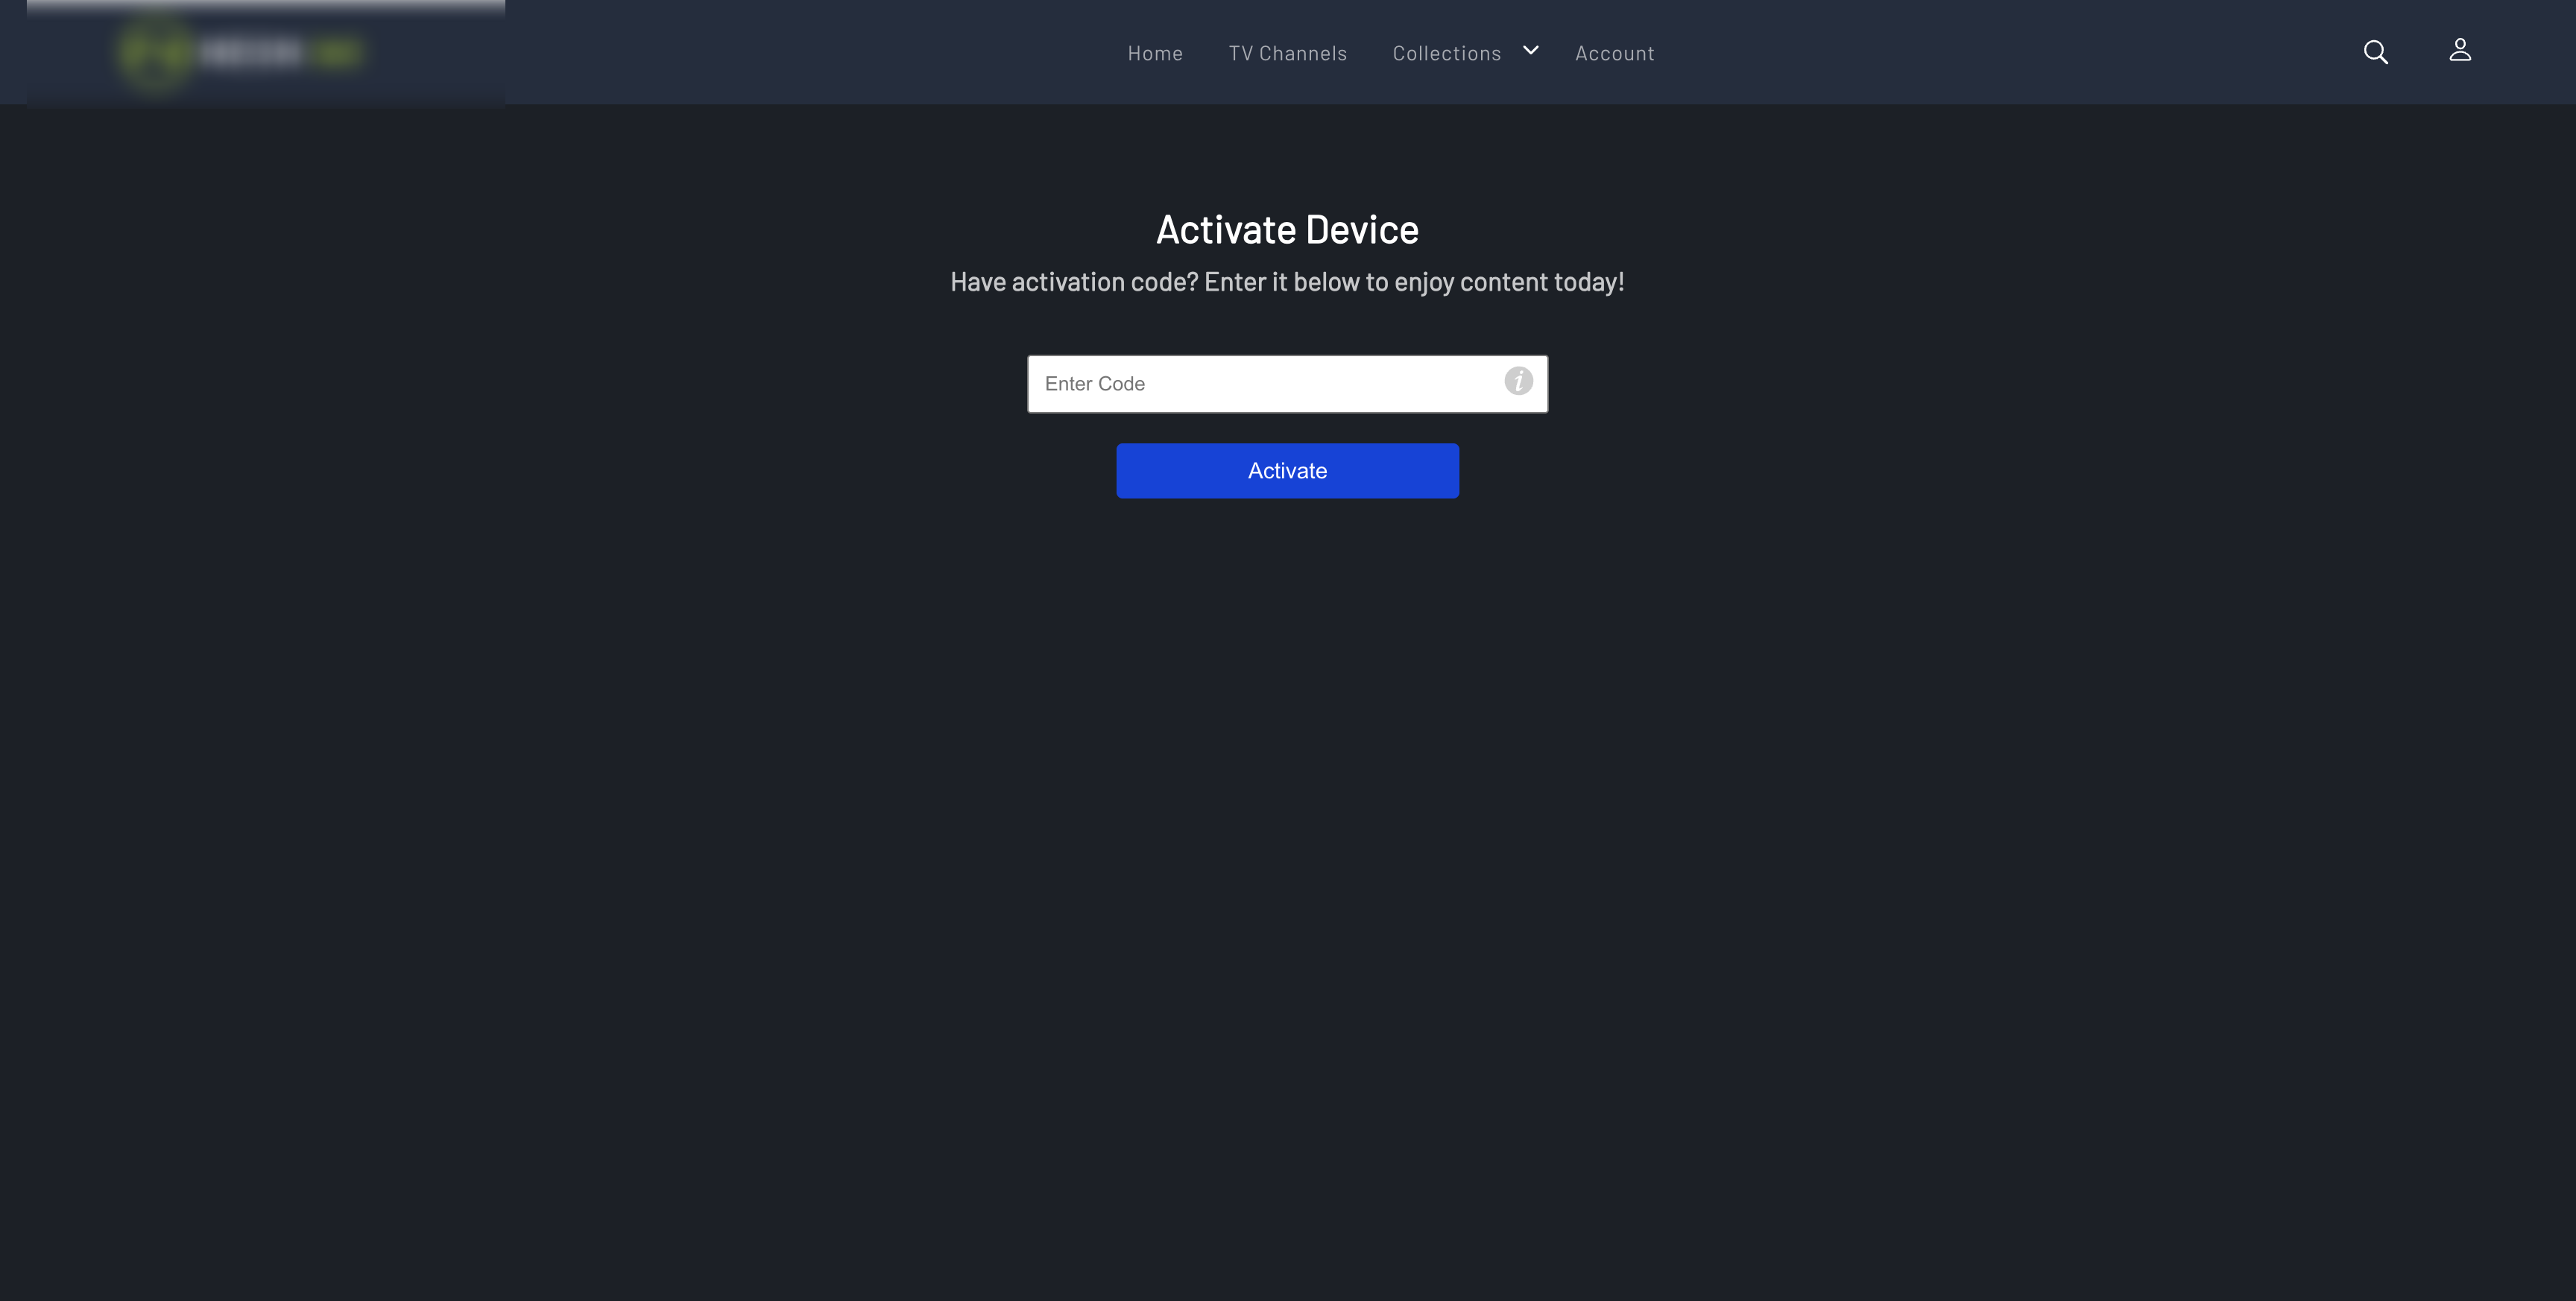
Website /activate form with title, code field, tooltip, and Activate.
Signed-out customer
- Opening
/activatesends the customer to Authentication. - After sign-in they return to
/activate. - If they opened
/activate?code=YOURCODEwhile signed out, the code is stored and included on the return URL.
Signed-in customer
- Enter a code and select Activate, or open
/activate?code=YOURCODEso the code can be submitted automatically. - The page shows Processing Text while the device is linked.
- Activation Success Message Text appears for a successful link (or
Device has been Activated!if that field is empty), then the customer is sent to the homepage. - A failed or invalid code shows Not Valid Activation Code.
Verification checklist
- Activate Device page exists as a System Screen or Link Account Page
- Page path is
/activate - VL Link Your Account / Activate Device is on the layout
- Web title, subtitle, placeholder, Activate, tooltip, and success copy are reviewed
- Not Valid Activation Code is reviewed
- Page is published
- Signed-out customers are sent to Authentication, then back to
/activate - A signed-in customer can activate a valid unused device code and reach home
- An invalid code shows Not Valid Activation Code
/activate?code=prefills / submits the code for a signed-in customer- Authentication at
/authentication(or your site’s sign-in path) is published
Troubleshooting
| Problem | What to check |
|---|---|
| Module is not in the picker | Confirm the page type is System Screen or Link Account Page. Search for VL Link Your Account / Activate Device. |
| Page path is wrong | Open Page Settings and set path to /activate. |
| Customer never sees the form | Unsigned customers are sent to Authentication first. Publish Authentication and complete sign-in. |
| Valid code still fails | Confirm the device code is current and unused. The website shows Not Valid Activation Code for a failed submit. |
| Labels do not change on the site | Save module settings, publish the page, and allow cache to clear. For localization, edit copy in the correct language. |
Success shows then customer stays on /activate |
After success the site sends the customer to the homepage. Allow a few seconds and confirm / is published. |
| Customer expected a TV provider list | That is VL TVE Activate 01 at /tveactivate. This page only links a device to the account. |
| QR or “Go to” copy never appears on the website form | Those Localization fields are for device screens that show QR / URL instructions. The website form is title, subtitle, code, tooltip, and Activate. |
Deep link /activate?code= does nothing |
Signed-in customers can auto-submit that code. Signed-out customers must sign in first; the code is stored for return. |
Best Practices
- Use one Activate Device page at
/activate. - Keep
/activateand/tveactivateas separate pages — account-device link vs TVE device activate. - Publish Authentication so unsigned customers can return to
/activate. - Keep success and invalid-code copy short and easy to scan on TV-adjacent phones.
- Localize title, subtitle, placeholder, Activate, tooltip, success, and Not Valid Activation Code when the site has multiple live languages.
- Test signed-out, signed-in, deep-link code, success, and invalid code before launch.
- Publish after every meaningful change — draft pages do not update production.
FAQs
Q. What page type should I use?
System Screen (or Link Account Page). Set the path to /activate.
Q. What is the module name in the picker?
VL Link Your Account / Activate Device (this is the Template Builder caption for Activate Device 01).
Q. How is this different from VL TVE Activate 01?
This module links a device to the customer’s account at /activate. VL TVE Activate 01 activates a TVE device at /tveactivate and can show Choose a Provider.
Q. Must the customer be signed in?
Yes, before the website form stays on screen. Unsigned customers are sent to Authentication, then back to /activate.
Q. Can I pass the code in the URL?
Yes. /activate?code=YOURCODE stores and can submit the code for a signed-in customer, or keeps it for after sign-in.
Q. Does this page connect a cable or satellite provider?
No. Use VL TVE 01 (/tve) to connect a provider, or VL TVE Activate 01 (/tveactivate) for TVE device activation.
Q. Does this page take card payment?
No. It links a device to an existing account.
Important Information
- Search the picker for VL Link Your Account / Activate Device.
- Place the module on a System Screen or Link Account Page at
/activate. - The website requires a signed-in customer before the form is shown. Sign-in uses
/authentication. - Success sends the customer to the homepage.
- Codes are case sensitive (tooltip copy is configurable).
- This is not the TVE activate page (
/tveactivate). - Create the page, add the module, configure copy, then publish.
- Cache can delay frontend updates by several minutes.
Glossary
| Term | Definition |
|---|---|
| VL Link Your Account / Activate Device | System module for entering a TV / OTT device code to link that device to an account. |
| System Screen | Template Builder page type used for activate device, sign-in, TVE, and other system flows. |
| Link Account Page | Alternate page type that also lists system modules, including this one. |
| Activation code | Code shown on a TV or OTT device and entered on /activate. |
| VL TVE Activate 01 | Separate module for TVE device activation at /tveactivate. |
Contact Support
If you need help beyond this article, contact the ViewLift support team.
- Email: techsupport@viewlift.com
- Phone (US): +1-800-859-0420
- Phone (UK): +44-203-014-8921
Support hours: B2C requests are handled Monday to Friday. B2B support is available 24/7.