1. Overview
This user guide provides comprehensive instructions for adding or updating the Notification Popup Image in the AppCMS. It covers all necessary steps to ensure the notification image is configured correctly for optimal user engagement.
2. Prerequisites
Before you begin, ensure you have:
User Access: Necessary permissions to modify settings in AppCMS.
Basic Navigation Skills: Familiarity with the AppCMS interface.
Image URL: The URL of the image intended for use as a notification popup.
3. Introduction
Notification popup images play a crucial role in enhancing user engagement by providing visually appealing alerts within your application. This guide will walk you through the steps to effectively add or update the notification popup image.
4. Accessing the Tools
4.1 Logging into the Tools
Open your preferred web browser.
Navigate to the tools login page.
Enter your username and password.
Click Login to access your dashboard.
5. Navigating to Notification Popup Settings
5.1 Accessing AppCMS
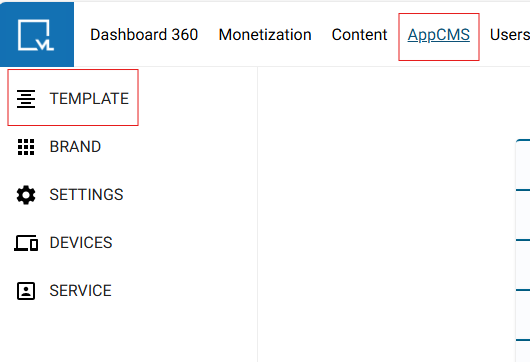
From the main dashboard, click on Tools in the navigation menu.
Select AppCMS from the dropdown options to enter the content management system.
5.2 Using the Template Builder
In the AppCMS dashboard, click on Template Builder to open the template management interface.

5.3 Adjusting Global Settings
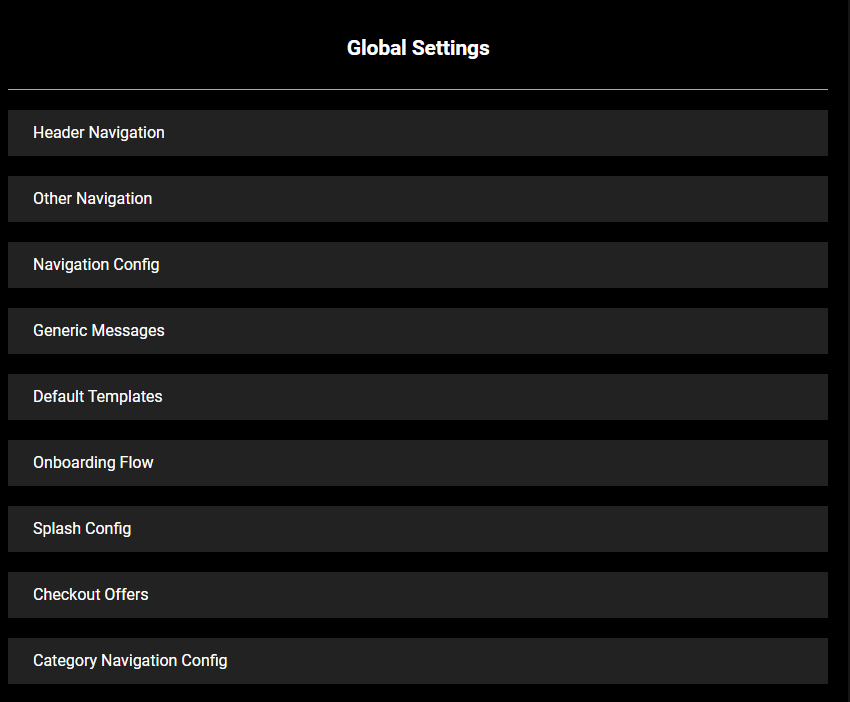
Within the Template Builder, navigate to Global Settings.
Click on Generic Messages to access the message configuration settings.

6. Adding or Updating the Notification Popup Image
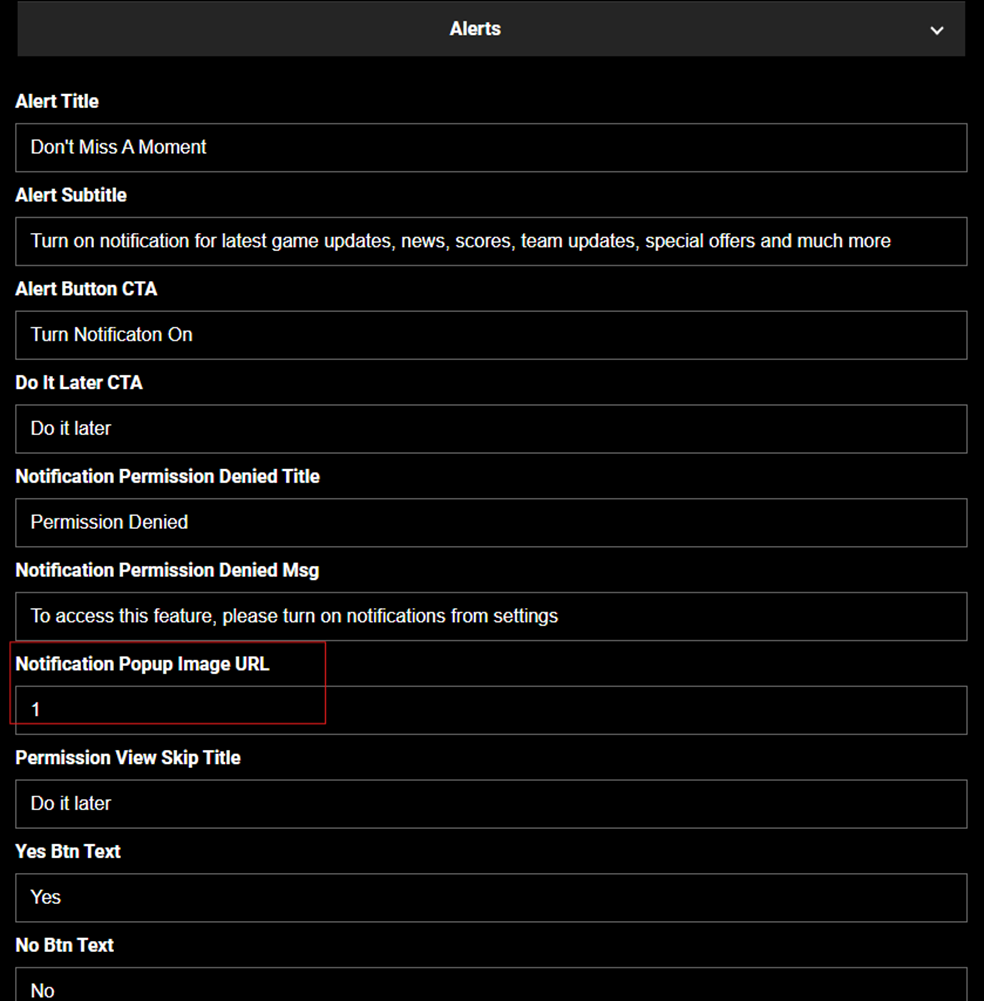
In the Alerts section, find the field labeled Notification Pop-up Image URL.
Enter the desired image URL in this field.

Double-check the URL for accuracy and accessibility.
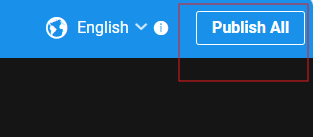
Click Publish All to save the changes.

7. Testing the Notification Popup
After updating the image, trigger a notification within the application to ensure it displays correctly.
Check the appearance on various devices (desktop, tablet, mobile) for consistency.
8. Troubleshooting Common Issues
Image Not Displaying: If the image fails to appear:
Verify that the image URL is correct and publicly accessible.
Ensure that the image format (e.g., JPG, PNG) is supported.
Popup Not Triggering: If the notification popup does not appear:
Confirm that the notification settings are enabled.
Test under various conditions to ensure correct configuration.
9. Best Practices
Image Quality: Use high-resolution images optimized for display to ensure clarity.
URL Verification: Always check that the image URL is valid and hosted on a reliable server.
Regular Testing: Periodically test the notification popup to confirm that it functions properly.
Accessibility Considerations: Ensure the image is suitable for all users, adhering to accessibility guidelines.
10. Contact Support
If you experience any issues or have questions not covered in this guide, please reach out to our support team:
Email: techsupport@viewlift.com
Phone: +1-800-859-0420 (US) or +44-203-014-8921 (UK)
Our support team is available to assist you with any concerns or technical difficulties you may encounter.
FAQ
Q1: What should I do if the image does not display correctly?
A1: Check if the image URL is accurate and accessible.
Q2: How can I test the notification popup after updating the image?
A2: Trigger a notification in the application to see how the new image appears in the popup.