Send notifications from Airship
- 16 Mar 2023
- 5 Minutes to read
- Contributors

- Print
- DarkLight
- PDF
Send notifications from Airship
- Updated on 16 Mar 2023
- 5 Minutes to read
- Contributors
- Print
- DarkLight
- PDF
Article summary
Did you find this summary helpful?
Thank you for your feedback
Airship is a customer engagement platform for mobile apps to help you deliver personalized notifications to users. Airship provides push messaging services and targeting capabilities through user segmentation. We can help you configure Airship with push notifications from your developer account.
Once the SDKs are integrated, your iOS or Android native apps will pass user tags from ViewLift tools to Airship as well as forward event data.
Note
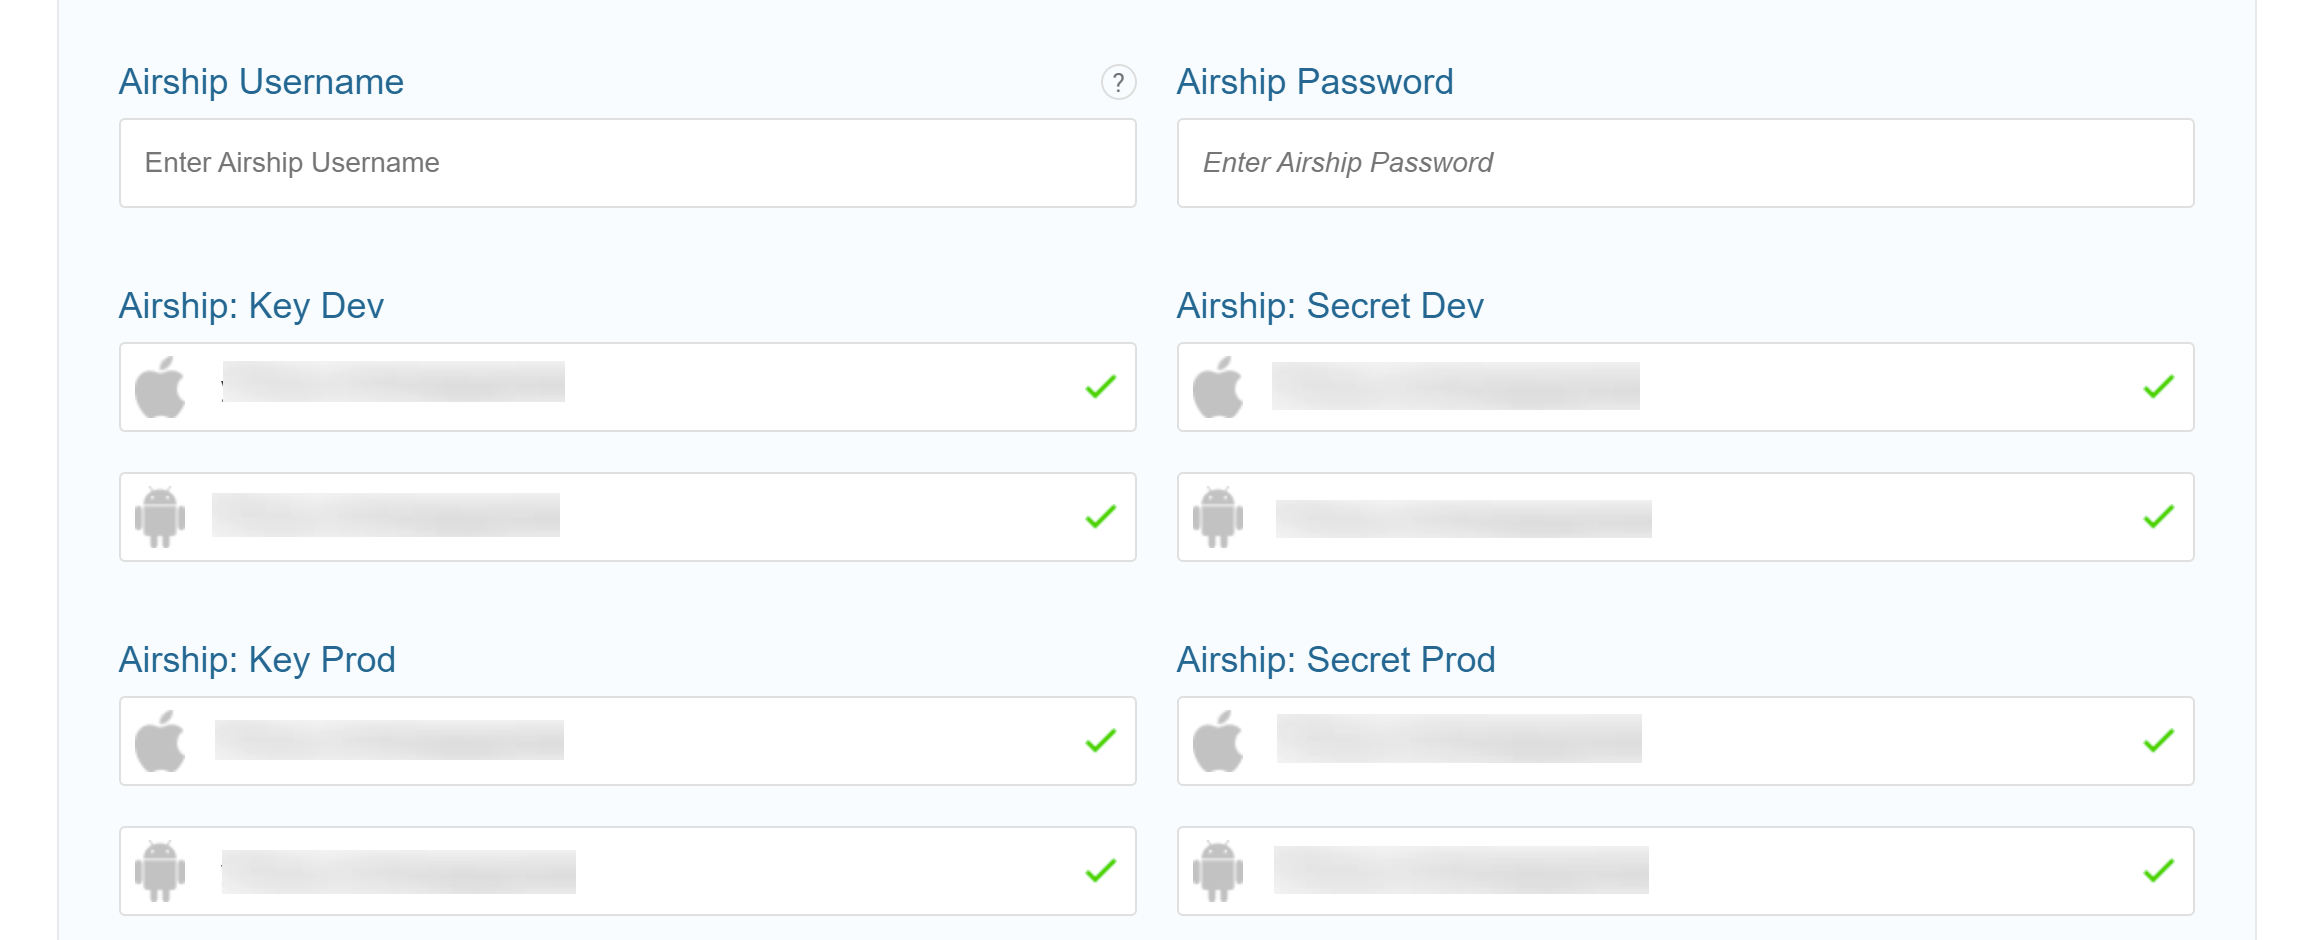
- Before your app is able to send notifications, please configure the Airship keys in the Tools Platform. To do this, go to AppCMS > Settings > NOTIFICATIONS & ENGAGEMENT CHANNELS. In the Airship section, enter your secret key
- Go to advanced settings, and enable the Churn Tag option to pass Churn user events from ViewLift to Airship.

- Airship currently supports notifications only for mobile apps. Web isn't supported.


Create Tag Groups
Tags are metadata that you can associate with channels or named users to help you organize and target your audience. Tag groups categorize your tags.
To create a Tag Group:
- Go to Settings > Project Configuration and click Manage for Tag Groups.
- Click Create Tag Group and enter:
- Name: A friendly name for the tag group that will help you recognize the tag group in other places. Example, User Subscription End date.
- Description: A description of the tag group.
- Group Key: The unique ID for the tag group, and how you will reference the tag group in the ViewLift app SDK. - (Optional) Enable Allow these tags to be set only from your server. This increases security by requiring tag read-write operations to be authenticated with your master secret key.
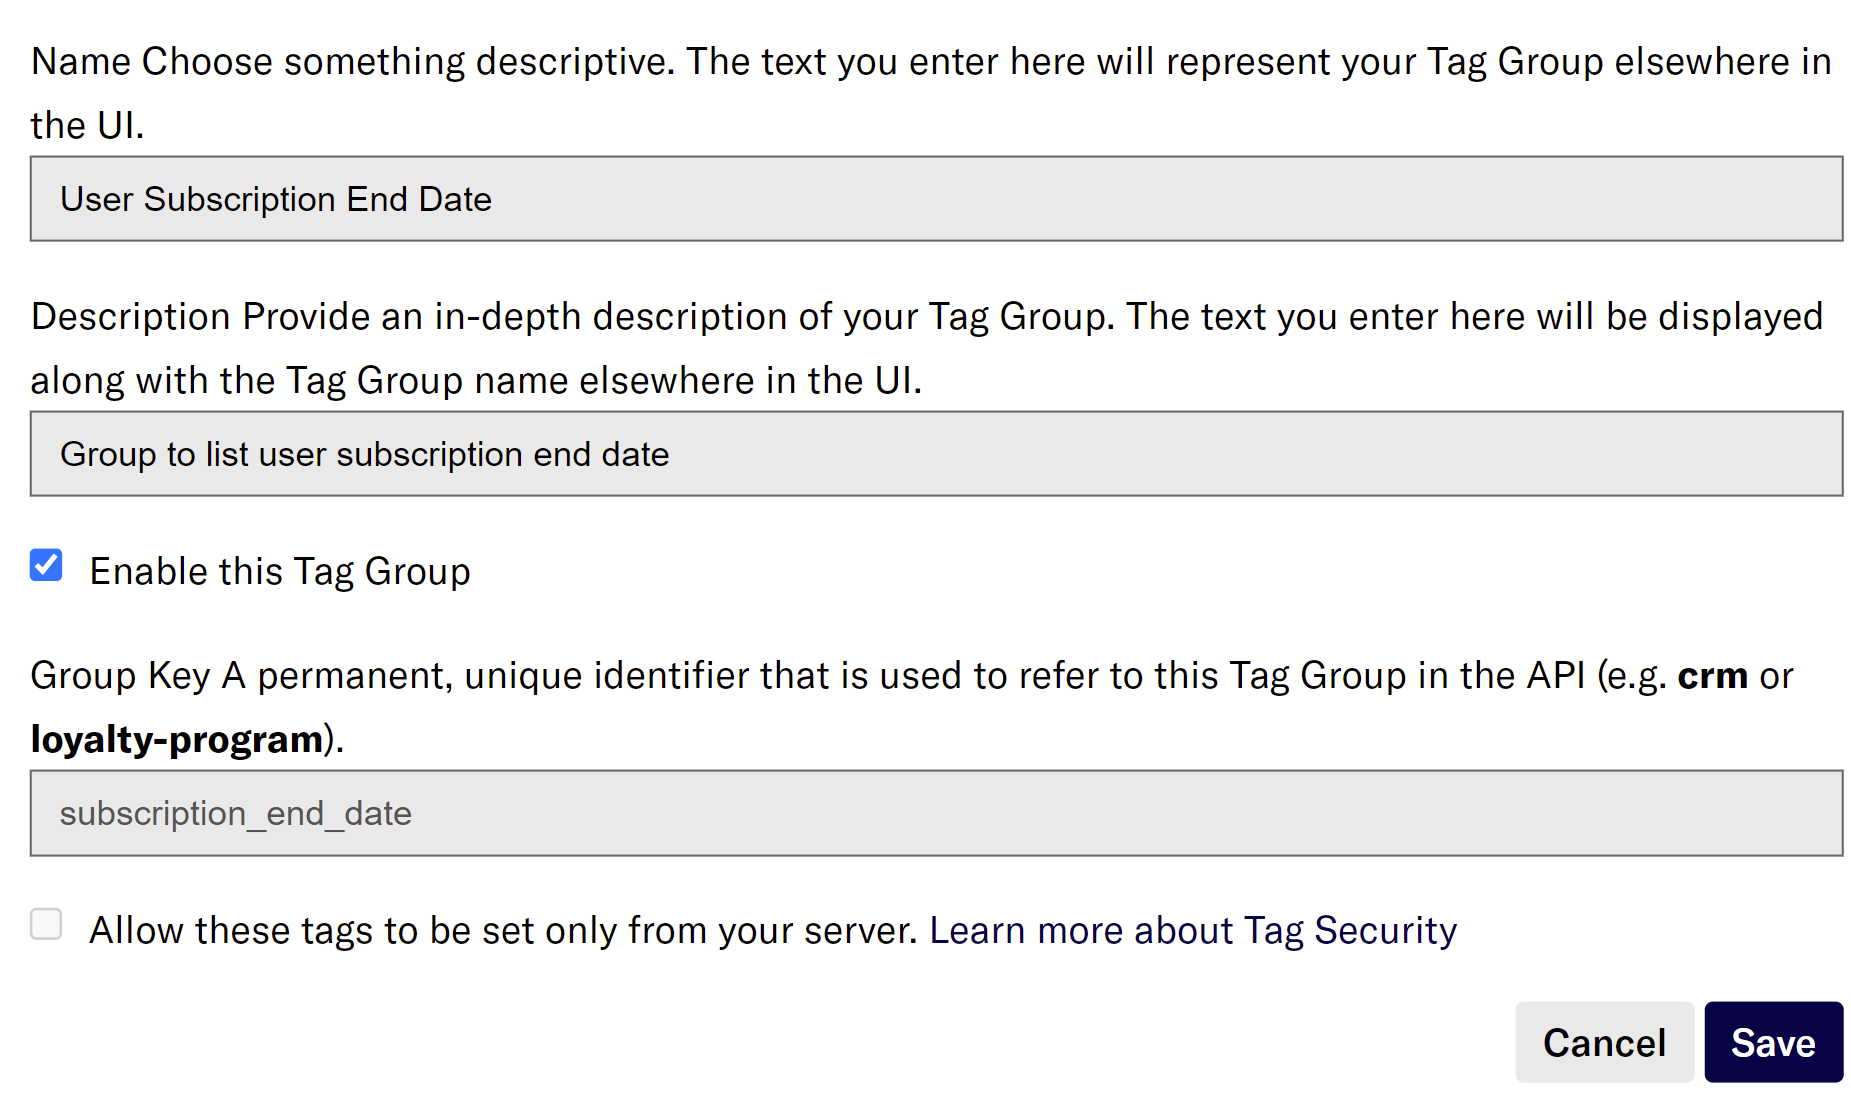 Creating a Tag Group in Urban Airship
 - Click Save.
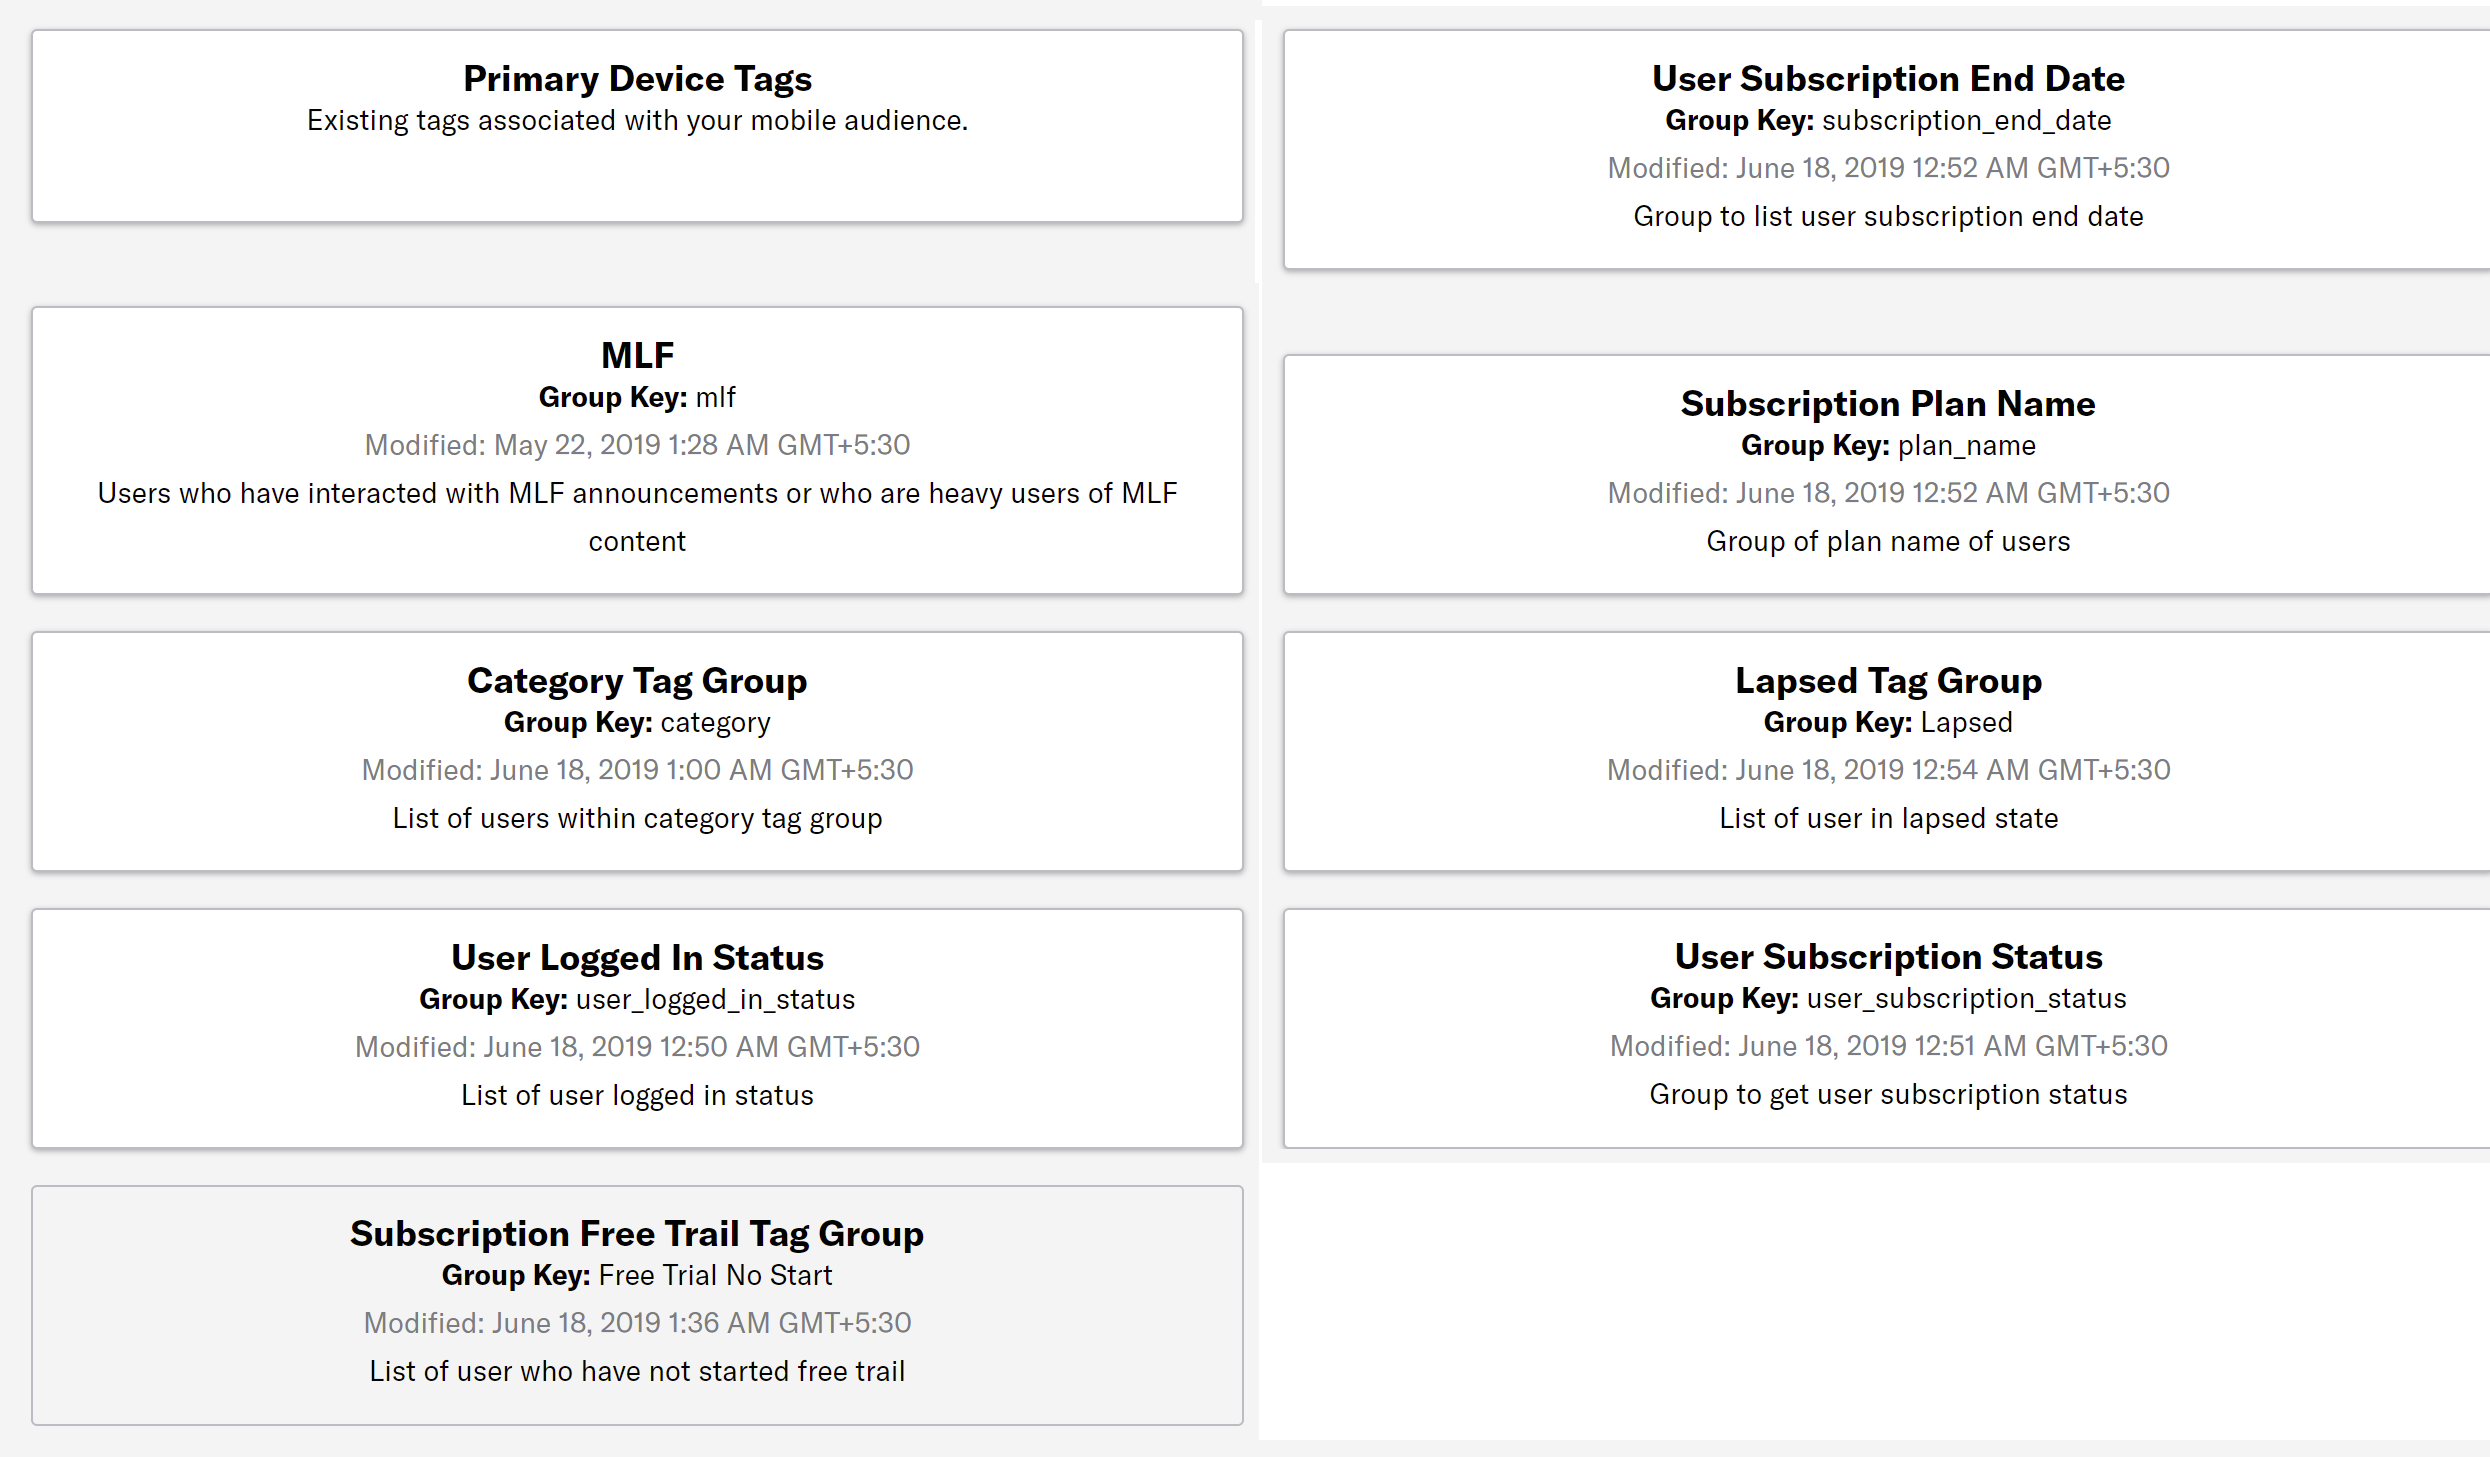 List of Tag Groups you can create with user events and tags


Named users
Enable Named users tag from Settings > Project Configuration, click Manage to add customer's first name in your push notifications. The vl_user_id in ViewLift can be passed to display the names of users in Airship. For more information, see Named users.
Look up users in ViewLift Tools
You can get the GUID of a user in the Tools platform and use it to search for a specific user in Airship.
- In the ViewLift Tools platform, go to the User tab and search for a user you want to verify in Airship.

- From the search results, click the user row to display the user details page.
- From the URL, copy the last part of the URL after "accountNew" as shown in the figure below:

- Place the GUID into Airship by navigating to Audience > Contact Lookup.


Create a Test group
Want to test the integration between app SDKs, Airship, and ViewLift Tools? If you are testing for the first time, a test build and the channel ID (device token ID) are necessary. You can then create a test audience group. To create a test group, go to Audience > Preview and Test Groups > Add user.

.png) Get the device id and paste it into the ID field in Airship
Get the device id and paste it into the ID field in AirshipPlease reach out to ViewLift Support if you want to test out the integration between the ViewLift Tools and Airship. If you want to test any new tags or new event data which you implemented after the initial configuration, you can test it in the live environment with 'real' push notifications.
Airship x ViewLift 5 real-world use cases
1, User (a) receives personalized push notifications to upgrade from monthly to yearly membership.
You can create user segmentation using tag groups and tags that are getting from ViewLift. Create audience segmentation in Airship to categorize monthly users from yearly users. In order to execute this use case and the following, updates to both the app SDKs, Airship SDK, and connection between the two are necessary. Based on that you can consider new custom implementation, ViewLift will engage with the Airship Onboarding team to run through their implementation process.
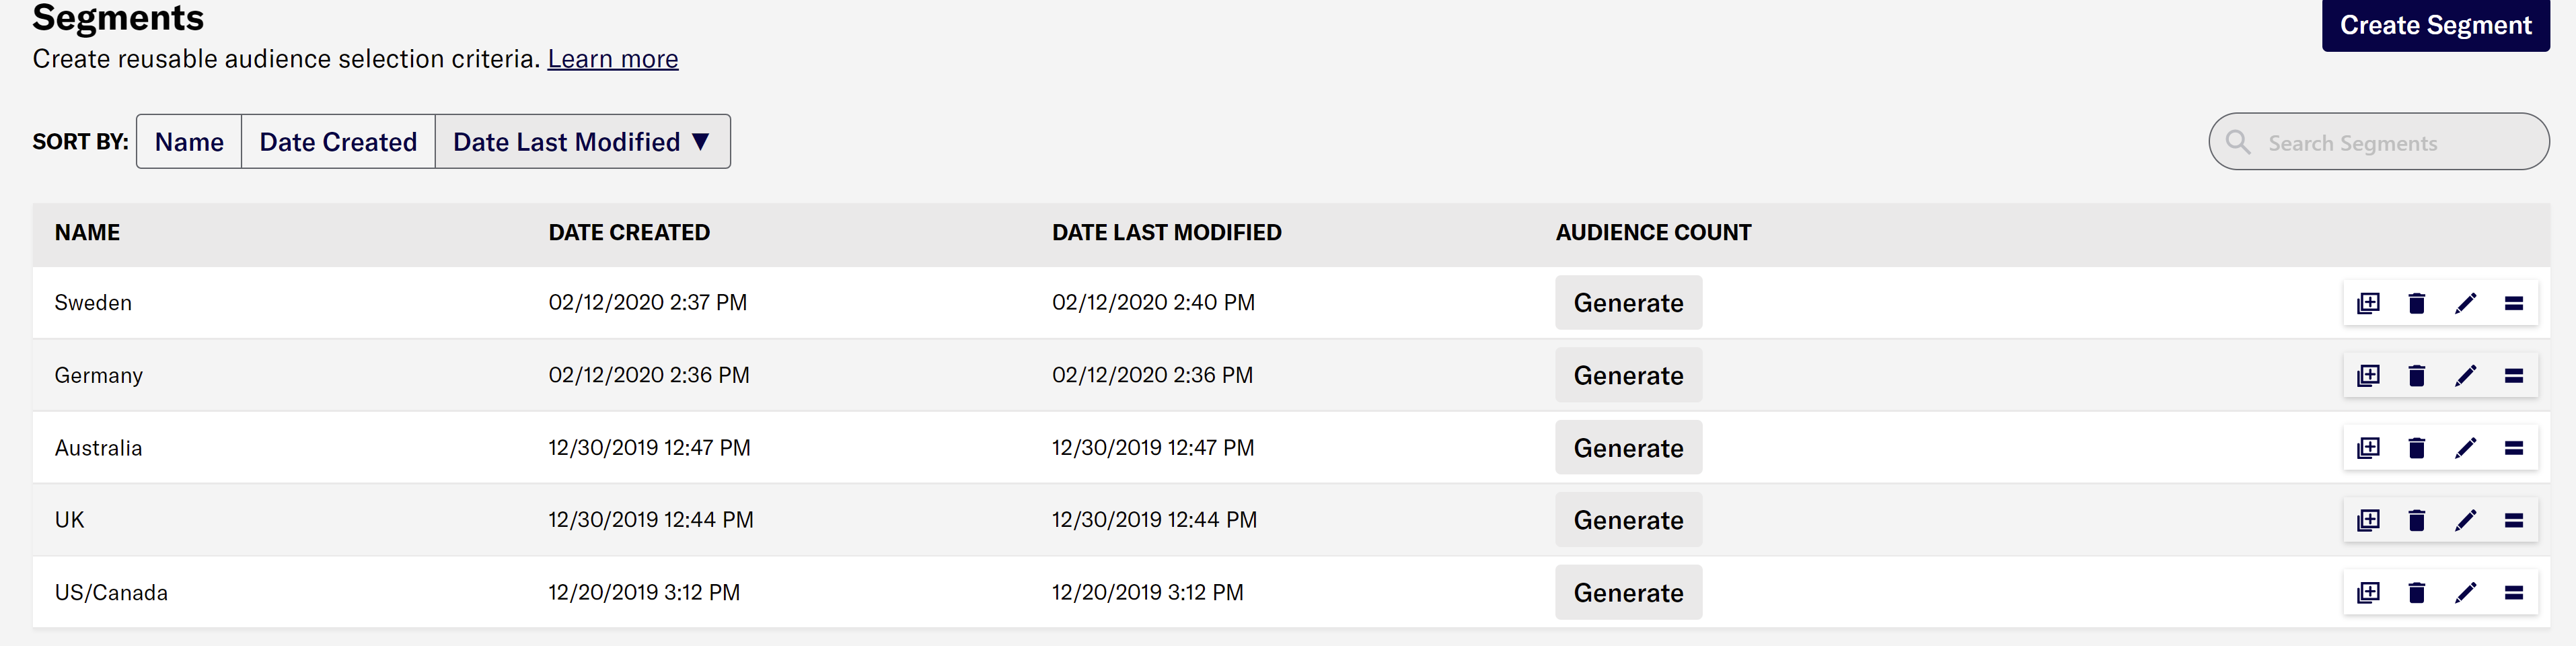
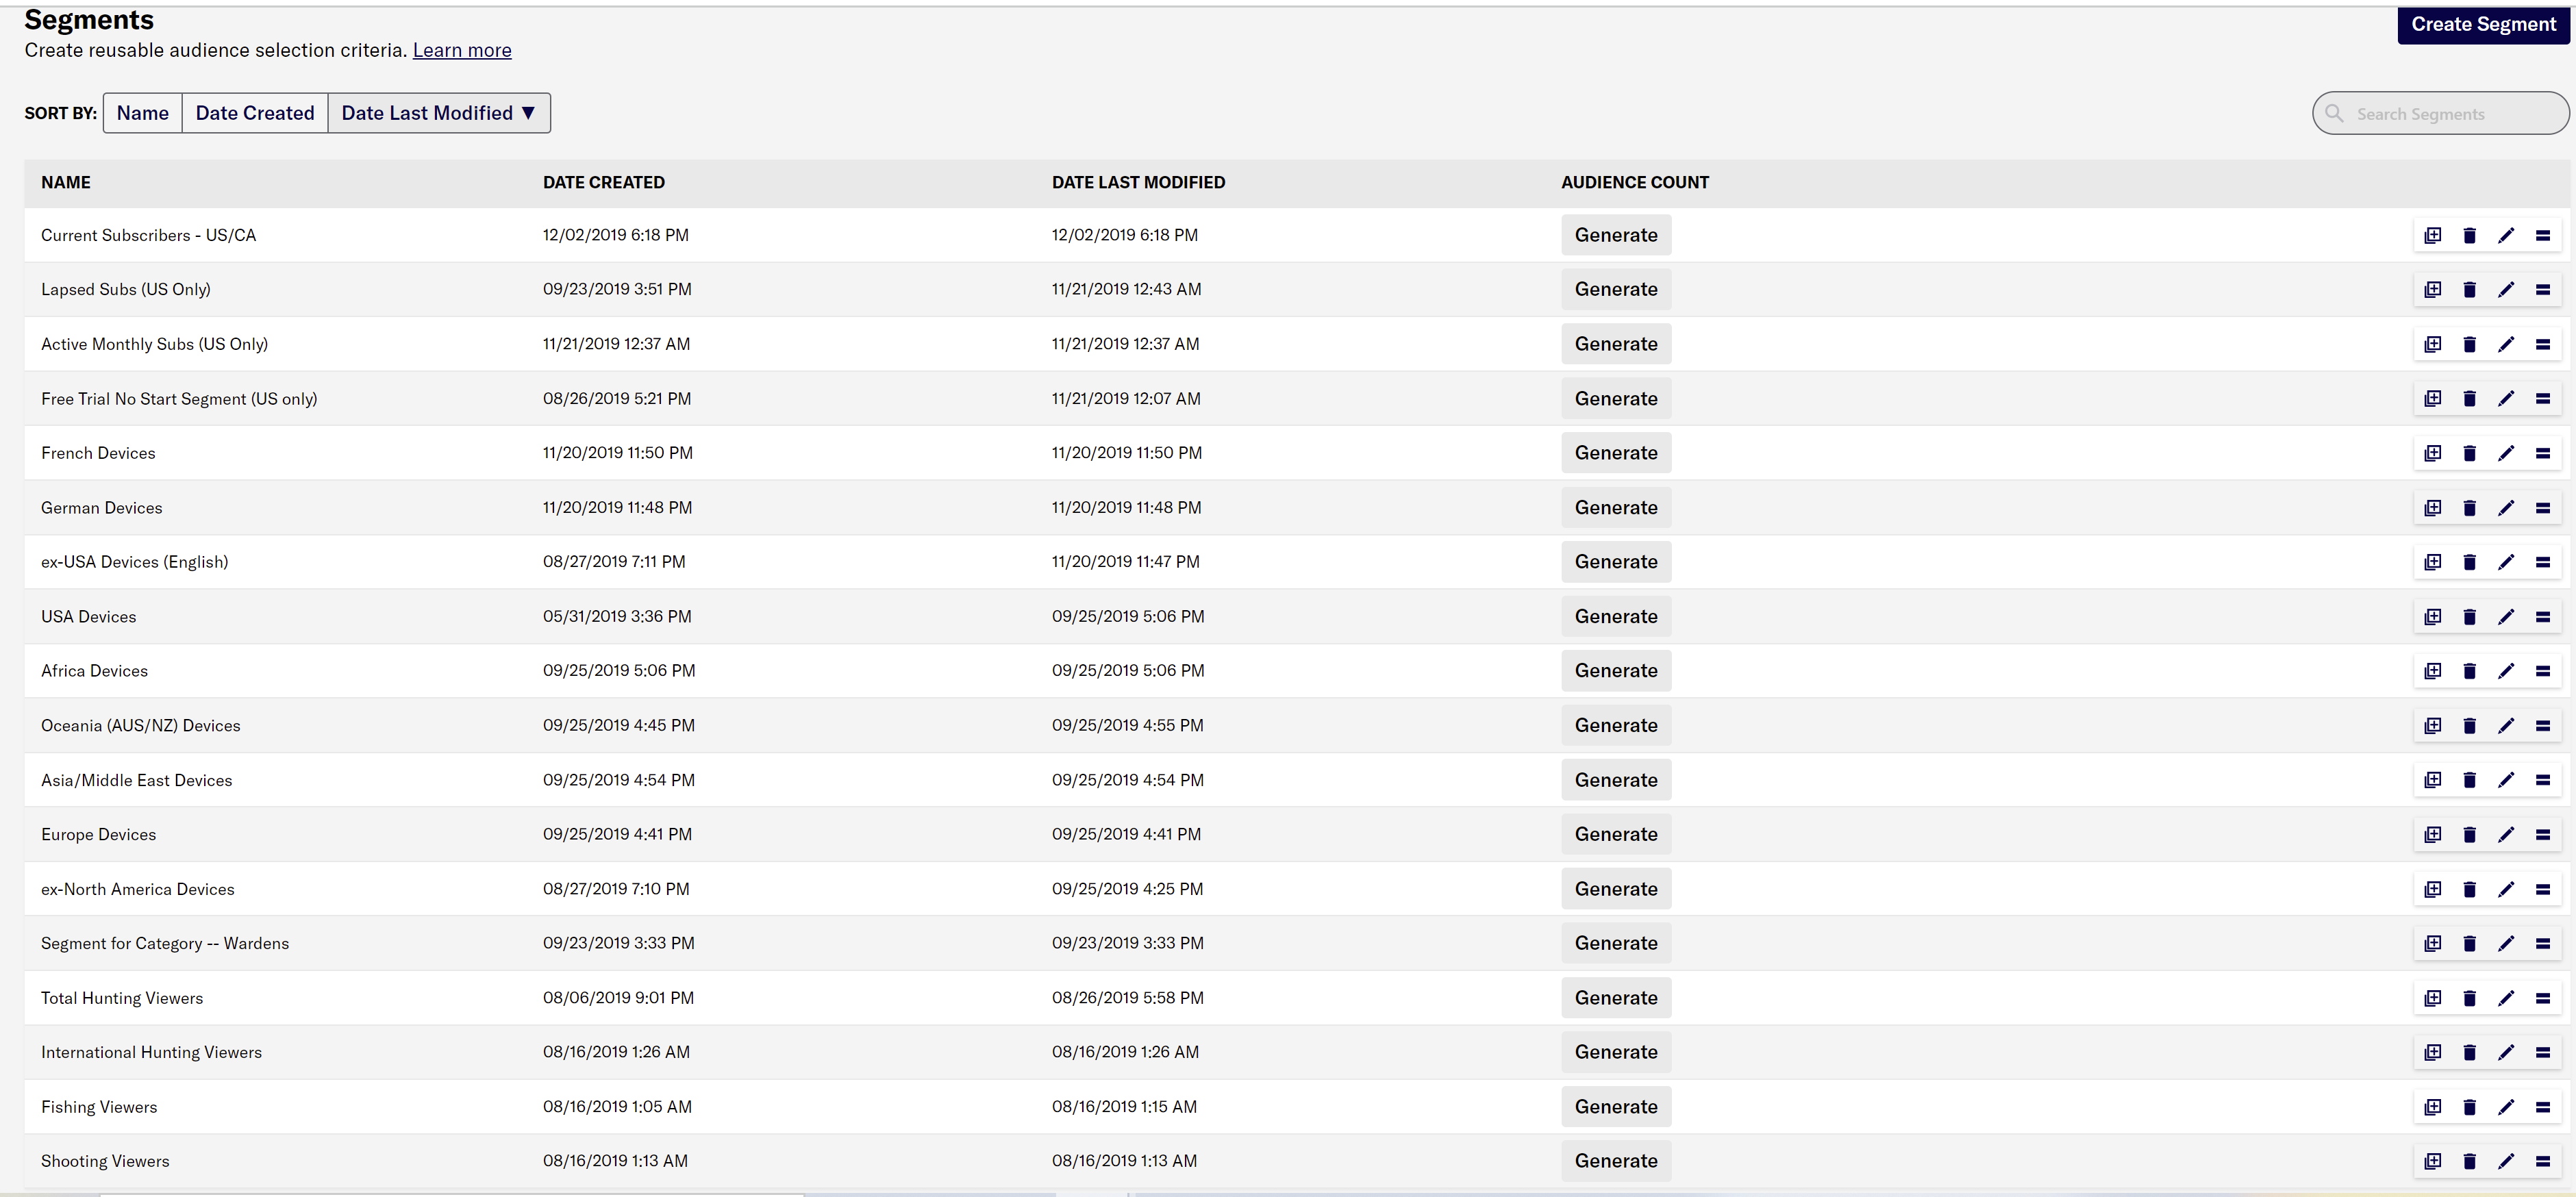 Create user segmentation from Audience > Segments
2, User (b) receives personalized push notifications about shows being filmed in their city.
ViewLift exposes location settings to Airship. Create a targeted segment with language and country.
 User segmentation by location

You can add additional filters in the form of an event/attribute key-value pair.
3. User (c) receives personalized push notifications that their free trial access ends in 3 days, and is prompted to upgrade.
By default, ViewLift doesn't fire user information for free trial period. Contact ViewLift Support if you want to capture this event in ViewLift and pass it to Airship. The challenge could be that on a per-user basis you will need to know that their trial ends in 3 days or if you want ViewLift to send the event to Airship 3 days prior to the end of the trial, and use that as a trigger for an ongoing message.
4. User (d) receives personalized push notifications when they've watched 3 live streams/TVOD content to upgrade to paid membership.
By default, ViewLift doesn't pass these user tags or events to Airship. You might want to leverage on custom events since these events can be counted. ie, send this message if custom event occurs a certain amount of times.
5. User (e) receives personalized push about new observational shows released after they've watched 5+ amount of shows tagged as 'observational'.
Create a Category tag group in Airship and tag the 'observational' tag if you have added it in ViewLift Tools. ViewLift will start sending that particular category to Airship once you configure it. Using that you can create a segment with that category tag, and send targeted notifications. Here's example below:
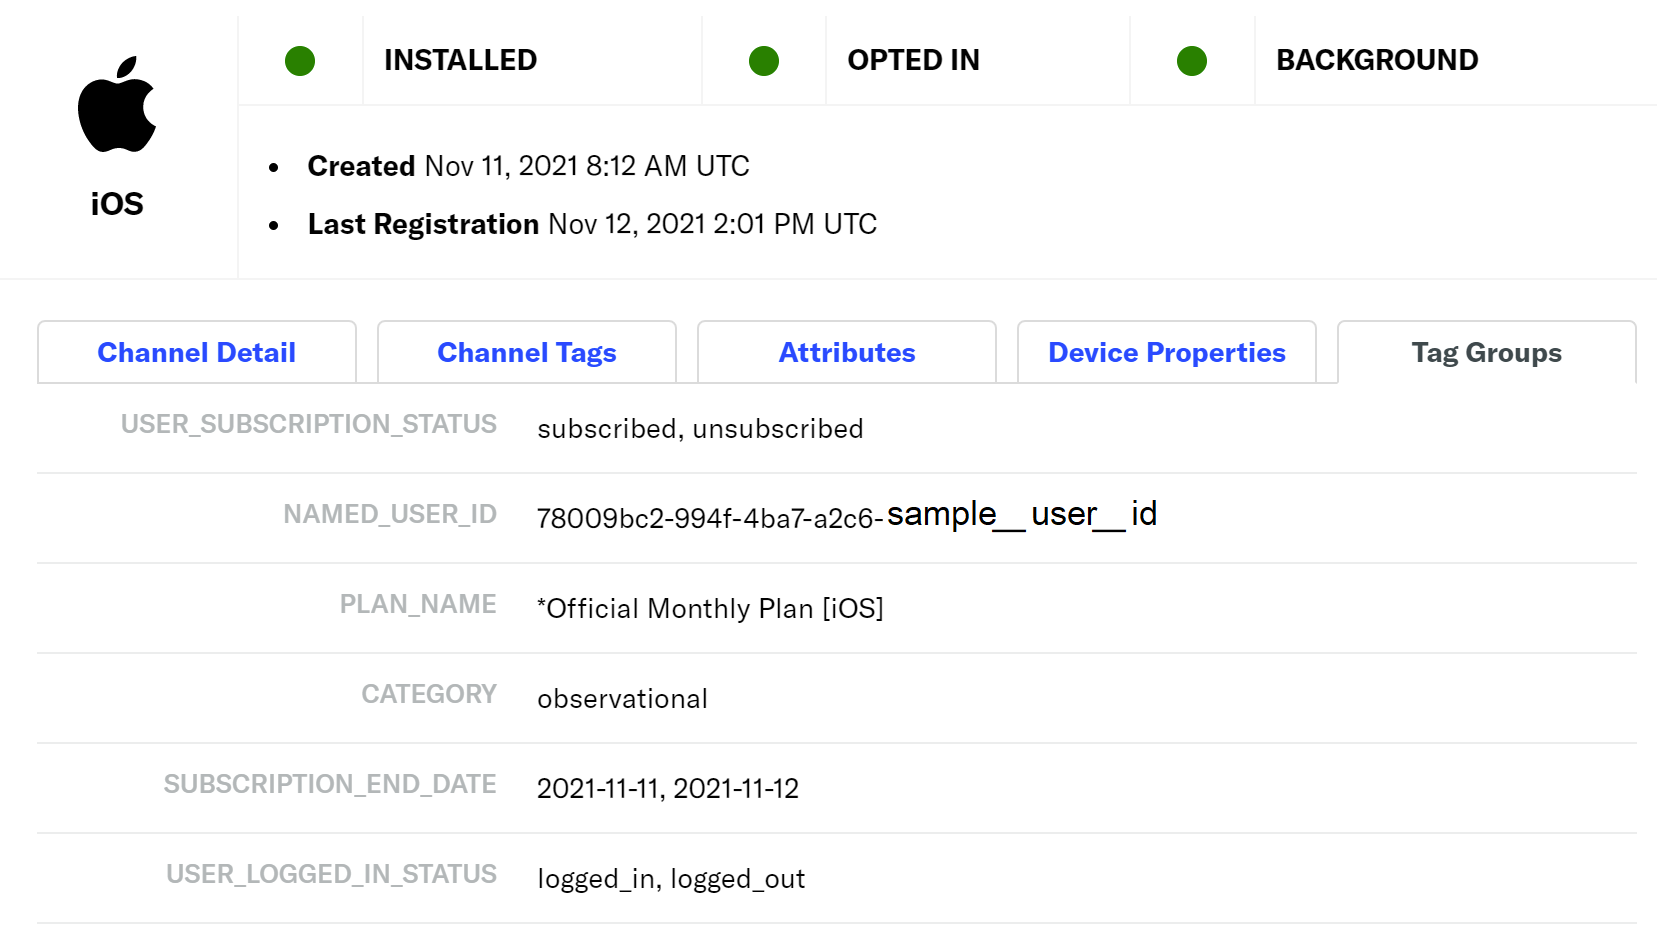 Displays the Category info passed from VL to Airship
 Create deep linking
- Log in to your Airship account and draft a message.
- From the Airship apps page, click on your account.
- From the Messages Overview page, click the + button in the upper-right corner.
.png)
- In the What would you like to create page, select Message.
- In the following Who will receive your message page, turn on the toggle for the channels on which you want to deliver the message.
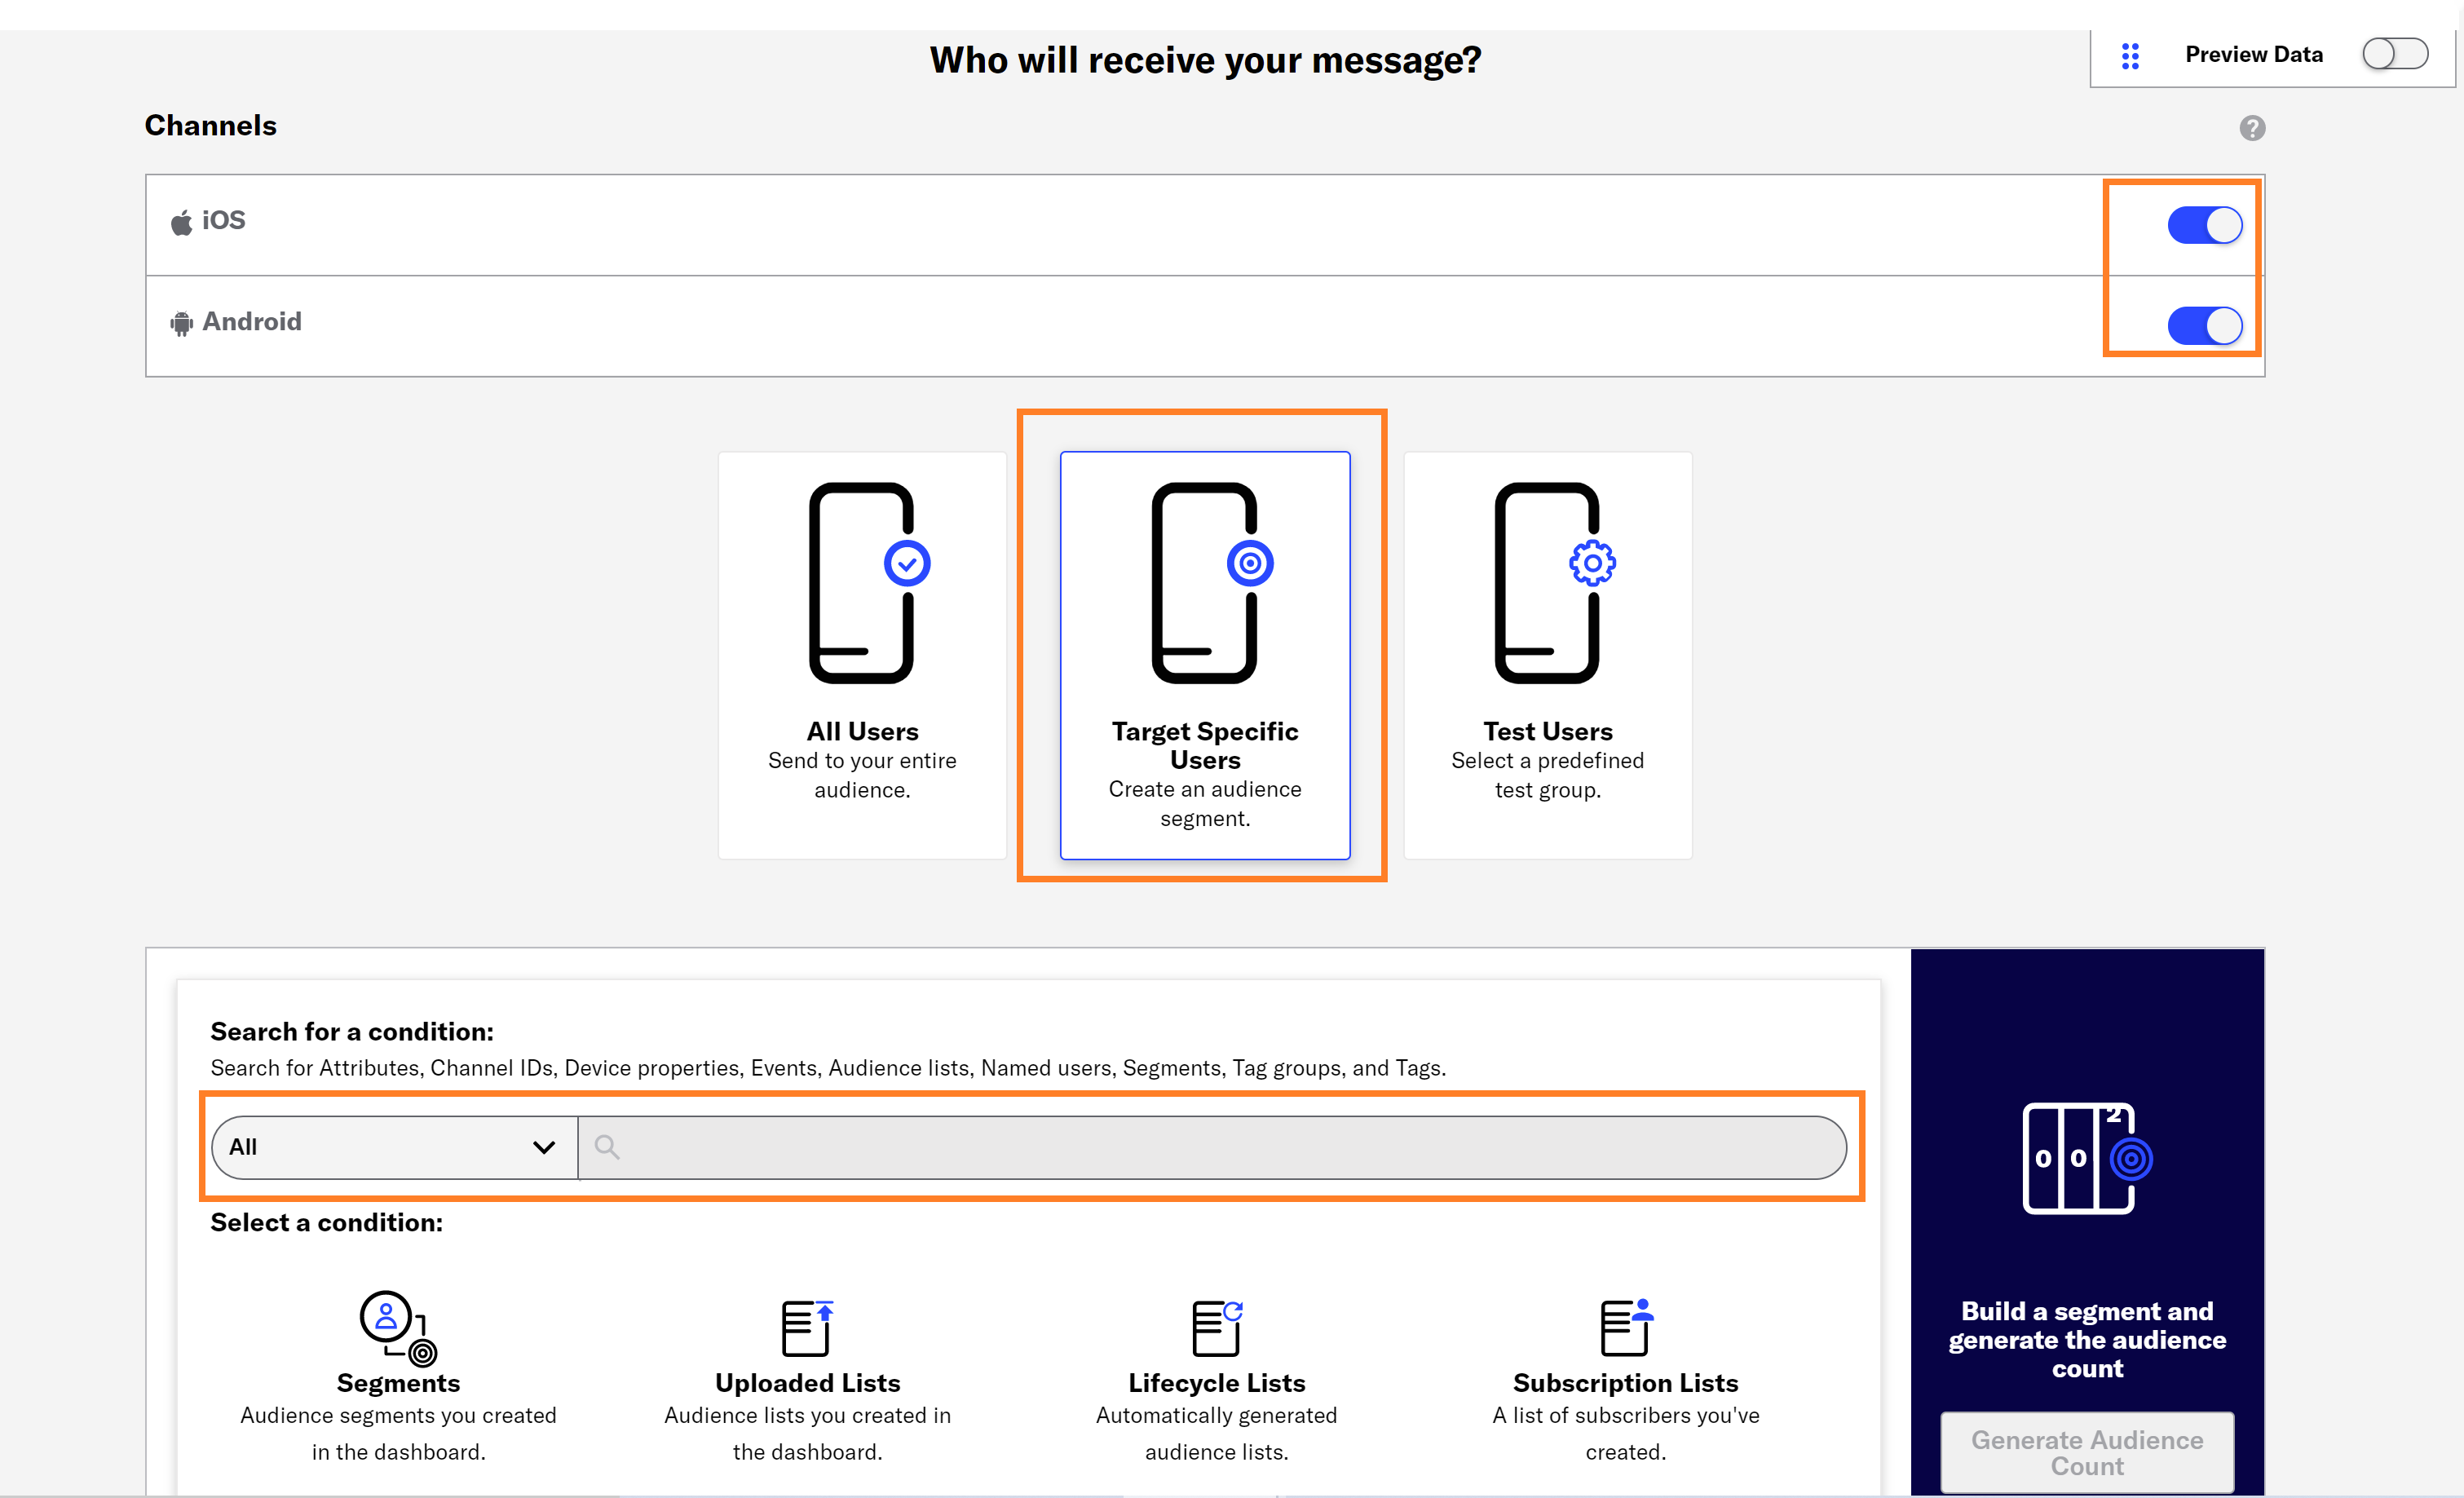 Send messages to targeted audience. Click All Users if you want to deliver to all users
 - In the Search for a condition drop-down, select a condition or search by an attribute. For example, search by Device Property.
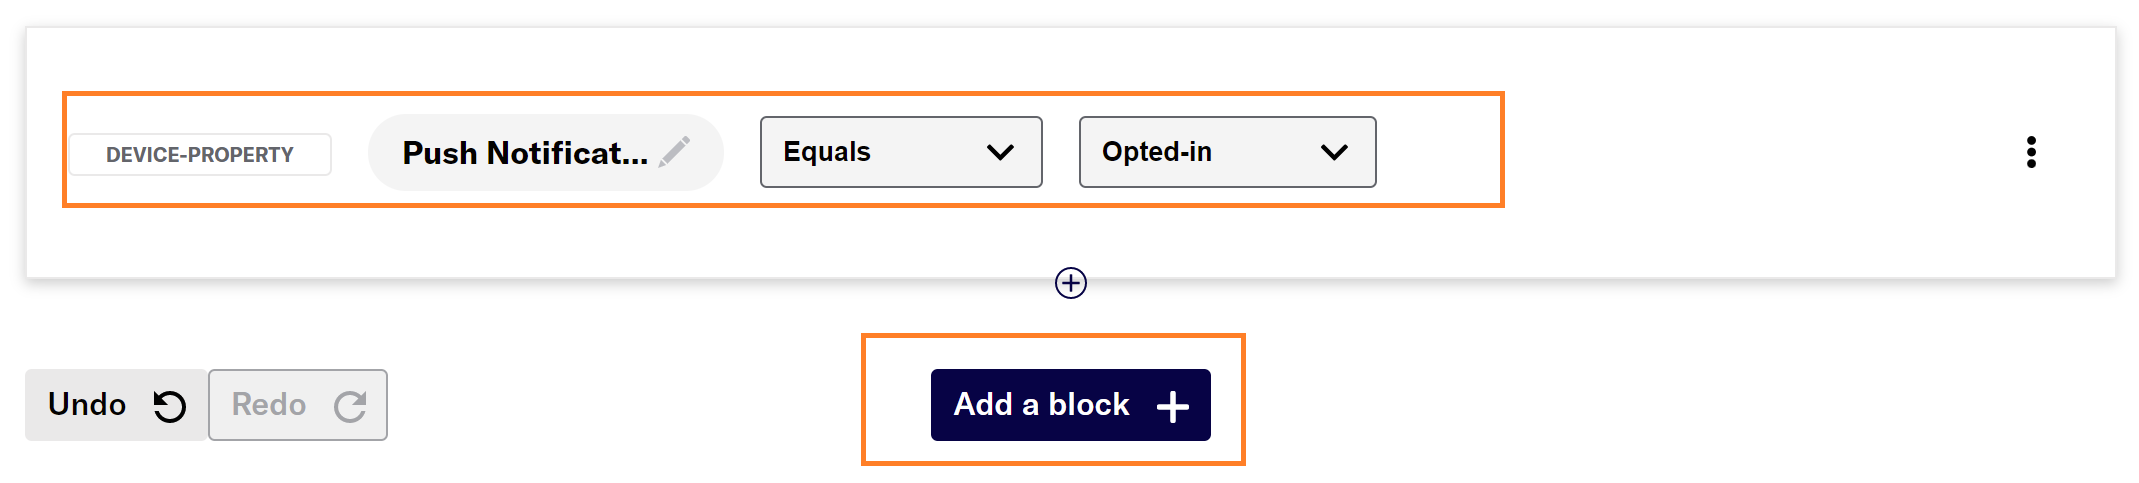
- Click Add a block to add more user attributes to refine the audience further.
- After setting up the audience filter, click on the Content tab in the main menu on top, and select the message type as Push Notification, In-App Message, or Silent Push Notification. You can combine the message to be delivered both as a push notification as well as an in-app message.
- Click Add content.
.png)
- To deep link a video or series, from the Actions tab, select Deep Link, and paste the permalink of the video in the videoname field. The full app url with the videoname appears in the field below. Try the optional features in the Optional features section as shown in the mock screen above. For more information on how to manage deep linking within your apps, see this Airship's article.
- Move to the Delivery tab on top, and select one of the following type of delivery: Send now, Schedule or Recurring.
- Go to Review & Schedule tab to review your message before hitting the Send button.
.png)


.png)
Related topics
Was this article helpful?