- Print
- DarkLight
- PDF
1. Introduction
Enhance your platform's functionality by enabling internal video embedding. With this feature, you can seamlessly embed videos from your platform onto third-party websites, expanding your reach and audience engagement. This document provides a comprehensive guide on how to enable and configure internal video embedding using ViewLift Tools.
2. Prerequisites
Before you begin the process of enabling internal video embedding, ensure that you meet the following prerequisites:
Access to ViewLift Tools: You must have access to the ViewLift Tools platform, which provides the necessary tools and features for managing your video content.
Authorization to Modify Settings: You should have the necessary authorization to modify settings in the AppCMS section of ViewLift Tools.
Knowledge of Domain Hosting: It is essential to have knowledge of the domain where the embedded videos will be hosted, as you will need to specify this domain during the embedding process.
3. Overview
Internal video embedding allows you to embed videos from your platform onto third-party domains, such as websites or blogs. By doing so, you can extend the reach of your video content beyond your platform, increasing visibility and engagement with your audience. The process involves enabling the embedding feature in ViewLift Tools and specifying the domains where the embedded videos will be allowed to play.
4. Procedures
4.1 Accessing Embed Player Settings
To begin the process of enabling internal video embedding, follow these steps to access the Embed Player settings in ViewLift Tools:
Log in to your ViewLift Tools account.
Navigate to the AppCMS section.
From the left navigation panel, select Settings.
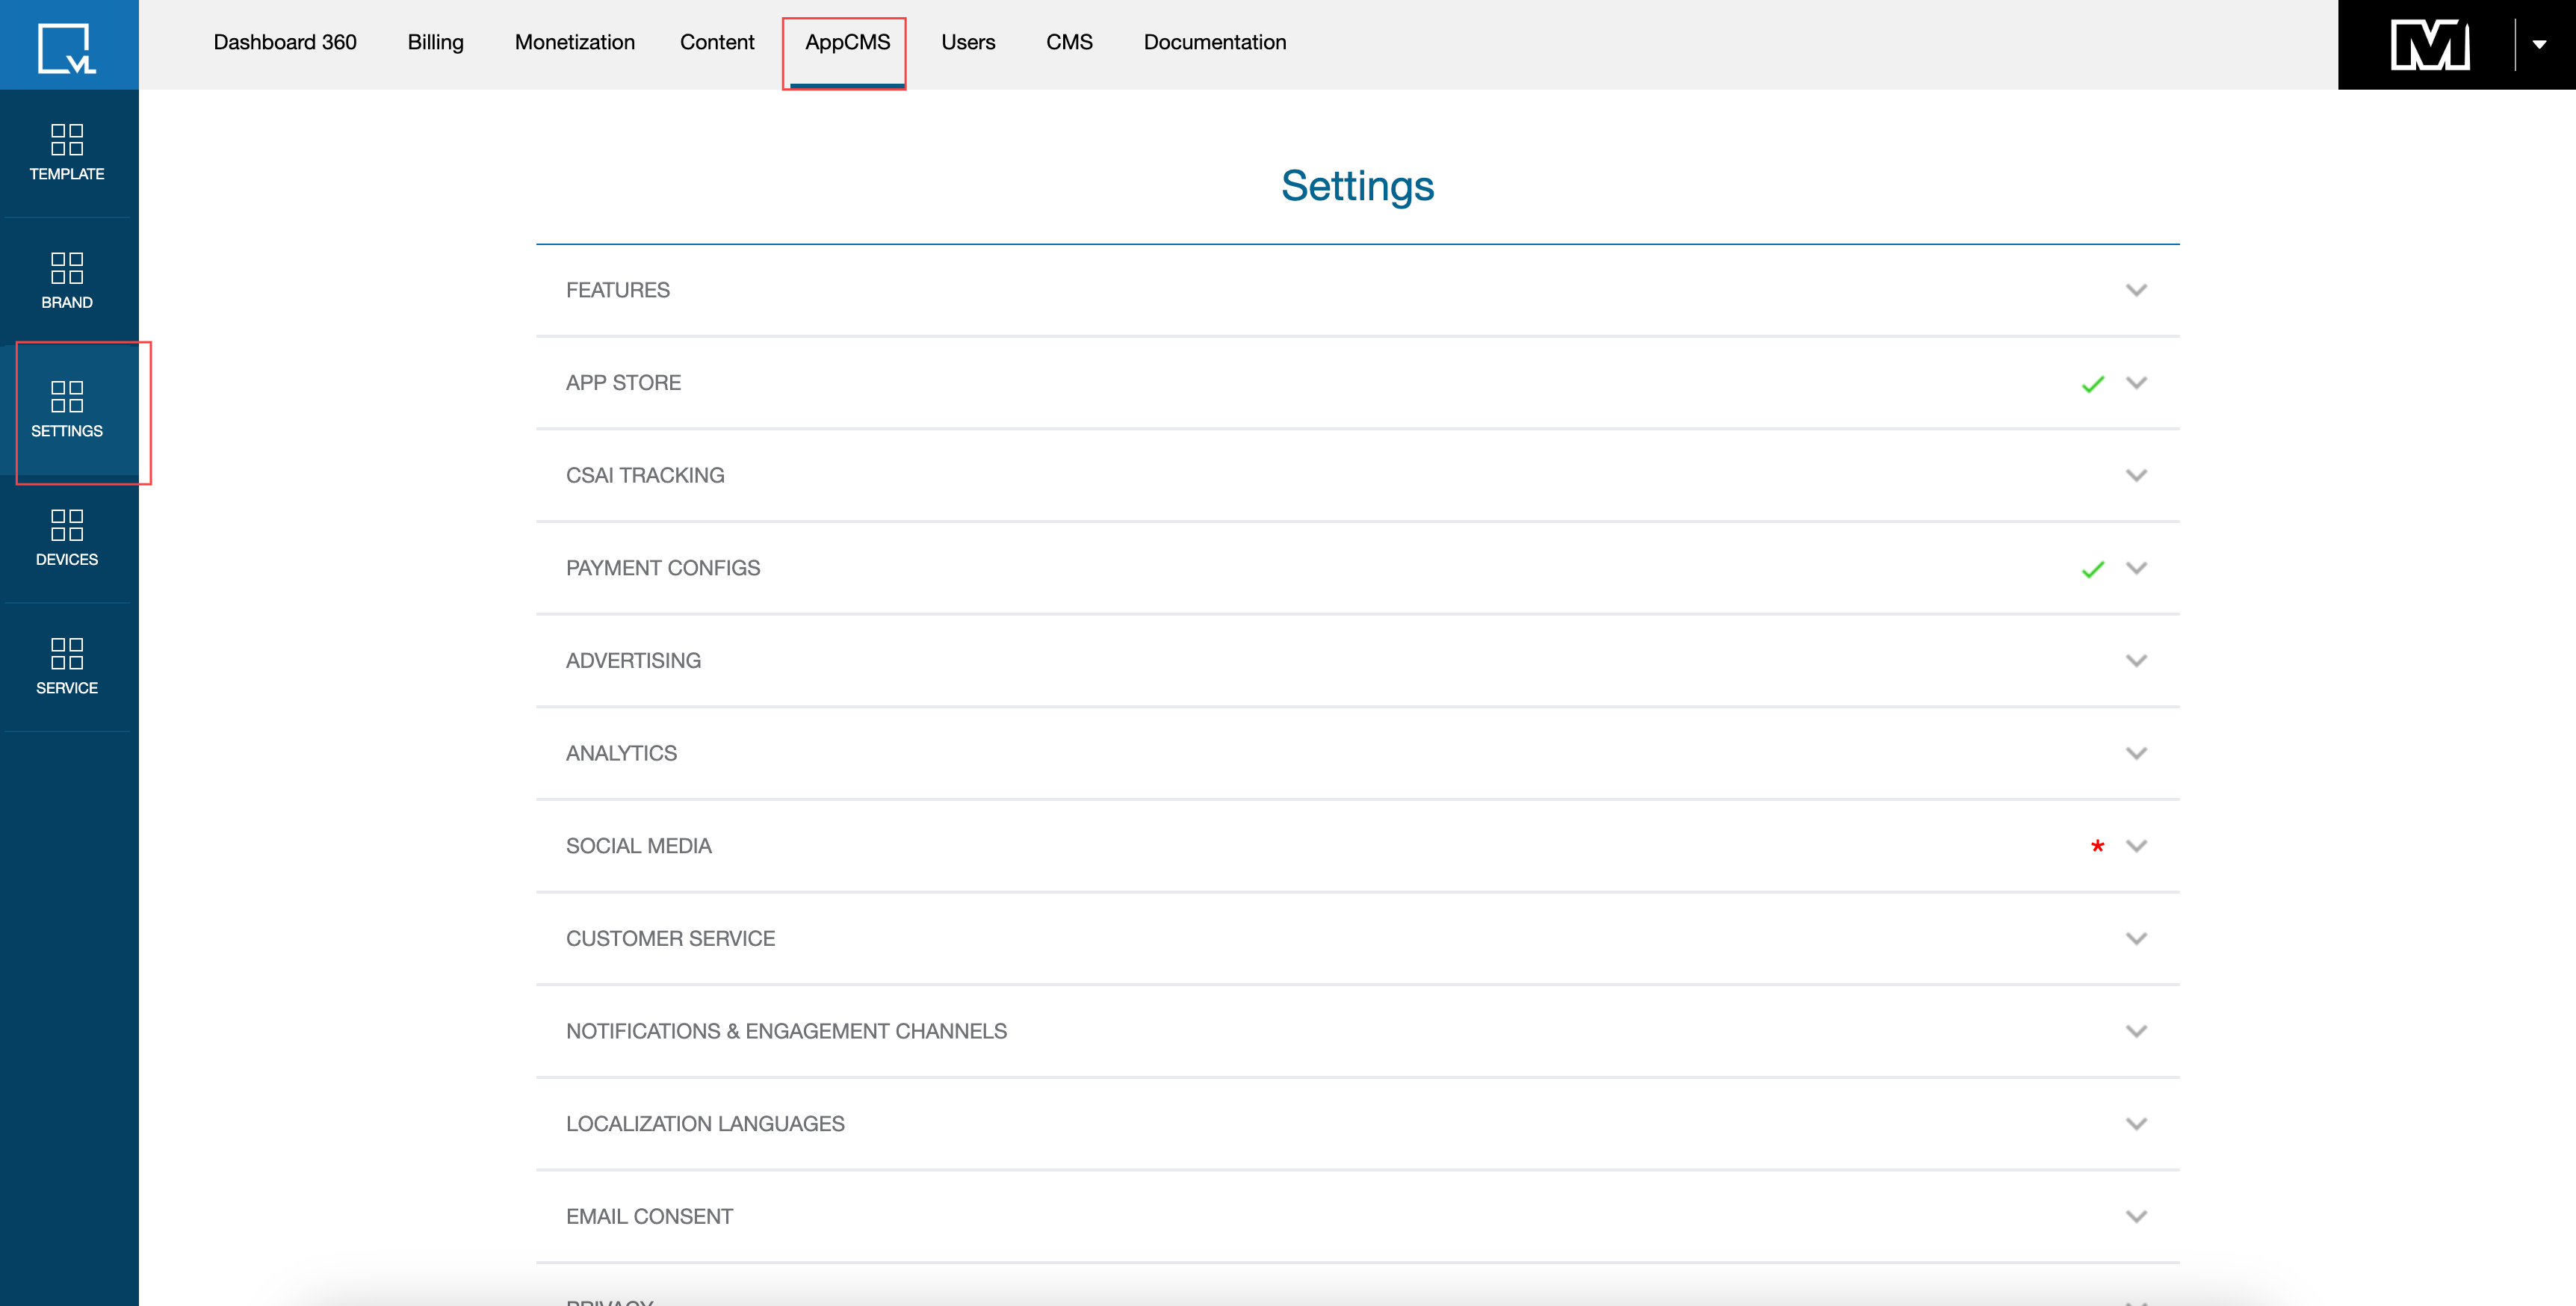
Choose Embed Player from the submenu to access the Embed Player settings.
4.2 Enabling Embed Player Option
Once you have accessed the settings, follow these steps to enable the Embed Player option:
Locate the Enable Embed Player Option toggle within the settings.
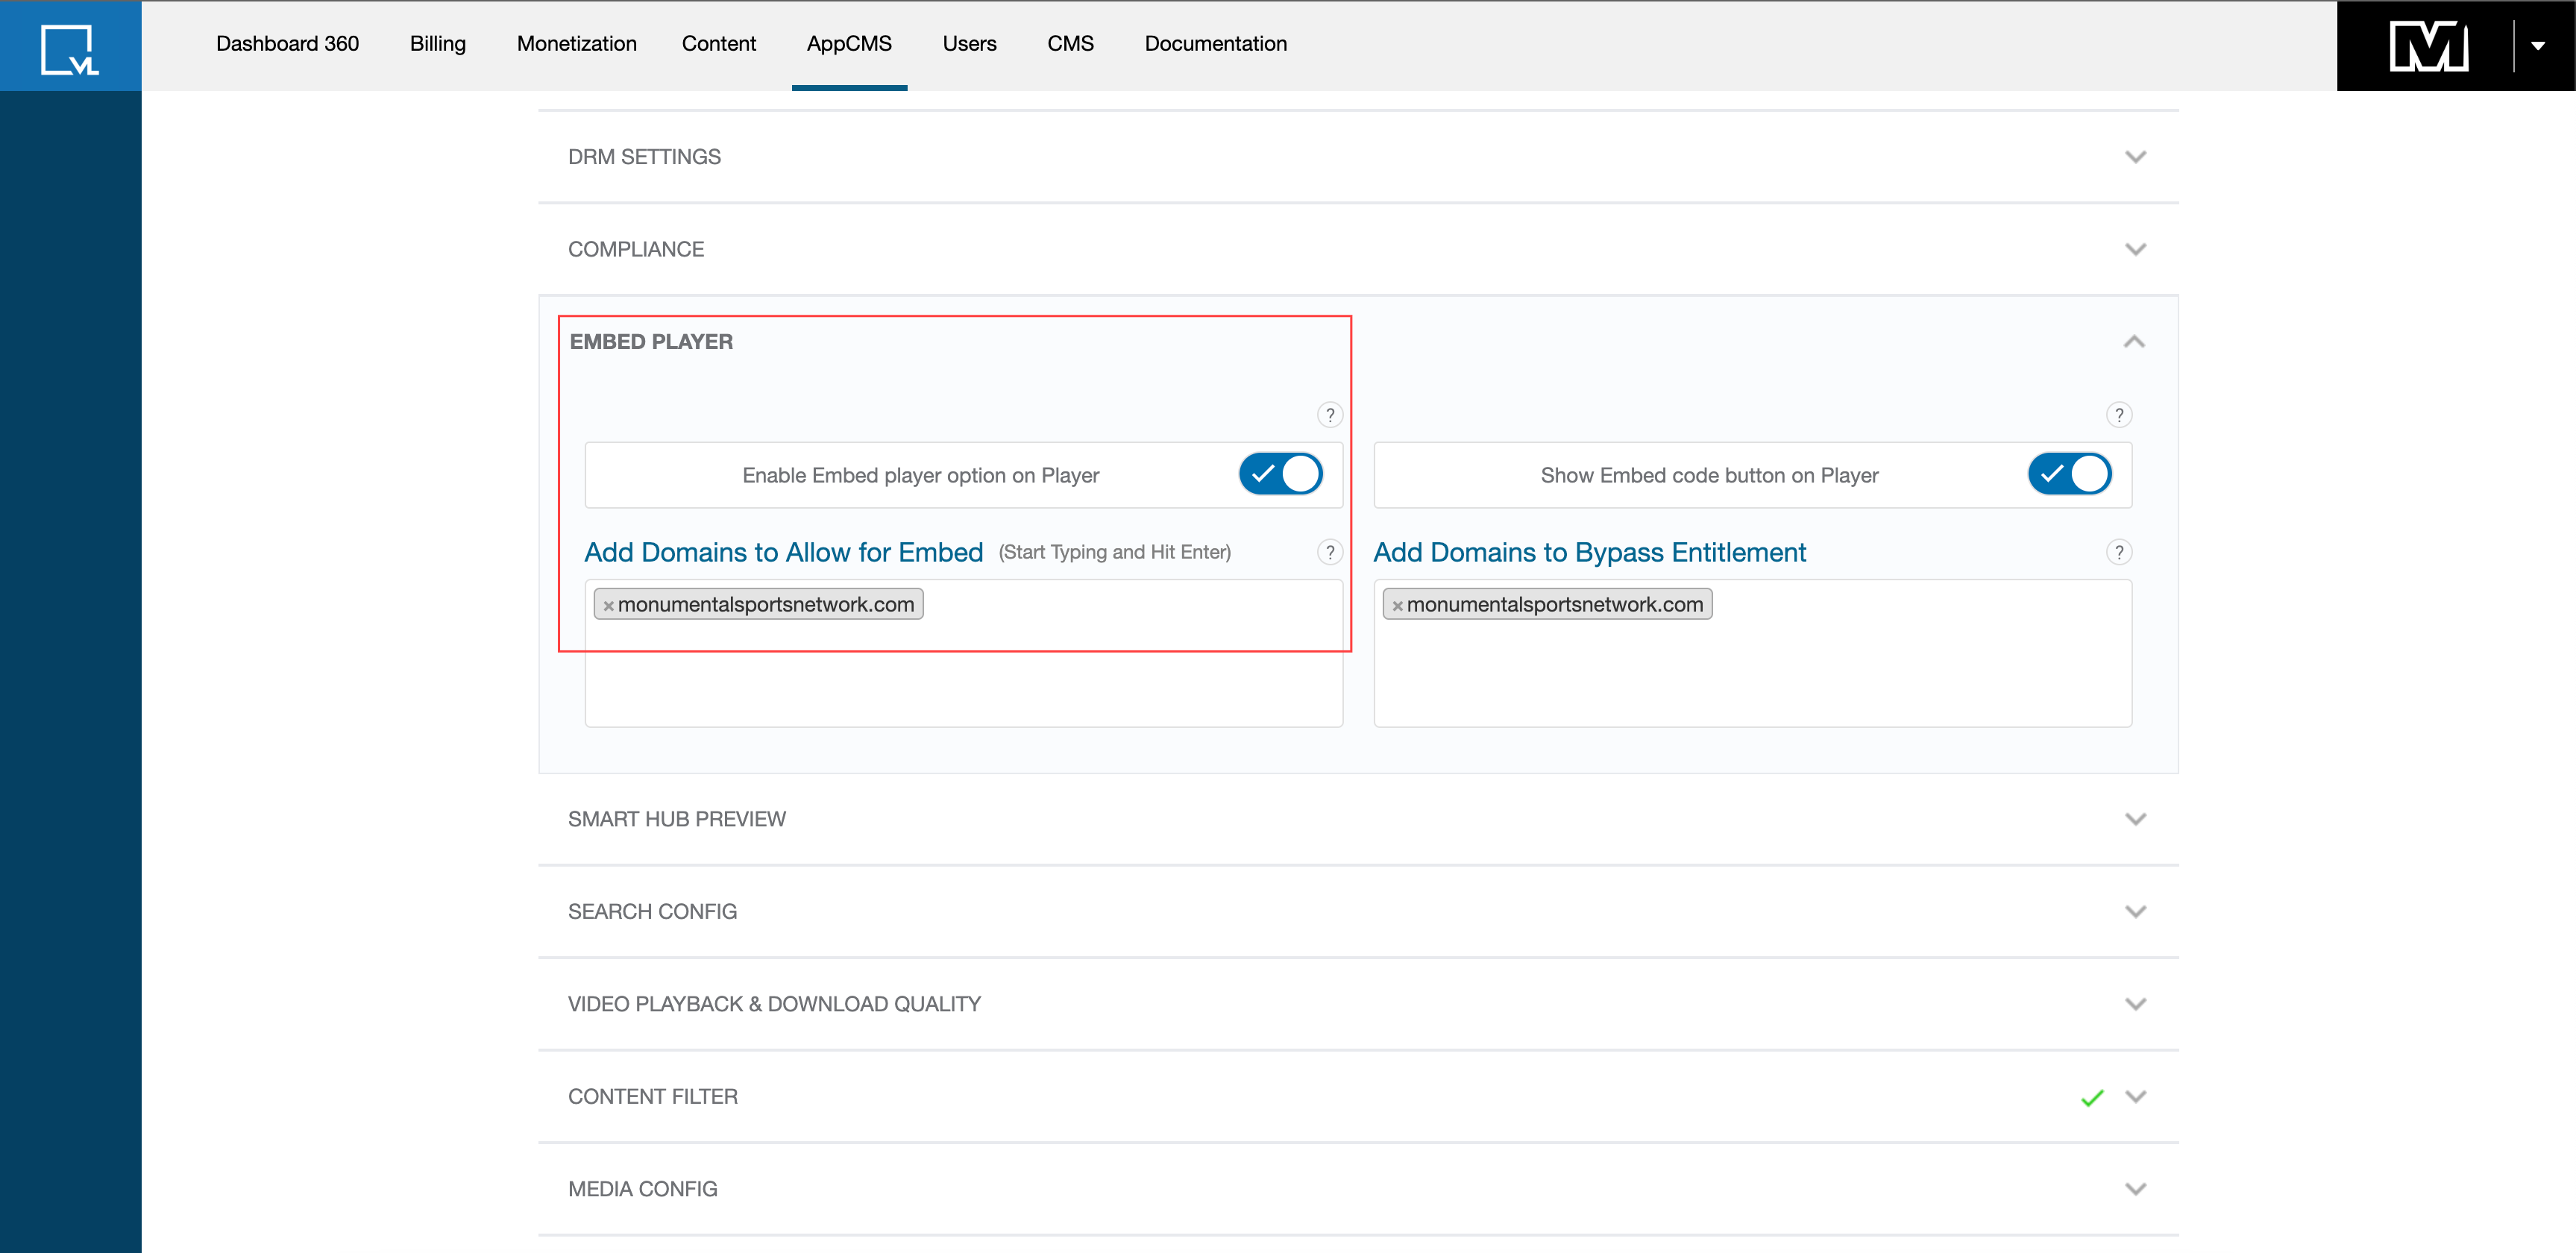
Enable Embed Player Toggle Toggle the switch to the On position to activate the internal video embedding feature.
4.3 Adding Allowed Domains
After enabling the Embed Player option, you need to specify the domains where the embedded videos will be allowed to play. Follow these steps to add allowed domains:
Find the Add Domains to Allow field within the Embed Player settings.
Enter the domain names (e.g., xz.com) where you want to embed the videos.
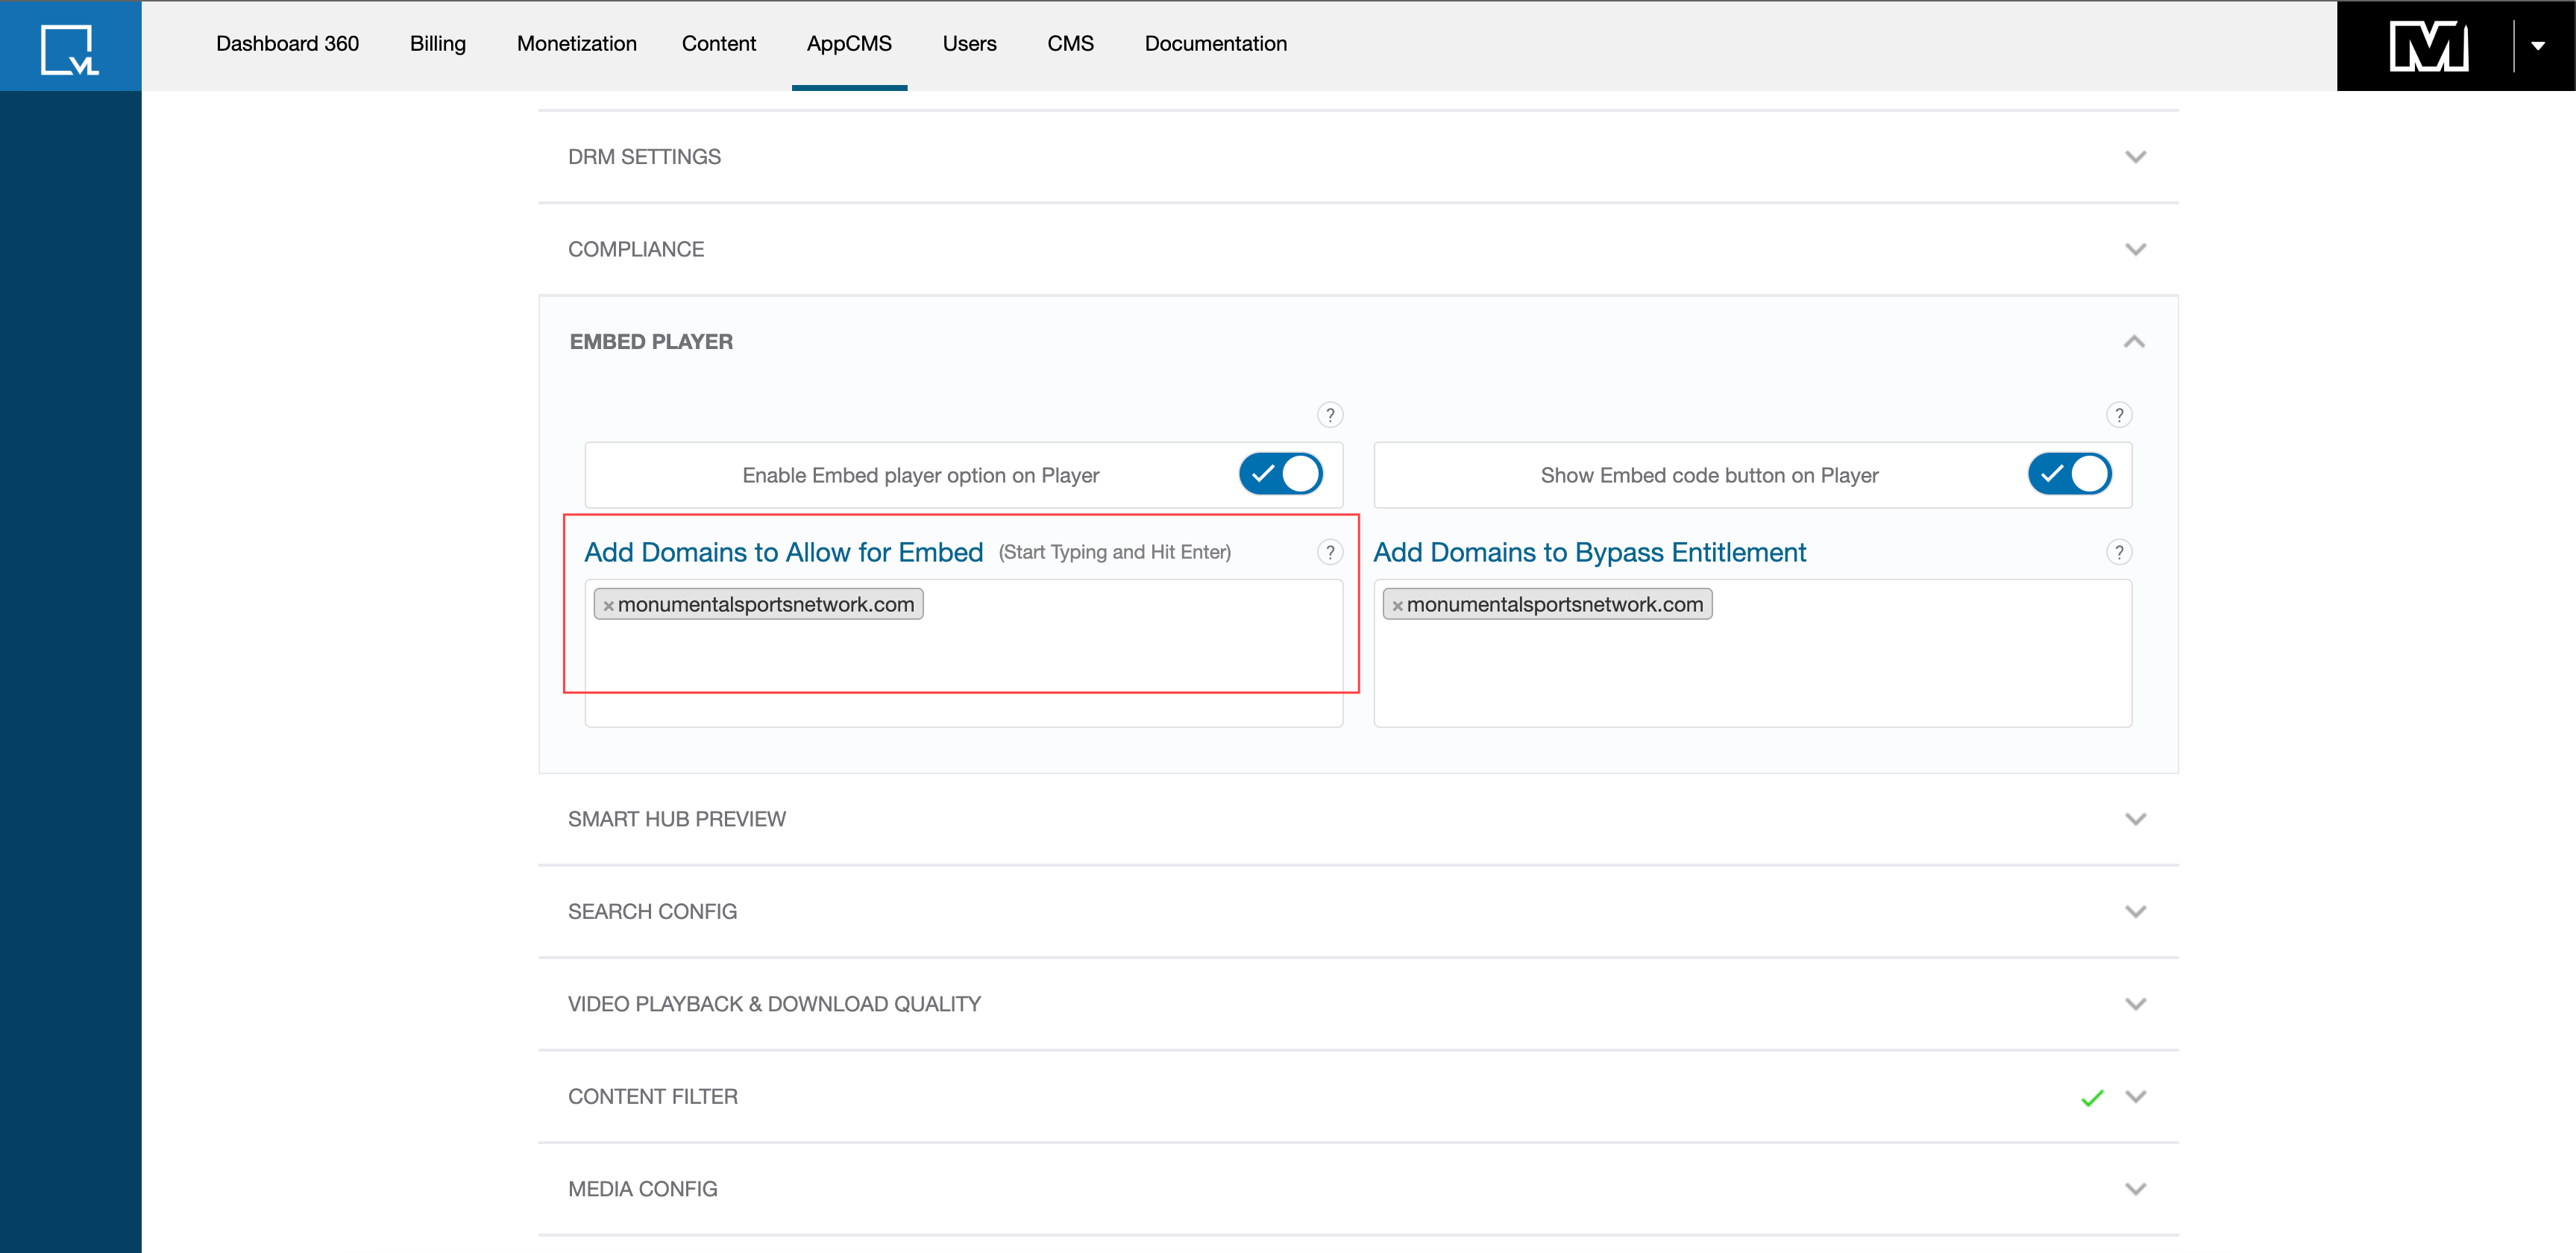
Add Domains Option
Click the Save button to apply the changes and add the specified domains to the allowed list.
Note:
When specifying domains in the Add Domains to Allow field, only the domain name needs to be written without the full URL, for example, "xyz.com" instead of "https://xyz.com".
4.4 Embedding Videos
Once you have enabled the Embed Player option and added allowed domains, you can proceed to embed videos onto third-party websites. Follow these steps to embed videos:
Go to the Content section and locate the video you wish to embed in the video playlist.
Access the Embed option for the chosen video, found in the video's settings or details.
Copy the code provided in the Embed option.
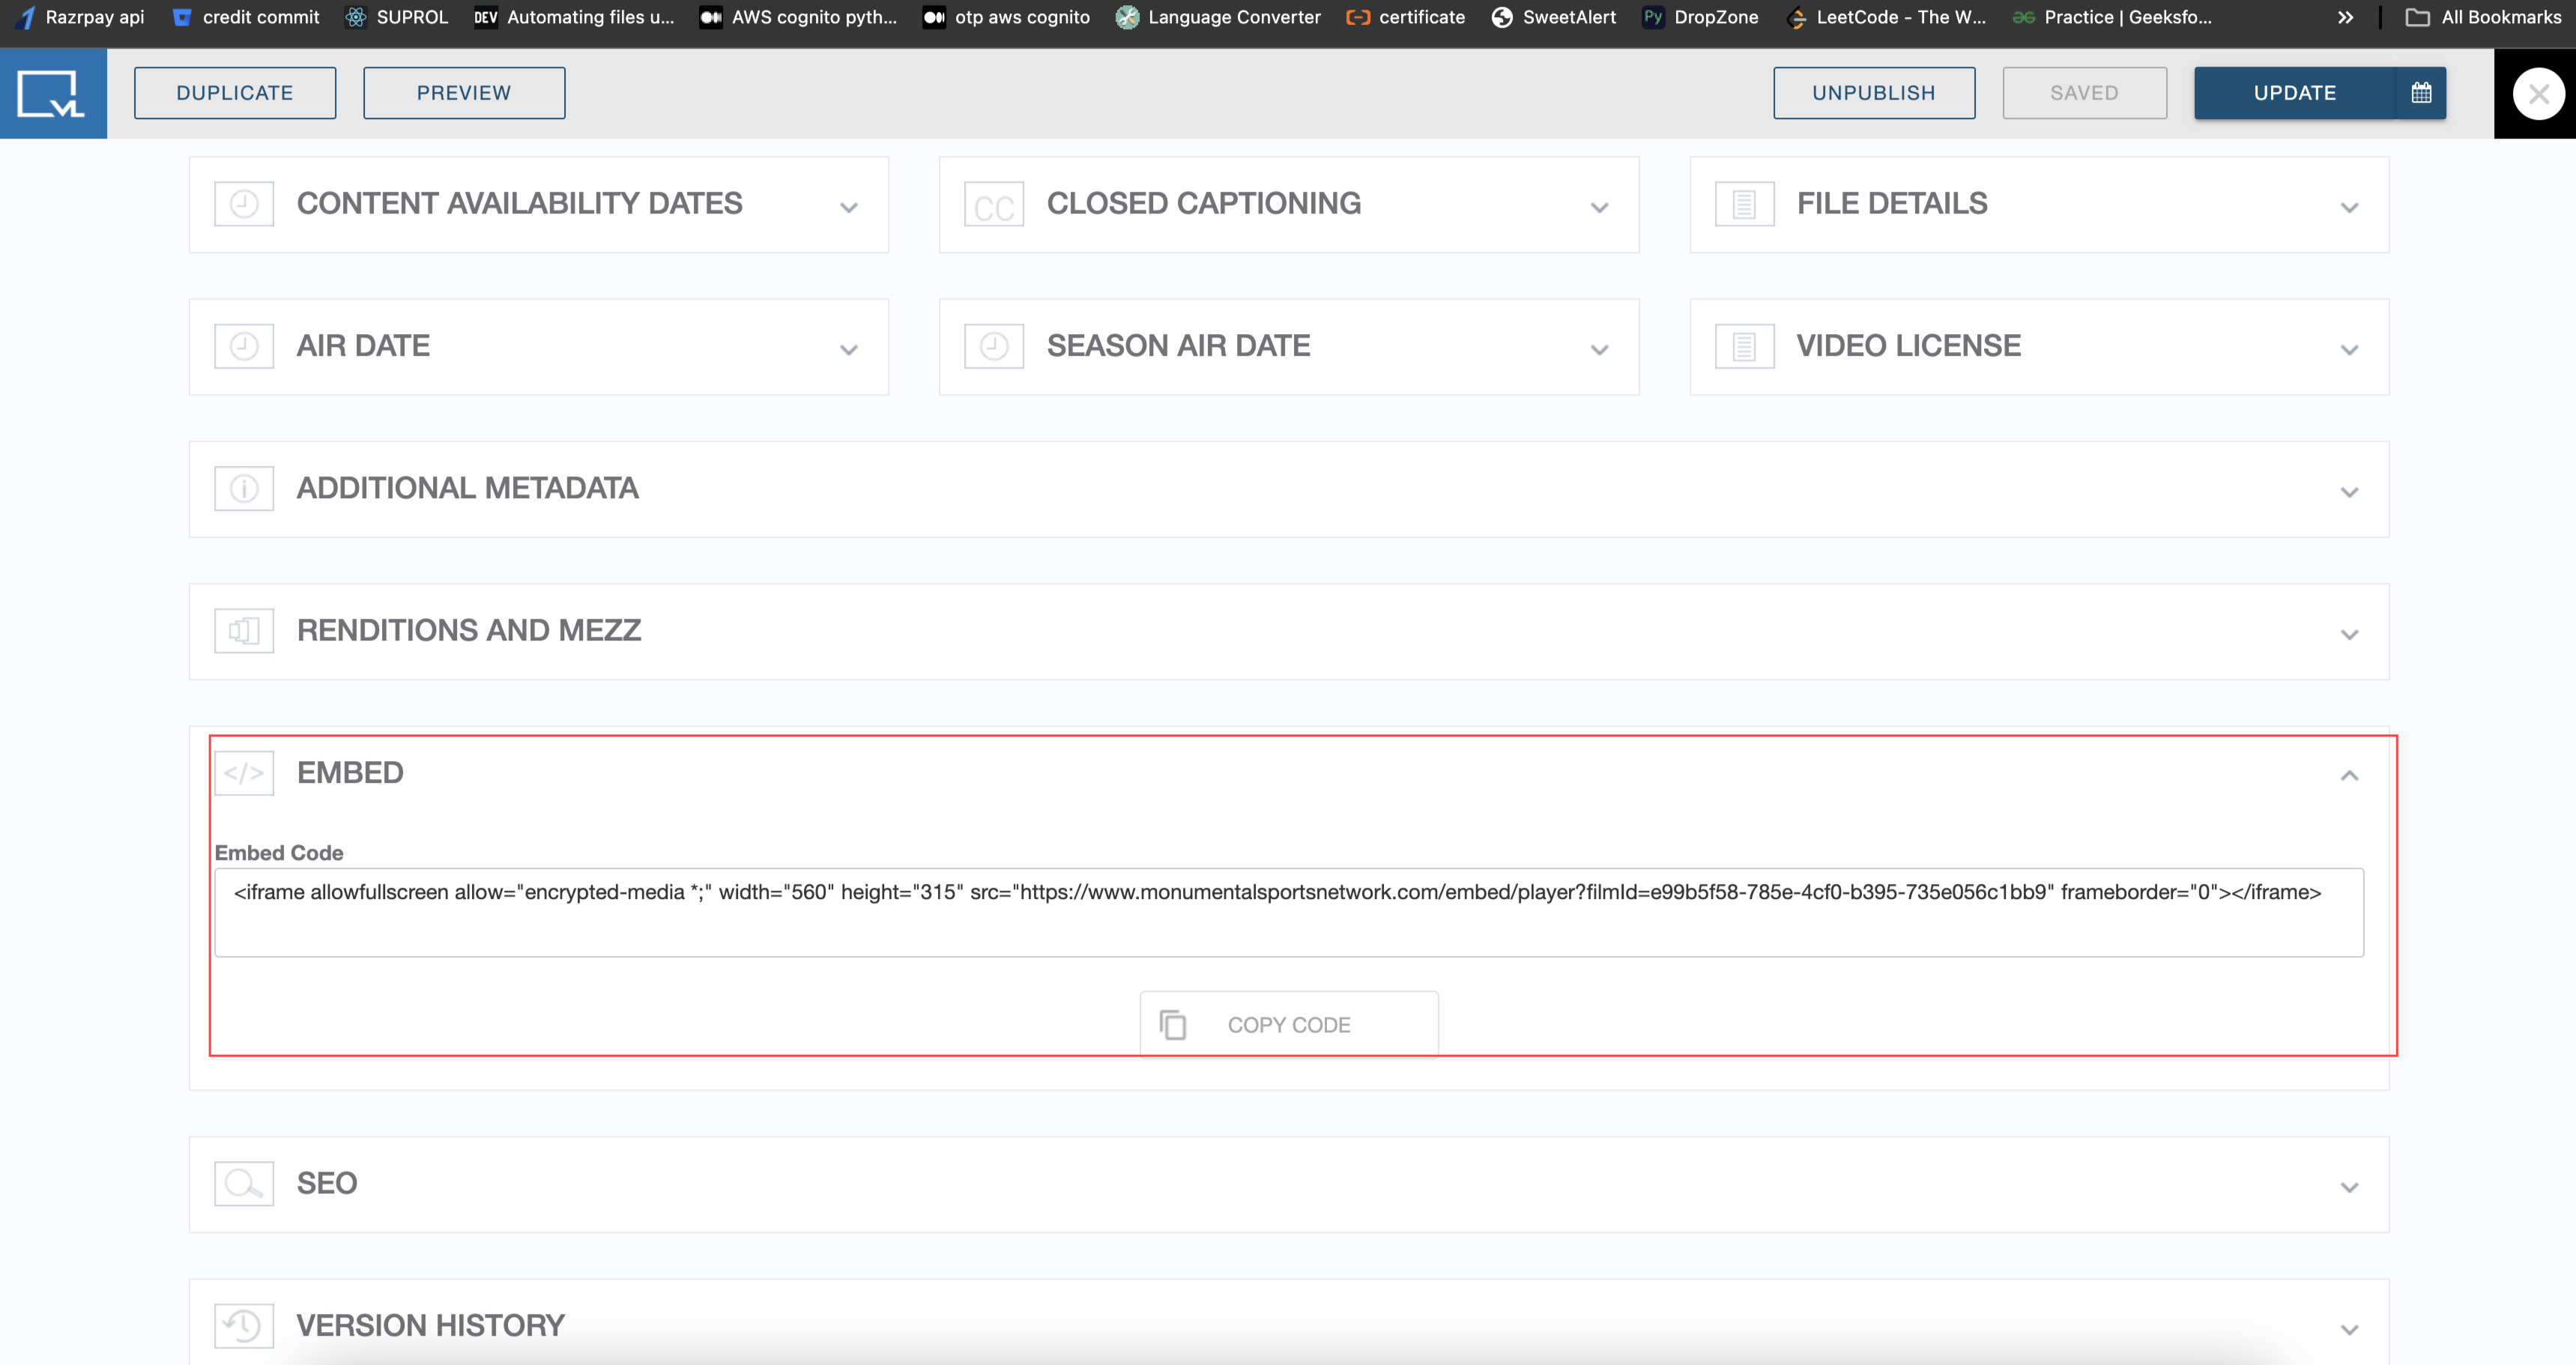
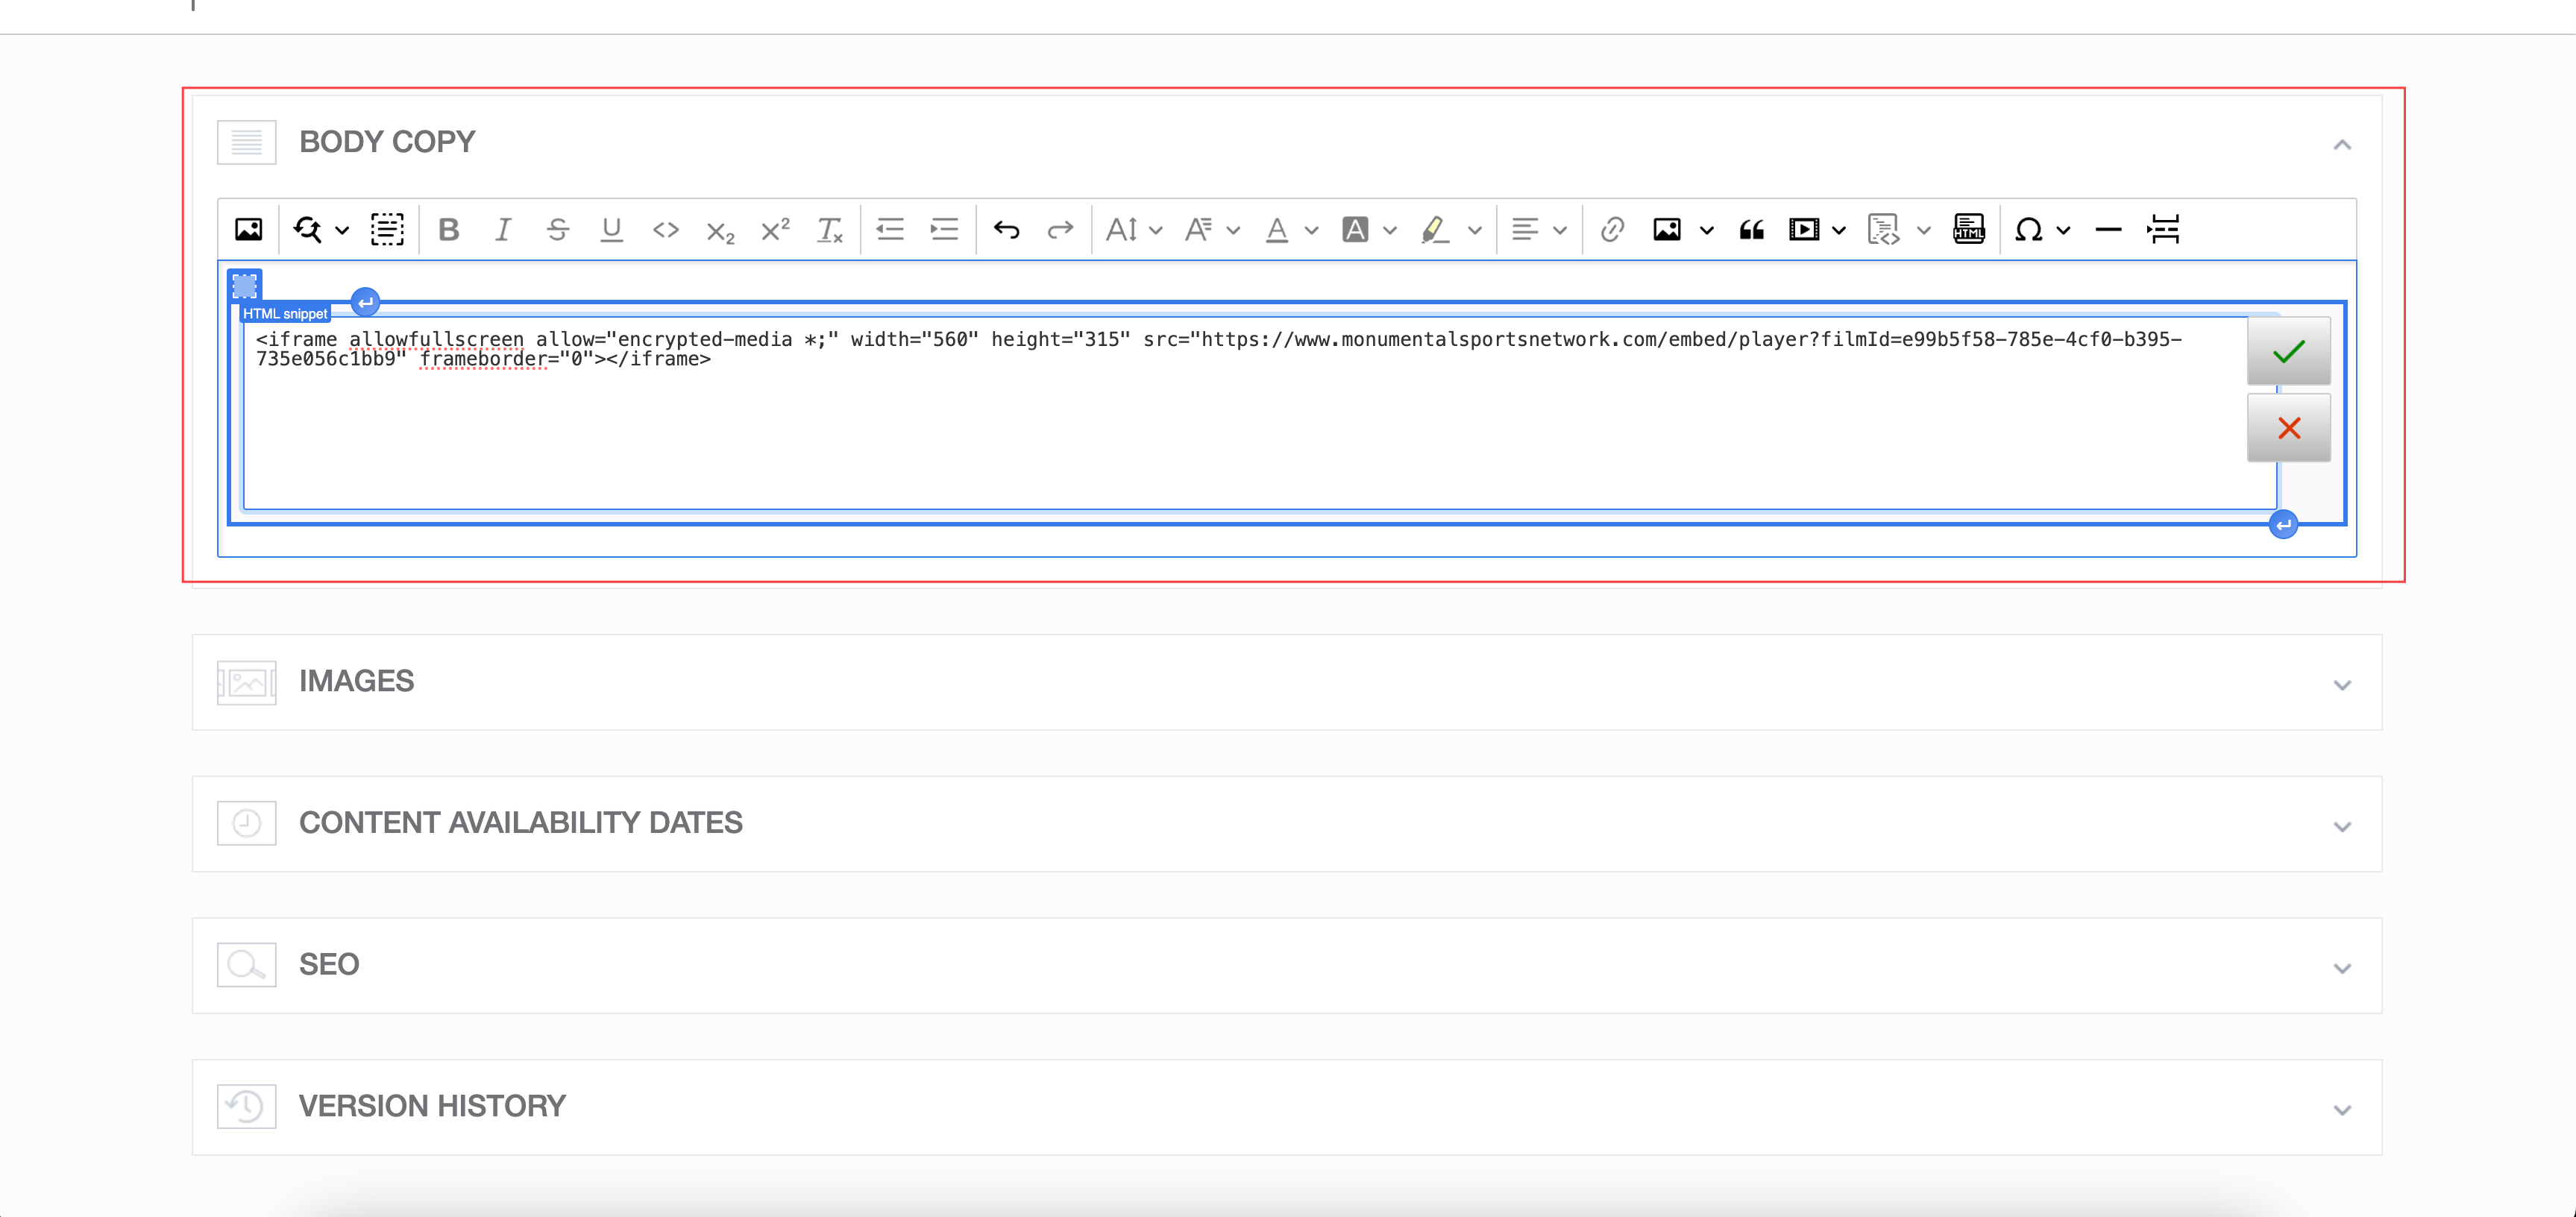
Embed Option Proceed to the Article section and access the BODY COPY option.
Paste the HTML code into the BODY COPY of the article at the desired location for embedding the video.
Finally, click the Save button to confirm the changes.
4.5 Testing
After embedding the video onto the third-party domain/article, it's essential to test the embedding to ensure it functions correctly. Follow these steps to test the embedded video:
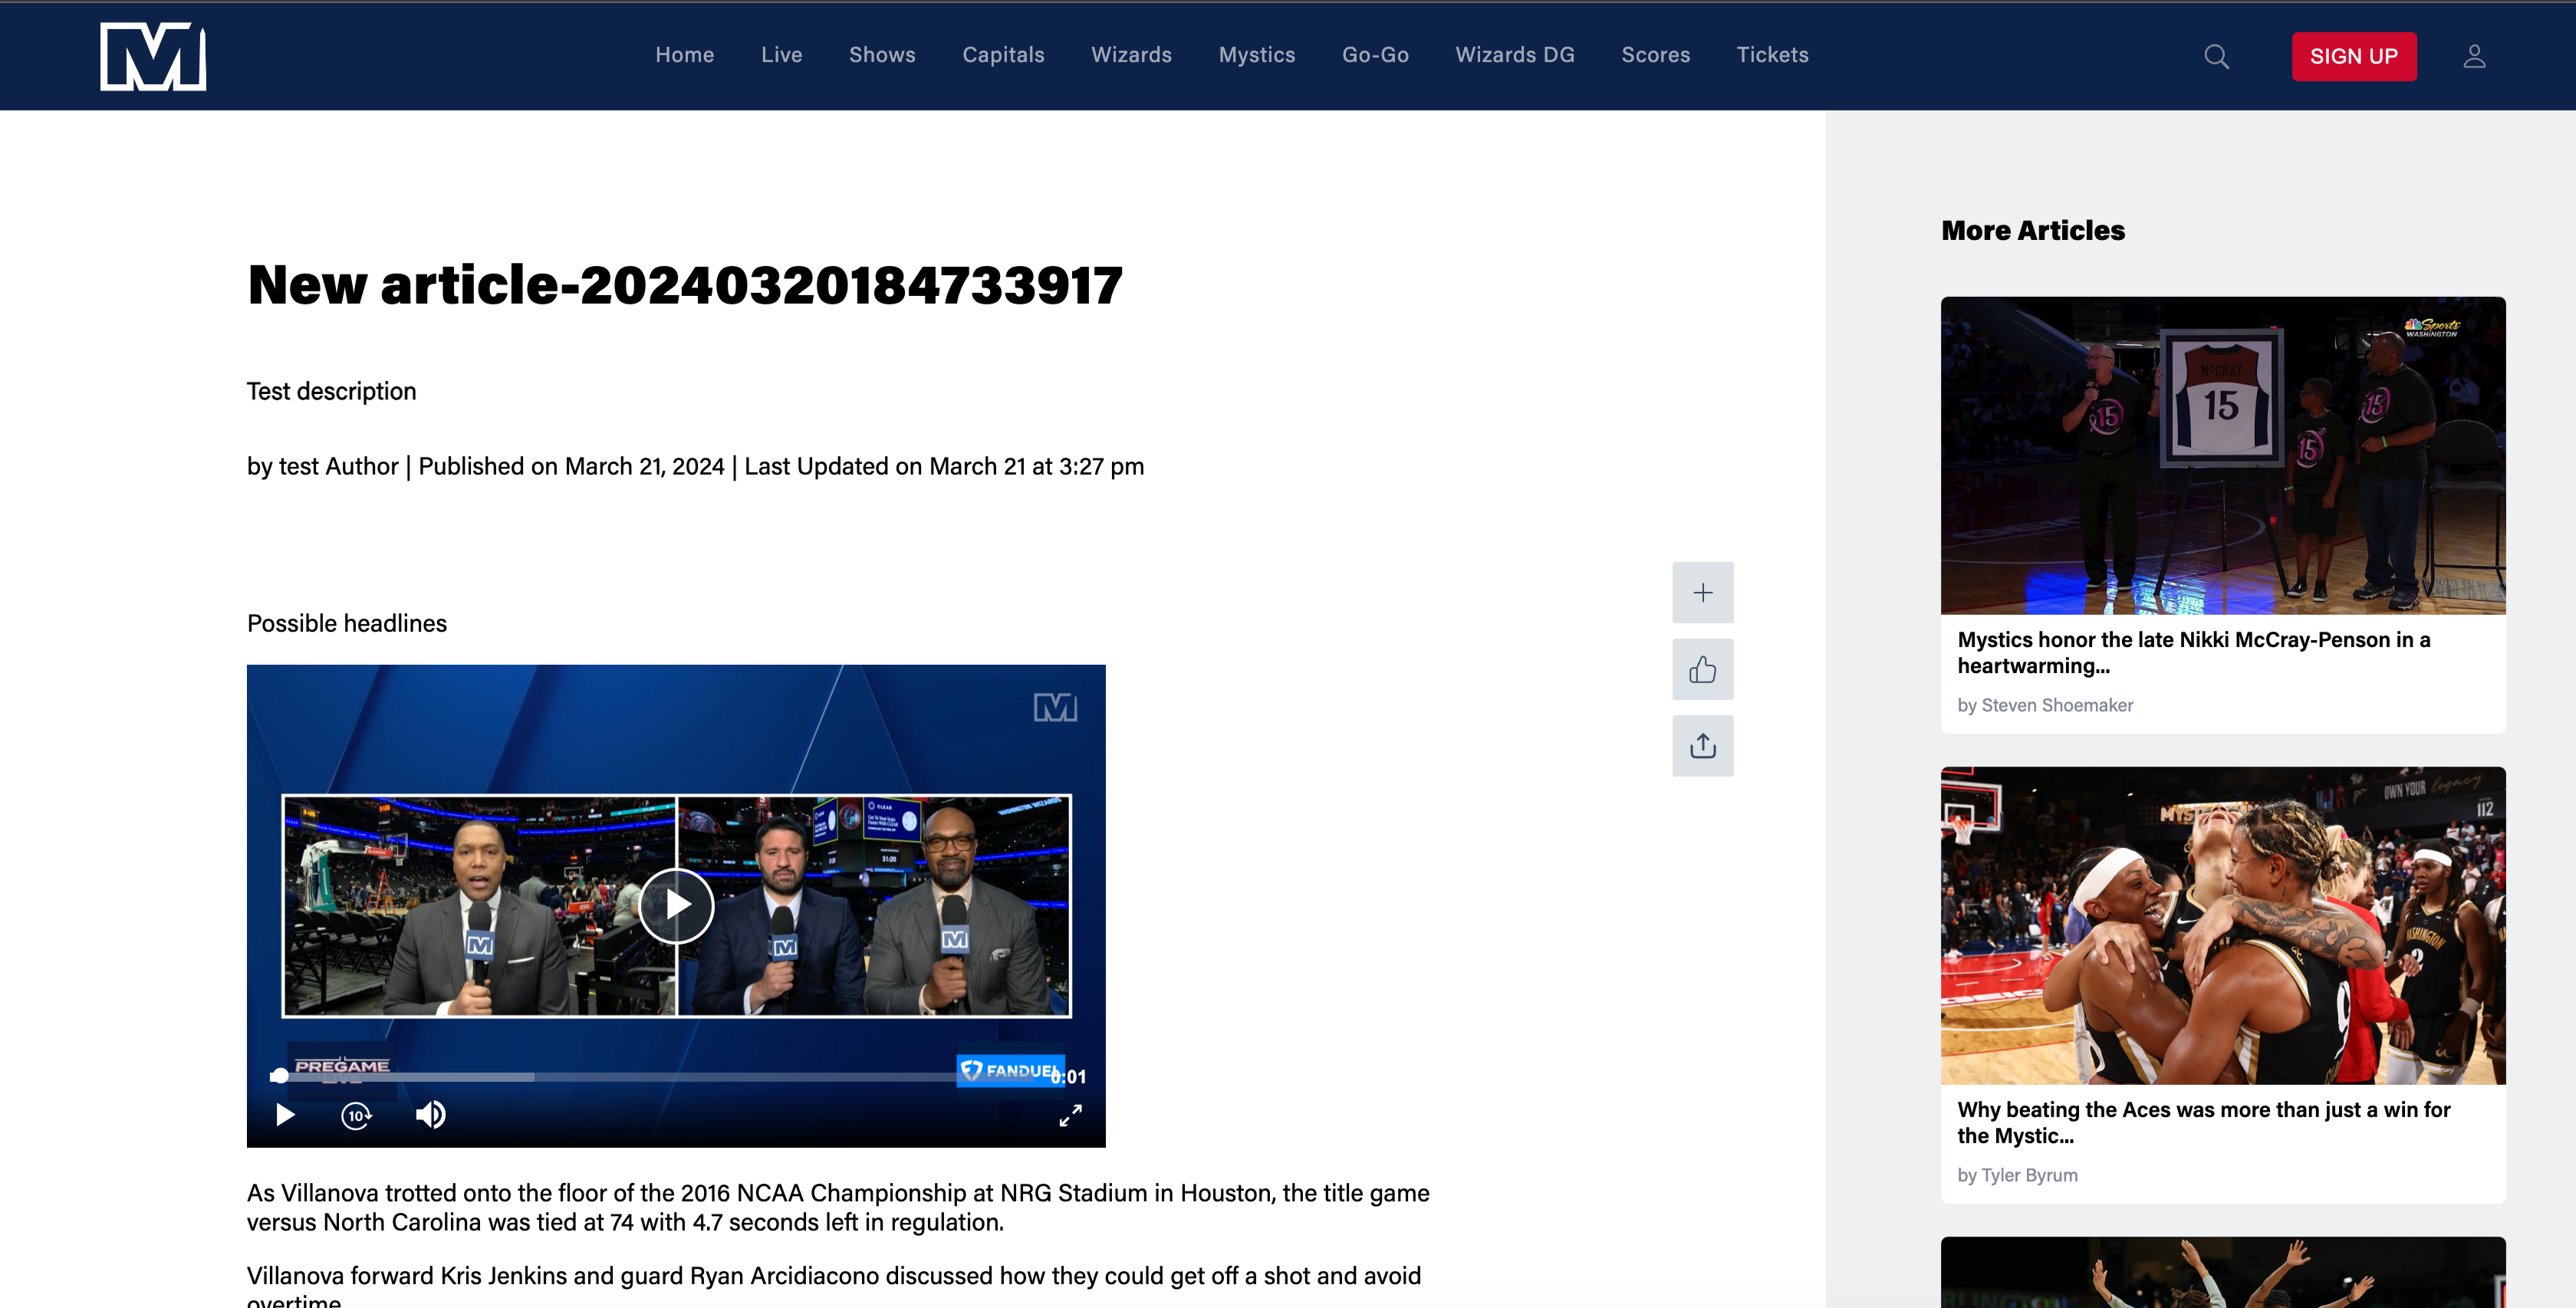
Visit the third-party domain/article where you have embedded the video.
Verify that the video plays seamlessly on the site without any issues.
Notes:
Ensure accurate input of domain names in the Add Domains to Allow field to prevent embedding issues.
Test embedded videos on various third-party domains/sites to ensure compatibility and seamless playback.
Monitor the performance of embedded videos regularly to detect any issues promptly.
Exercise caution when sharing embed parameters tags with third parties to prevent unauthorized access to platform content.
Keep track of changes made to embed settings to maintain consistency and security.
.png)


